Solar Pool Pump Failure: 4 Shocking Reasons Your System Suddenly Stopped Working?
Your sparkling pool is now murky, and the familiar hum is gone. The solar pool pump has stopped. Frustration sets in, wondering about costly repairs and lost swim time.
The most common reasons a solar pool pump stops working are related to four key areas: inadequate power from the solar panels, a critical blockage in the water line or impeller, a malfunction in the electronic controller, or an internal failure within the pump motor itself.

It's a moment I've seen many times in my decade of working with solar water systems. That sinking feeling when technology just… quits. You've invested in a fantastic, energy-efficient system, and now it feels like a high-tech paperweight. But don't panic. As an engineer who has designed and troubleshooted hundreds of these systems, I can tell you that the fix is often simpler than you think. Together, we are going to walk through a systematic diagnosis. We'll start with the easiest checks and move to the more complex, just like I would in the field. Let's get your solar pool pump back to work.
1. Is a Shocking Lack of Power from Your Panels Killing Your Solar Pool Pump?
Your pump is starving for energy, but the sun is shining. This confusing situation points directly to the power source, but the cause isn't always obvious or simple.
Lack of power is a top reason for failure. Your solar pool pump may not be working due to dirty panels, new shading from trees or buildings, loose or corroded wiring, or simply degraded panels that have lost their efficiency over their many years of service.

A Deeper Dive into Your Power Problem
Your solar array is the engine of your entire system. Without a consistent and strong supply of DC electricity, your solar pool pump simply cannot function. It's designed to shut down safely when the voltage or current is too low to prevent damage. So, before you even think about touching the pump, let's become detectives and investigate the power supply chain from the sun to the wires.
Checking for Obvious Obstructions
This sounds basic, I know. But you would be surprised how often this is the culprit. Over the years, I've seen everything from a thick layer of dust after a dry spell to a bird's nest covering a crucial corner of a panel.
First, just look. Are the panels covered in dust, pollen, leaves, or bird droppings? A layer of grime can slash your power output significantly. A good cleaning with a soft brush and some water can sometimes bring a dead system right back to life.
Second, consider the time of year and day. Has a tree grown new leaves that now cast a shadow in the afternoon? Did a neighbor build a new shed? I once had a client in Thailand, an engineer much like you, Jacky, whose pump kept cutting out around 2 PM every day. It turned out a new palm frond was casting a perfect shadow across a single panel, crippling the entire array's output. Shading is a serial killer for solar power production. Even a small shadow on one panel can have a big impact on the entire string.
Inspecting Your Wiring and Connections
This is where your engineering eye comes in handy. The path from the solar panels to your controller is filled with connectors, wires, and junction boxes. Each one is a potential point of failure.
Start with a visual inspection. Look for loose connections at the panel junction boxes and at the input of your controller. Wiggle them gently. A connection that feels loose needs to be tightened. Look for any signs of corrosion, which often appears as a white or greenish powder on terminals. This is especially common in humid or coastal areas. Corrosion creates resistance, and resistance kills power.
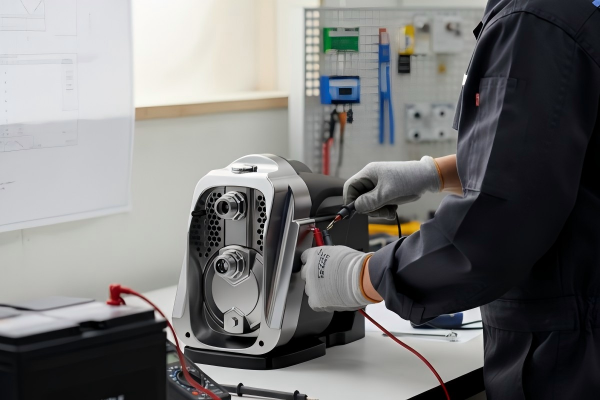
I always carry a multimeter; it's an engineer's best friend. If you have one, you can perform a few simple voltage checks. On a sunny day, carefully disconnect the wires from your controller and measure the Open Circuit Voltage (Voc) from the solar panels. It should match the specifications for your array. If it's significantly lower, you have a problem in the array itself—it could be a bad panel or a faulty bypass diode.
Here’s a simple checklist for your power inspection:
| Check Item | What to Look For | Action if Problem Found |
|---|---|---|
| Panel Surface | Dirt, dust, leaves, bird droppings | Clean panels with water and a soft brush. |
| Panel Shading | Shadows from trees, buildings, or other objects | Trim branches or consider relocating panels if possible. |
| Wiring | Loose plugs, frayed cables, signs of chewing from animals | Tighten all connections. Replace any damaged wires. |
| Connections | Corrosion (white/green powder) at terminals | Disconnect power, clean terminals with a wire brush, and reconnect tightly. |
| Voltage (Advanced) | Low Open Circuit Voltage (Voc) at the controller input | Test individual panels to isolate the faulty one. |
Don't underestimate these simple power checks. In my experience, more than 50% of "dead pump" calls are resolved right here, without ever needing to touch the solar pool pump itself.
2. Could a Devastating Clog Be the Real Reason Your Solar Pool Pump Failed?
The system has power, and you can hear the motor trying to run, but no water is moving. This is a classic sign of a bottleneck somewhere in your plumbing.
A clog is a very common issue. A blocked skimmer basket, a full pump strainer basket, or debris wrapped around the pump’s impeller can completely stop water flow, making it seem like your solar pool pump has failed when it's just being choked.

A Deeper Dive into Blockages
Your solar pool pump is designed to move a massive volume of water. But this also means it can suck in a lot of debris. Leaves, twigs, insects, and even small toys can find their way into your plumbing. The system has several lines of defense, but if they are overwhelmed or neglected, the pump will eventually choke. The motor might run, but if water can't get in and out, it can't do its job. In some cases, a smart controller will detect this "no-load" situation and shut the motor down to prevent it from overheating.
The First Line of Defense: Skimmer and Strainer Baskets
Think of these as the guards at the gate. Their job is to catch the big stuff before it can reach the sensitive parts of your solar pool pump.
- The Skimmer Basket: This is the basket in the wall of your pool. It's the very first stop. If this is packed with leaves, water can't even begin its journey to the pump. This is a simple, five-second check.
- The Pump Strainer Basket: This is the clear-lidded basket attached to the front of the pump itself. It’s the final barrier before water enters the pump housing. Because it's often clear, you can sometimes see if it's full without even opening it. If it's packed with debris, the pump is being starved of water.
How to Check and Clean:
- Important: Always turn off all power to the solar pool pump at the breaker or disconnect switch before opening the system.
- Relieve any pressure in the system by opening the air relief valve on your filter.
- Open the pump lid (it usually twists or unclamps).
- Lift out the basket and empty the contents.
- Use a hose to spray out any remaining gunk. Check the basket for cracks or damage. A broken basket can let debris pass through and cause a much bigger problem.
- Reseat the basket, check the lid's O-ring for wear, and secure the lid.
I once worked with a resort that had a brand new, powerful solar pool pump system. It kept shutting down. After checking the power and controller, I finally opened the strainer basket. It was completely impacted with flower petals from the beautiful trees surrounding the pool. The pump was so powerful it was sucking them in faster than the maintenance crew could clean the basket. The simple solution was to add cleaning the pump basket to their daily routine.
The Heart of the Problem: A Clogged Impeller
If both baskets are clean and you still have no flow, the problem is likely deeper inside: the impeller. The impeller is a spinning disk with vanes that grabs the water and throws it out toward the filter. It's the part that does the actual work of pumping.
Small debris that gets past a cracked basket can get lodged in the impeller. A single piece of string, a small pebble, or a clump of hair can be enough to jam it completely.
How to Check for a Clogged Impeller:
- Power is OFF. I can't stress this enough.
- After removing the pump strainer basket, you should be able to see the front end of the impeller at the back of the housing. Sometimes you can reach in (carefully!) with your fingers or a pair of needle-nose pliers to feel for an obstruction.
- If you can't reach it, you may need to unbolt the pump housing from the motor to get direct access. On most models, this involves removing 4-6 bolts. The whole motor and seal plate assembly will slide back, exposing the impeller.
- Once exposed, you can clearly see if anything is wrapped around it or stuck in the vanes. Carefully remove the debris. While you're there, spin the impeller by hand. It should spin freely with a slight magnetic resistance but no grinding or catching. If it feels gritty or won't turn, you may have a bearing problem, which we'll discuss later.
Clearing a clog is satisfying work. It’s often a "no-cost" repair that just takes a little bit of your time and restores your solar pool pump to full power immediately.
3. Has the Brain of Your System, the Solar Pool Pump Controller, Given Up?
You've confirmed power is getting to the controller, and the plumbing is clear. Yet, your solar pool pump is silent. It’s time to investigate the system's brain: the controller.
A dead controller can be frustrating. The pump and panels might be fine, but if the electronics fail, the entire system is useless. This is often an overlooked component.
The controller, or inverter, is the intelligent link between your panels and pump. It can fail due to overheating, moisture damage, a power surge, or simple component failure over time, leaving your solar pool pump completely unresponsive, even with perfect sun.

A Deeper Dive into Controller Malfunctions
The solar pump controller is a sophisticated piece of electronics. Here at Rafsun, our R&D department of 30+ engineers spends a huge amount of time perfecting these devices. Its main job is to perform Maximum Power Point Tracking (MPPT), which means it constantly adjusts the electrical load to squeeze the absolute maximum wattage from your solar panels as the sun's intensity changes. It also provides critical safety protections for the motor, guarding against over-voltage, under-voltage, and dry-running. When it fails, everything stops.
Decoding Controller Error Codes
The first thing to do is look at the controller itself. Does it have any lights on? Is there a display? Many modern solar pool pump controllers will give you a clue in the form of a blinking LED or a specific error code on an LCD screen. Don't ignore these! They are messages from the machine telling you what's wrong.
Your user manual is your best friend here. It will have a table that translates these codes.
Common Controller Error Code Categories:
| Error Type | Possible Meaning | What to Check |
|---|---|---|
| Low Voltage / Low Power | Not enough sun, partial shading, dirty panels. | The solar panel array (as discussed in section 1). |
| High Voltage | Too many solar panels connected in series for the controller's rating. | Your array's voltage (Voc) vs. the controller's max input voltage spec. |
| Pump Stall / Over-Current | Impeller is jammed, or there is a short in the motor windings. | The impeller for clogs; check motor resistance with a multimeter. |
| High Temperature | Controller is overheating due to poor ventilation or direct sun. | The controller's location, ventilation slots for dust/insects. |
| Dry Run Protection | Pump has run without water. | Water level in the pool, check for clogs preventing water from reaching the pump. |
I remember a customer who was convinced his new pump motor was bad because the controller showed an "Over-Current" error. He was ready to ship it back. I had him check the impeller one more time. Sure enough, a small plastic toy piece had made it past the baskets and was perfectly wedged, stalling the motor. The controller was just doing its job, protecting the motor from burning itself out.
The Impact of Heat and Environment
Controllers are packed with electronics, and electronics hate two things: excessive heat and moisture.
Is your controller mounted in direct, blistering sunlight? Is it in a poorly ventilated pump house? Heat is the number one enemy of electronic components like capacitors and processors. Over time, it will degrade them and lead to premature failure. Our Rafsun controllers are designed with robust heat sinks and tested for high temperatures, but physics has its limits. Ensure your controller has good airflow and is shielded from direct sun if possible. Check that its cooling fins or ventilation slots aren't clogged with dust or spiderwebs.
Moisture is the other killer. I've seen controllers fail because a sprinkler head was constantly spraying them, or because they were mounted in a place where rainwater could run down the wall and get inside the casing. Even though many are rated for outdoor use (look for an IP rating like IP65), it's always best to protect them from the elements. Look for any signs of water intrusion or corrosion on the circuit board if you feel comfortable (and have disconnected all power) opening the cover.
If the controller has no lights, no display, and you've confirmed with a multimeter that DC power is going in but nothing is coming out to the pump, then it's highly likely the controller itself has failed and will need to be replaced.
4. Is Unseen Internal Damage Quietly Destroying Your Solar Pool Pump Motor?
You've checked the power, cleared all clogs, and the controller seems to be working. If the pump still hums loudly, grinds, or does nothing at all, the problem may lie within the heart of the machine: the motor.
A failed motor feels like the worst-case scenario. It seems catastrophic and expensive. But understanding why it failed is key to preventing it from happening again.
Internal motor failure in a solar pool pump is often caused by two things: worn-out bearings leading to friction and seizure, or a compromised water seal that allows water to destroy the electrical components. Both are serious and often require professional repair or replacement.

A Deeper Dive into Motor Failure
The motor of a solar pool pump is a marvel of engineering. At Rafsun, we specialize in permanent magnet synchronous motors because of their incredible efficiency. These aren't simple motors; they are precision-built machines. But even the best machine can fail if subjected to harsh conditions. The two most common culprits I see are bearing failure and seal failure.
The Telltale Signs of Bad Bearings
Your motor has at least two sealed bearings that allow the central shaft to spin thousands of times per minute with minimal friction. Over many years of service, the grease inside these bearings can dry out, or they can be damaged by excessive vibration.
How to Diagnose Bad Bearings:
- Sound: This is the biggest clue. A motor with healthy bearings has a smooth, consistent hum. A motor with failing bearings will start to make a high-pitched screeching or a low-pitched grinding noise. It's a sound you won't mistake. If you hear this, the bearings are on their way out.
- Heat: A motor with bad bearings creates a lot of friction, which generates heat. The motor housing will feel excessively hot to the touch (be careful!).
- Seizure: In the final stage of failure, the bearing will completely seize. The motor will try to start, you'll hear a loud "HUMMM," but the shaft won't turn. The controller will then trip on over-current and shut it down.
I remember a case at a community pool where the manager ignored a "squealing" pump for weeks. He thought it was just "being loud." One day, it seized completely. When we took the motor apart, the failed front bearing had gotten so hot it partially melted the plastic bracket holding it, causing a much more complex repair. The lesson: listen to your a solar pool pump; it will tell you when it's in pain.
The Silent Killer: Water Seal Failure
Between the "wet end" (the pump housing with the impeller) and the "dry end" (the electric motor) is a critical component called the shaft seal. It's a spring-loaded, two-part seal that allows the motor shaft to pass into the wet end while keeping every drop of water out of the motor.
If this seal fails, water will slowly leak along the shaft and into the motor housing. For a solar pool pump, this is a death sentence. Water will corrode the bearings, and short out the electrical windings, destroying the motor from the inside out.
How to Diagnose a Failed Seal:
- Puddles: Look for a small puddle of water directly underneath the area where the motor connects to the pump housing. You might also see white, crusty mineral deposits from evaporated water.
- Tripped Breakers: If water gets into the windings, it can cause a short circuit. If your system is connected to a GFCI breaker, it will trip instantly.
- Grinding/Seizure: Just like with old bearings, water-damaged bearings will start to grind and eventually seize up the a solar pool pump motor completely.
Running a pump dry (without water) is the fastest way to destroy a shaft seal. The water flowing through the pump actually cools and lubricates the seal. Without that water, it can overheat and fail in minutes. This is why having working dry-run protection in your controller is so vital, and why clearing clogs quickly is not just about performance, but about protecting your investment.
If you suspect an internal motor failure, it is often a job for a professional. Replacing bearings or seals requires special tools like pullers and presses. But by identifying the symptoms, you can make an informed decision and understand exactly what needs to be fixed.
Conclusion
Finding your solar pool pump dead is frustrating. But by systematically checking the power, clearing clogs, inspecting the controller, and listening to the motor, you can often pinpoint the problem yourself.