Low water pressure turns simple tasks into frustrating chores.
A weak shower or a slow-filling sink can disrupt your daily routine.
Imagine finally solving this issue for good.
Yes, you can boost water pressure by installing a water pressure booster pump, which is the most effective solution for consistently low pressure.
Other methods include adjusting your pressure-reducing valve (PRV), checking for leaks, cleaning fixtures, and ensuring all valves are fully open.

Weak water flow can be a sign of various issues within your home's plumbing system.
While simple fixes can sometimes provide a temporary boost, understanding the root cause is key to finding a permanent solution.
For homeowners and property managers, low pressure not only impacts comfort but can also affect the performance of appliances like washing machines and dishwashers.
This guide will walk you through the most effective methods to diagnose and permanently resolve low water pressure problems.
We will explore everything from simple DIY checks to advanced technological solutions that deliver consistent, powerful water flow throughout any building.
Learn how to take control of your water system.
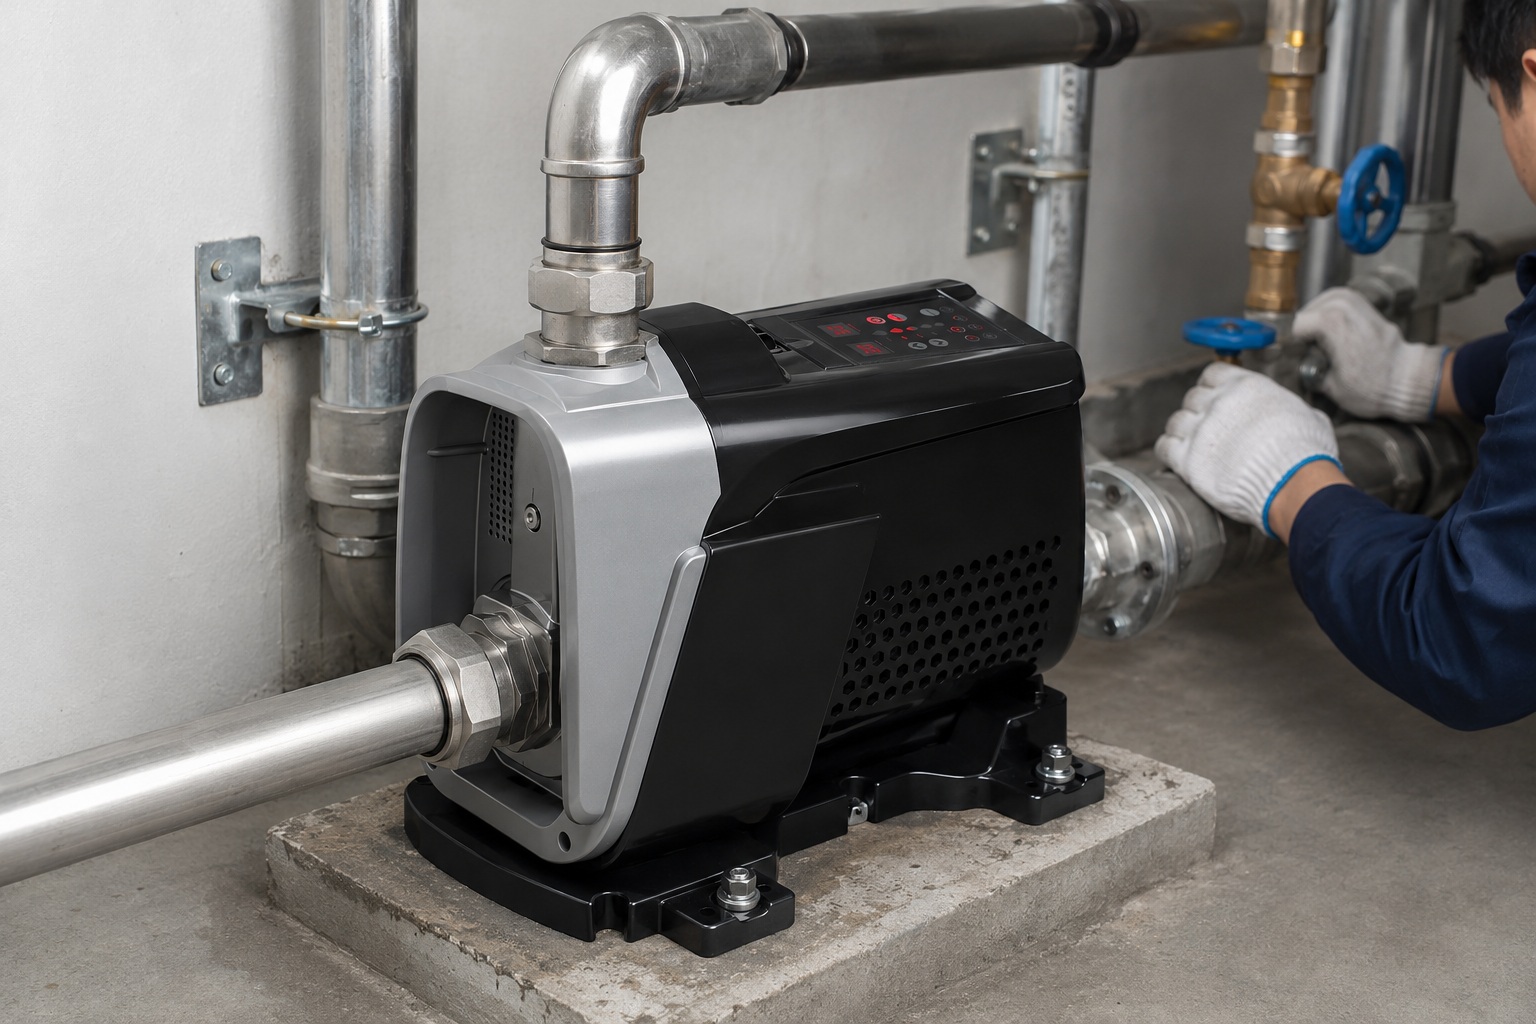
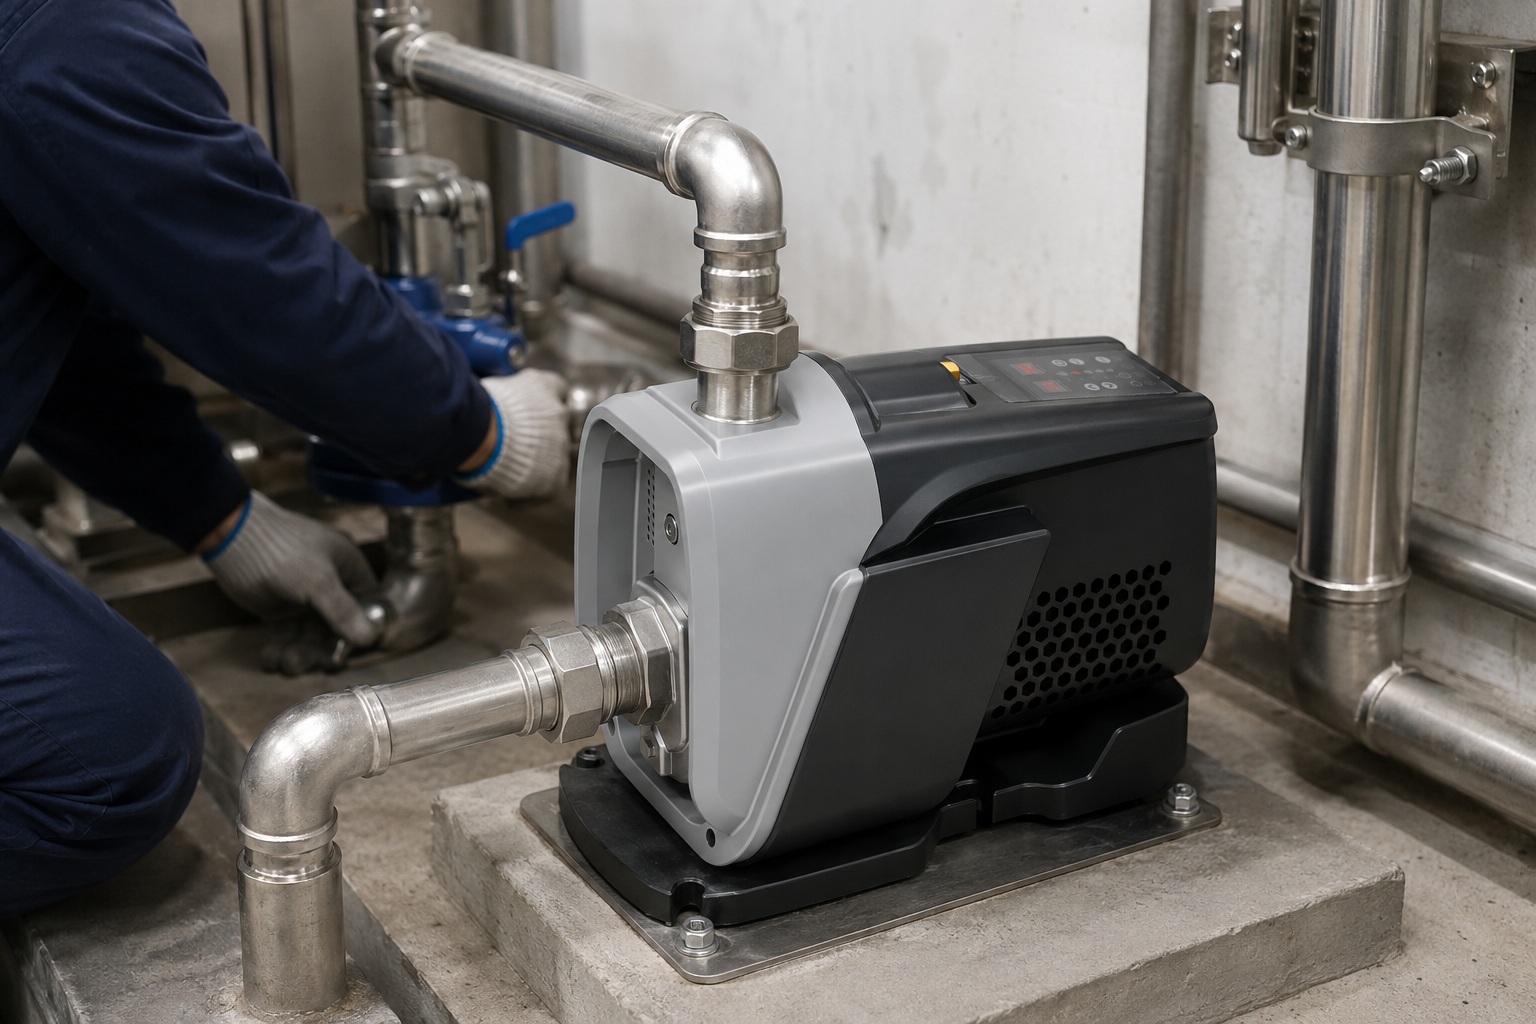
Install a Water Pressure Booster Pump
Struggling with consistently weak water flow throughout your property?
This can make even basic tasks feel inefficient and frustrating.
A dedicated booster pump offers a definitive solution.
A water pressure booster pump is the most powerful and reliable method to significantly increase water pressure.
An intelligent variable frequency drive (VFD) pump, for instance, provides a constant, adjustable pressure supply, ensuring optimal performance for all your fixtures and appliances.
When basic troubleshooting doesn't solve chronic low pressure, a booster pump becomes the primary engineering solution.
This is particularly true for properties with low municipal supply pressure, homes with extensive plumbing, or multi-story buildings where gravity works against the water flow.
Unlike passive solutions that only address restrictions, a booster pump actively adds energy to the water system.
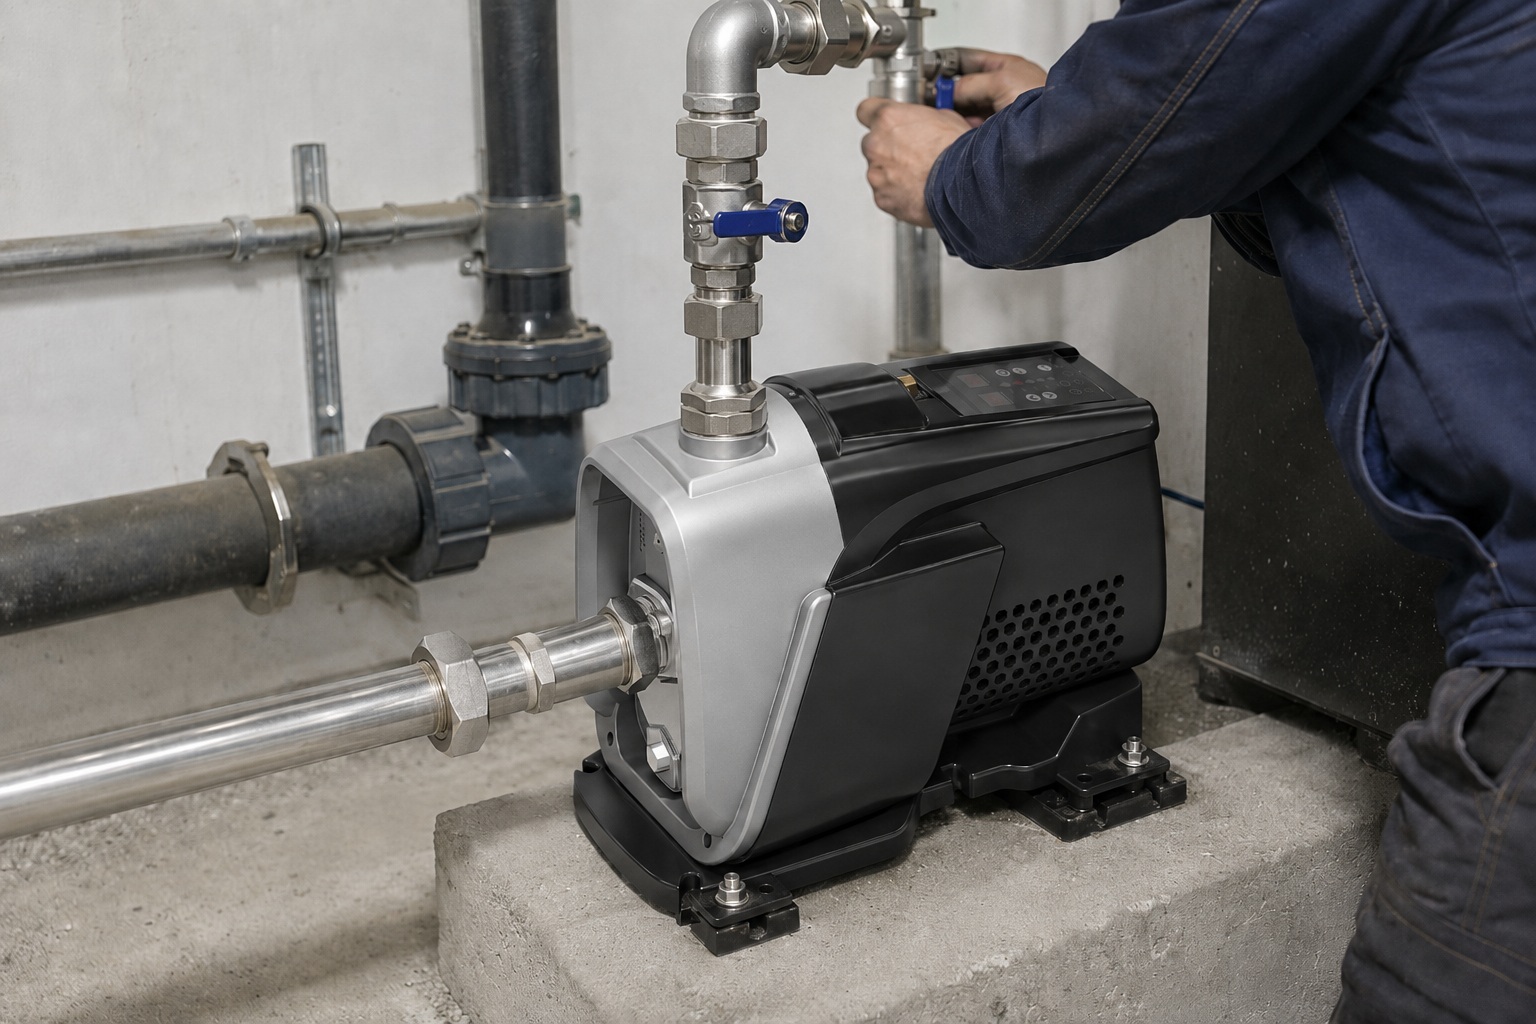
Modern pumps have evolved far beyond simple on/off devices.
They are now sophisticated, intelligent systems designed for efficiency, durability, and quiet operation.
Let's explore the core components that make these systems the ultimate solution for pressure boosting.
Core Drive Technology: The Power of VFD and PMSM
The heart of a modern booster pump is its advanced motor and control system.
The combination of a Variable Frequency Drive (VFD) and a Permanent Magnet Synchronous Motor (PMSM) represents the peak of current pump technology.
This synergy delivers performance that older, fixed-speed pumps cannot match.
The VFD acts as the pump's brain.
It precisely controls the motor's speed in real-time based on water demand.
When you open a single faucet, the motor runs just fast enough to meet that need.
When more faucets are opened, the VFD instantly ramps up the motor speed to maintain the exact same water pressure.
This eliminates the annoying pressure drops and surges common with older systems.
The PMSM is the muscle.
These motors are far more efficient and quieter than traditional induction motors.
This technology allows for incredibly quiet operation, with noise levels often below 50dB, making them suitable for installation anywhere in a home without causing a disturbance.
Another critical feature enabled by this technology is the "soft start" and "soft stop" function.
Instead of jolting to full power instantly, the pump gradually accelerates and decelerates.
This dramatically reduces mechanical stress on the pump's internal components and prevents hydraulic shock, known as water hammer, protecting your entire plumbing network from damage.
| Feature | Benefit | Technical Impact |
|---|---|---|
| VFD Control | Constant, Stable Pressure | Adjusts motor RPM to match water usage in real-time. |
| PMSM Motor | Ultra-Quiet & Efficient | Higher efficiency and lower noise output (≤50dB). |
| Soft Start/Stop | Increased System Lifespan | Reduces mechanical stress and eliminates water hammer. |
| Wide Voltage Range | Reliable Operation | Functions perfectly even with unstable power grids (e.g., 165–260V). |
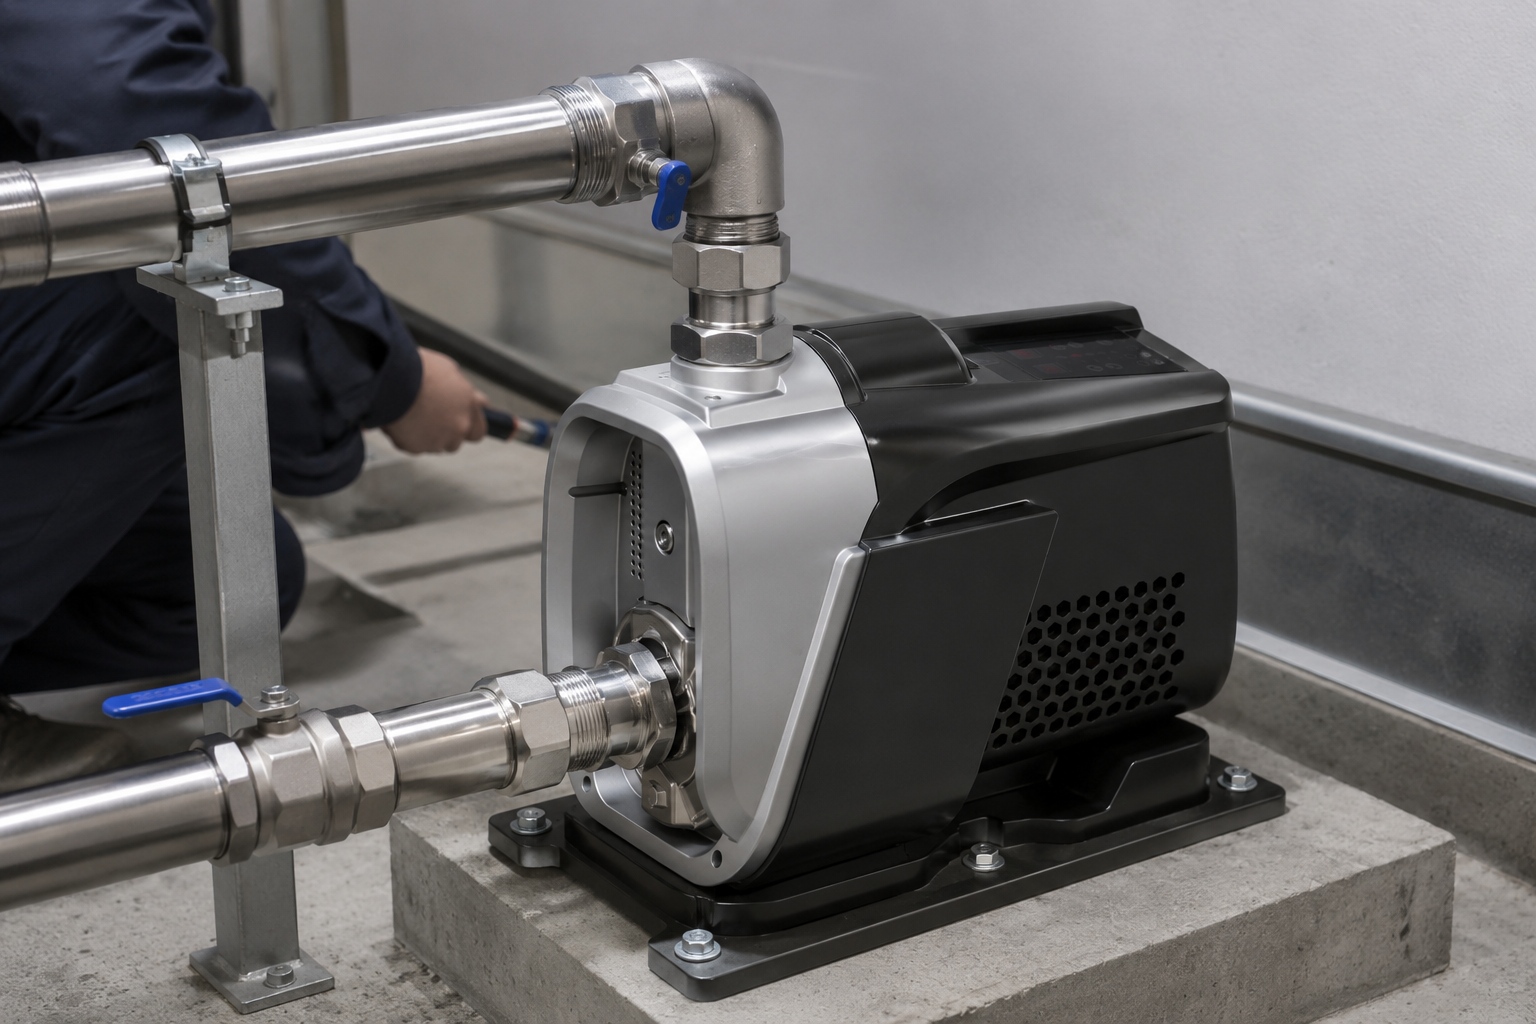
Built to Last: Superior Mechanical and Material Engineering
A pump's longevity is determined by the quality of its construction.
From the internal motor components to the external housing, a commitment to high-grade materials is essential for reliable, long-term operation.
Every detail, down to the smallest bearing, plays a critical role in the pump's overall performance and durability.
The engineering starts at the core with the motor's stator.
Using high-grade 600-grade silicon steel minimizes energy loss and improves efficiency.
Superior thermal management, indicated by a low temperature rise (≤50K), ensures the motor runs cooler, directly extending its operational lifespan.
Class F insulation wire provides high heat resistance, allowing the pump to perform reliably even under heavy loads.
The impeller is the component that actually moves the water.
Using AISI304 stainless steel is the benchmark for quality.
This material is exceptionally resistant to corrosion and wear, ensuring it won't degrade over time, even with varying water quality.
This maintains the pump's hydraulic efficiency for years.
Even seemingly small components like bearings are crucial.
Using premium bearings from trusted manufacturers like NSK or C&U results in measurably better performance.
These high-precision bearings can operate up to 40% more quietly and have a lifespan that is over 10% longer than standard alternatives, contributing to the pump's overall quietness and reliability.
Unmatched Electronic Reliability
The electronic controller is the most sensitive part of a modern pump.
It is highly susceptible to damage from moisture, dust, and condensation, which are common in the environments where pumps are installed.
Protecting these electronics is the single most important factor in ensuring a long service life.
An advanced solution to this problem is "potting" the main controller board (PCB).
This process involves completely sealing the circuit board and all its components in a protective, non-conductive compound.
This creates an impenetrable barrier against the environment.
This sealing method achieves a very high protection rating, typically IP67.
An IP67 rating means the core electronics are 100% waterproof and dustproof.
This robust protection can prevent over 95% of failures that are typically caused by moisture getting into the electronics.
By isolating these sensitive components from the harsh operating environment, this design feature can extend the controller's lifespan by an estimated 3 to 5 years compared to unsealed boards.
This ensures the pump's intelligence remains functional for the long haul.
Comprehensive "Smart Shield" Protection
An intelligent booster pump does more than just move water.
It actively protects itself and the surrounding plumbing system from a wide range of potential faults.
A comprehensive suite of built-in safety features, often numbering more than a dozen, is what separates a premium pump from a basic one.
These protections can be categorized into several groups.
Electrical and thermal protections are fundamental.
They guard against damage from an unstable power supply, such as over-voltage or under-voltage conditions.
They also monitor for overcurrent, motor stalling, and overheating of both the driver board and the water itself, shutting the pump down before permanent damage can occur.
System and sensor protections are equally critical.
The most important of these is dry run protection.
If the water supply is interrupted, the pump will detect it and stop running to prevent burnout.
Advanced systems use a smart multi-stage recovery algorithm.
It will attempt to restart itself after short intervals first, then longer intervals, to check if water has returned, saving energy and avoiding constant cycling.
Other smart protections include an antifreeze function that circulates water to prevent freezing in cold climates and a pipeline leak warning that can alert you to small, hidden leaks in your plumbing system.
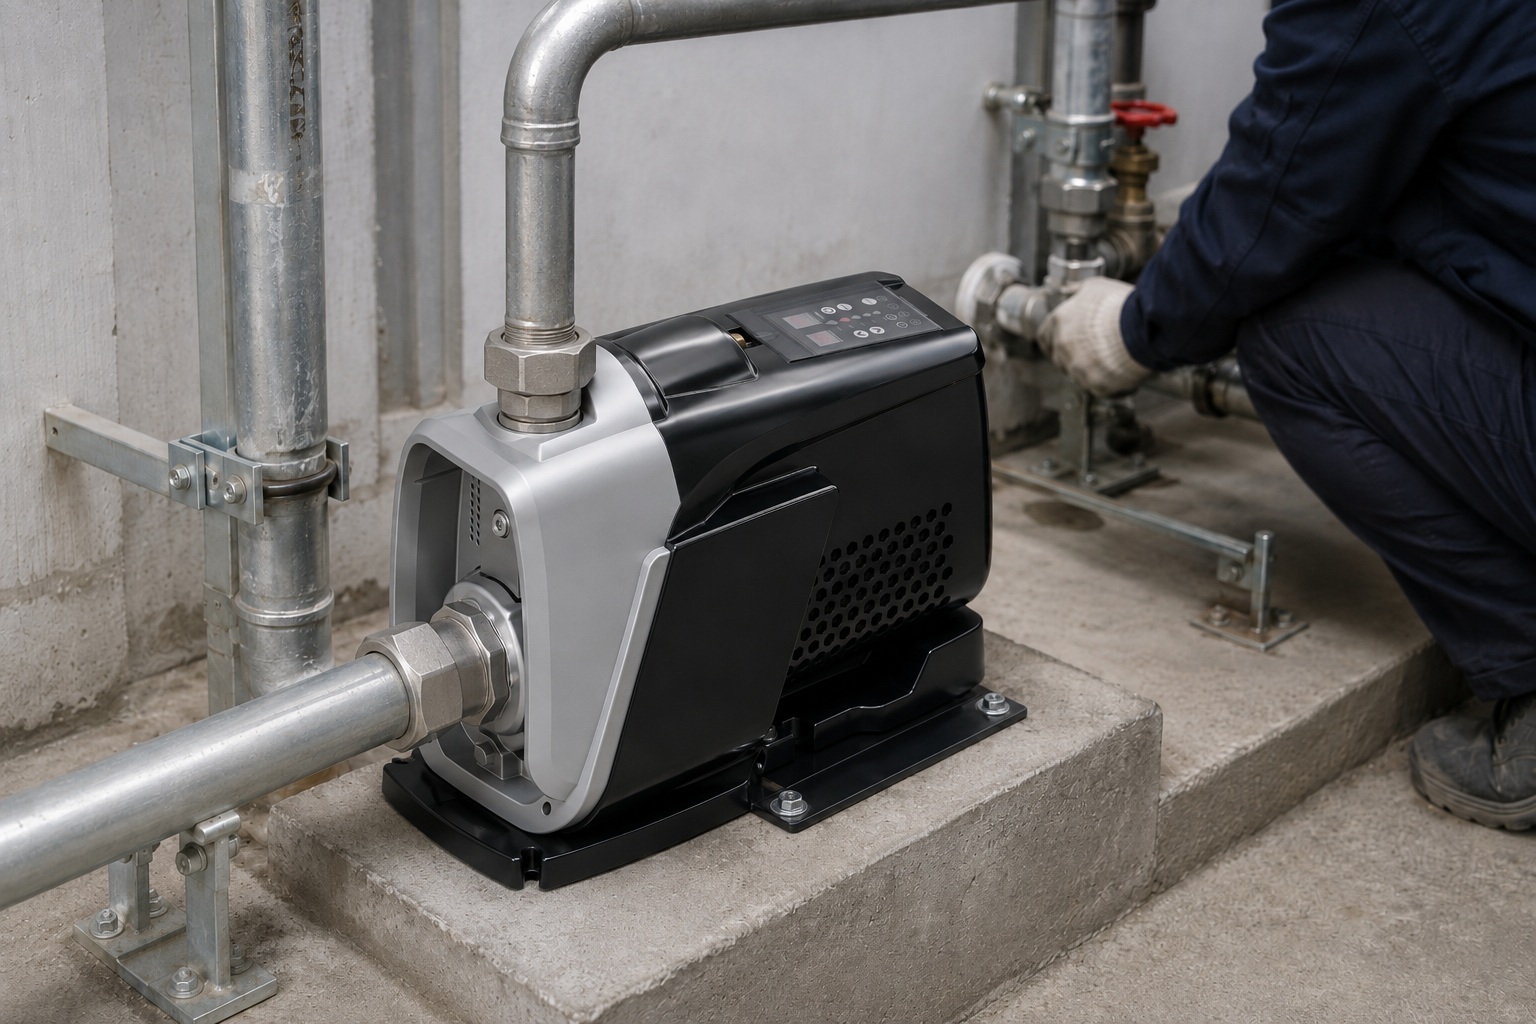
User-Friendly Controls and Real-Time Data
Despite the complex technology inside, operating a modern booster pump should be simple and intuitive.
A well-designed user interface allows you to set your desired pressure and then forget about it.
However, it should also provide access to deep diagnostics and real-time data for advanced users or technicians.
A typical interface features a few simple buttons for core functions.
These usually include power on/off and "up" and "down" buttons to set the target water pressure.
LED indicators provide an at-a-glance status update, showing if the pump is running, if there is a fault like a water shortage, or the current power level.
For those who need more information, advanced pumps offer a live data display.
By pressing a specific button sequence, you can cycle the display through critical operating parameters.
This allows you to see the motor's exact RPM, real-time power consumption in watts, the temperature of the water and the PCB, and the current input voltage.
This level of transparency is invaluable for diagnostics and for understanding your system's performance.
Some models also offer optional Wi-Fi connectivity, allowing for remote monitoring and control via a smartphone app for the ultimate in convenience and oversight.
Adjust the Pressure-Reducing Valve (PRV)
Your home's plumbing might be intentionally restricted.
A pressure-reducing valve is designed to lower high municipal pressure to a safe level.
If set too low, it could be the source of your problems.
A Pressure-Reducing Valve (PRV) is a bell-shaped valve on your main water line that can be adjusted to increase pressure.
Locate the valve, loosen the locknut on top, and turn the adjustment screw clockwise in small increments to raise the pressure throughout your home.
Before investing in new hardware, it's essential to check if your existing equipment is set correctly.
A PRV is a common component in areas where the water pressure from the city's main line is very high.
Its job is to protect your pipes and appliances from damage caused by excessive pressure.
However, these valves can sometimes be set too low by a previous owner or plumber, or their settings can drift over time.
Learning how to properly check and adjust your PRV is a simple, cost-free step that could completely solve your low-pressure issues.
It's a crucial first diagnostic step for any homeowner.
What is a PRV and Where to Find It?
A PRV, or Pressure-Reducing Valve, is a control device installed on your main water supply line.
Its purpose is to automatically reduce the high pressure coming from the municipal water main to a lower, safer, and more consistent pressure for use inside your house.
Most home plumbing systems are designed to operate best between 50 and 60 PSI.
City water pressure can often exceed 100 PSI, which could damage pipes, fittings, and appliances over time.
You can typically find the PRV right after the main shut-off valve and water meter, where the water line first enters your home.
This could be in a basement, a crawl space, or a utility closet.
The valve is usually a brass fitting and has a distinctive bell shape on top with an adjustment screw and a locknut protruding from the center of the bell.
If you can't find a PRV, your home may not have one, which could mean your low pressure is caused by a different issue.
The Safe Way to Adjust Your PRV
Adjusting the PRV is a straightforward process, but it must be done carefully to avoid over-pressurizing your system.
You will need two tools: a wrench to loosen the locknut and a screwdriver or wrench for the adjustment screw.
It's also highly recommended to use a water pressure gauge to get accurate readings.
First, attach a pressure gauge to an outdoor spigot or a laundry sink faucet to get a baseline reading of your current pressure.
Next, locate the PRV.
You will see a threaded screw on top, held in place by a locknut.
Use your wrench to loosen this locknut by turning it counter-clockwise.
This will allow you to turn the adjustment screw.
To increase the pressure, turn the adjustment screw clockwise.
Make only small adjustments at a time—a quarter turn is a good starting point.
After each adjustment, go check the pressure gauge to see the effect.
It's important to have a faucet running somewhere in the house while you check the pressure to get a dynamic reading.
Repeat this process until you reach your desired pressure, which should ideally be between 50 and 60 PSI.
Do not exceed 75 PSI, as this can put your plumbing at risk.
Once you are satisfied, tighten the locknut while holding the adjustment screw in place.
Check for and Fix Leaks
A hidden leak could be secretly stealing your water pressure.
Even a small, steady drip from an unseen pipe can lead to a noticeable drop in flow.
This silent problem also wastes water and money.
Even small, unnoticed leaks in pipes, faucets, or toilets can cause a significant drop in overall water pressure.
Thoroughly inspect your plumbing system for any signs of moisture or drips and make the necessary repairs to restore lost pressure and prevent water damage.
Water pressure is all about maintaining a closed, sealed system.
Any breach in that system, no matter how small, will cause a pressure loss.
Before you consider more complex solutions, a thorough inspection for leaks is a fundamental step in troubleshooting.
Leaks are not just a pressure problem; they can lead to significant water waste, high utility bills, and potentially catastrophic water damage to your home's structure.
Finding and fixing them is a win-win situation.
Some leaks are obvious, like a dripping faucet, but others can be much harder to detect, hiding inside walls or under floors.
How to Systematically Hunt for Leaks
Finding hidden leaks requires a bit of detective work.
The best tool for the job is your water meter.
Start by making sure all faucets, showers, and water-using appliances in your home are turned off completely.
Go to your water meter and look at the dial.
Many meters have a small triangle or dial, often called a leak indicator, that spins even when there is very low flow.
If this indicator is moving, you have a leak somewhere in your system.
If your meter doesn't have a leak indicator, take a picture of the meter reading, wait for an hour without using any water, and then check the reading again.
If the numbers have changed, you have a leak.
Once you've confirmed a leak exists, you can start to narrow down its location.
Check all the common culprits first: look under sinks, around the base of toilets, and at the connections for your washing machine and dishwasher.
Listen for the sound of running water when nothing is on.
Toilets are a very common source of silent leaks.
You can check for a toilet leak by adding a few drops of food coloring to the tank water.
Wait about 15-20 minutes without flushing.
If any of the colored water appears in the toilet bowl, the flapper valve in your tank is leaking and needs to be replaced.
The Impact of Small Leaks on System Pressure
It's easy to underestimate how much a small leak can affect your water pressure.
Imagine your plumbing system as a balloon filled with water.
Even a tiny pinhole will cause the balloon to lose its firmness and pressure over time.
Your plumbing works on the same principle.
The pump or municipal supply provides pressure, but if water is constantly escaping, the system can't maintain that pressure effectively.
A leak creates a point of least resistance.
Water will always try to flow out of this opening, reducing the amount of force (pressure) available to push water out of your faucets and showerheads.
A single drip per second from a leaky faucet can waste over 3,000 gallons of water per year.
While that drip itself may not seem like much, the constant opening in the system it represents contributes to a permanent state of lower static pressure throughout your entire home.
Fixing that small leak closes the system, allowing it to fully pressurize once again.
Clean or Replace Fixtures and Aerators
You turn on the faucet, but the flow is weak and uneven.
The problem might not be your pipes, but a simple blockage at the endpoint.
Mineral buildup is slowly choking your fixtures.
Mineral deposits from hard water can clog faucet aerators and showerheads, drastically reducing water flow and perceived pressure.
Unscrewing these parts and cleaning them in vinegar, or replacing them if they are too clogged, is a quick and effective way to restore strong flow.
Over time, the water flowing through your pipes leaves behind tiny mineral deposits, primarily calcium and magnesium.
This is especially common in areas with hard water.
These deposits accumulate inside the small openings of your fixtures, like the screen on a faucet aerator or the jets on a showerhead.
This buildup acts like a dam, restricting the flow of water and creating the illusion of low system-wide pressure, when in fact the problem is localized to that specific fixture.
Cleaning these components is one of the easiest and most satisfying fixes for improving water pressure.
It costs almost nothing and can often be done in just a few minutes.
The Simple Process of Decalcifying Your Fixtures
Cleaning your fixtures is a simple DIY task.
For faucet aerators, you can usually unscrew the very tip of the faucet by hand or with a pair of pliers.
Be sure to wrap the aerator in a cloth before using pliers to avoid scratching the finish.
Once removed, you'll see a small screen, which is often full of gritty sediment and mineral scale.
For showerheads, you can typically unscrew the entire head from the shower arm.
If it's stuck, use a wrench, again protecting the finish with a cloth.
Once the parts are removed, the cleaning process is easy.
Disassemble the aerator or showerhead as much as possible.
Soak all the components in a bowl of white vinegar for a few hours, or even overnight for heavy buildup.
The acid in the vinegar will dissolve the calcium and magnesium deposits.
After soaking, use an old toothbrush to scrub away any remaining debris.
Use a paperclip or a pin to carefully poke out any sediment stuck in the small holes.
Rinse all the parts thoroughly with water and reassemble them.
When you turn the water back on, you will likely see a dramatic improvement in flow.
When to Clean vs. When to Upgrade
Regular cleaning should be part of your home maintenance routine, especially if you have hard water.
However, sometimes a fixture is too old or clogged to be effectively cleaned.
If the finish is corroded, the plastic parts are brittle, or you simply can't get all the buildup out, it may be time to replace it.
Upgrading your fixtures can also be an opportunity to improve water efficiency without sacrificing performance.
Modern low-flow showerheads and aerators are engineered to use less water while still providing the feeling of strong pressure.
They do this by mixing air with the water stream or by forcing the water through smaller, specially designed nozzles to increase its velocity.
So, if you find yourself cleaning the same old fixture repeatedly, consider investing in a new, high-efficiency model.
It can provide a better experience, save water, and be less prone to clogging in the future.
Conclusion
Boosting your home's water pressure is achievable.
By systematically troubleshooting, from cleaning fixtures to installing a modern booster pump, you can enjoy strong, consistent water flow throughout your property.
FAQs
How much does it cost to increase water pressure?
Costs vary widely.
Cleaning an aerator is free.
Adjusting a PRV is also free if you do it yourself.
Hiring a plumber for leak detection or PRV adjustment might cost a few hundred dollars.
Installing a high-quality booster pump is the most expensive option, often costing over a thousand dollars for parts and labor.
Can I increase water pressure myself?
Yes, many methods are DIY-friendly.
You can easily clean fixtures, check for obvious leaks, and adjust a PRV if you are careful.
Installing a booster pump or replacing major pipe sections, however, should be left to a licensed plumber for safety and proper execution.
What pressure is too high for a house?
Water pressure above 80 PSI is generally considered too high for a residential plumbing system.
Excessive pressure can damage pipe joints, fixtures, and appliances like washing machines and icemakers, leading to leaks and costly repairs.
Most experts recommend keeping pressure between 50 and 60 PSI for optimal performance and safety.
Does a water softener increase water pressure?
A water softener does not directly increase water pressure.
However, it can prevent future pressure loss in homes with hard water.
By removing minerals like calcium and magnesium, it stops the buildup of scale inside pipes and fixtures that restricts flow over time.
Why is my water pressure low in only one faucet?
If low pressure is isolated to a single faucet, the problem is almost certainly within that fixture itself.
The most common cause is a clogged aerator at the tip of the faucet.
It could also be a blocked cartridge or valve within the faucet body.
How do I know if I need a booster pump?
You need a booster pump if your low pressure is consistent throughout the entire house and is not caused by leaks, clogged fixtures, or a poorly adjusted PRV.
Get a pressure gauge and test your main line.
If the incoming pressure is below 40 PSI, a booster pump is likely the best solution.
Will bigger pipes increase water pressure?
Replacing old, narrow pipes with larger diameter ones can improve water flow and reduce pressure loss caused by friction, which can feel like an increase in pressure.
This is a major plumbing project, but it can be a permanent solution for older homes with undersized or corroded galvanized pipes.