Struggling with pump house plans?
An undersized shed causes overheating and maintenance nightmares.
A properly sized pump house is crucial.
For a typical residential well pump, a 4x4 foot (16 sq ft) pump house is a good minimum. This size provides enough space for the pump, pressure tank, and filters, while allowing room for maintenance access. Commercial systems require a bespoke size assessment based on equipment.

Choosing the right size for a pump house seems straightforward.
But it's a critical decision.
This choice impacts your pump's lifespan, its efficiency, and your ease of maintenance.
Getting it wrong can lead to costly problems down the line.
Let's explore the details to ensure you build it right the first time.
Problem Statement: The Issues with Incorrect Pump House Sizing
Planning a new pump system?
The pump house size is often an afterthought, leading to major operational headaches.
This oversight can cost you time, money, and system efficiency.
An incorrectly sized pump house creates significant problems. A small space can cause pump overheating, make maintenance nearly impossible, and fail to protect equipment from weather. An overly large space wastes money on construction and utilities, becoming an inefficient use of resources.
The size of your pump house is not just about fitting components inside.
It is a core element of your entire water system's health and longevity.
Many people underestimate the space needed, not just for the equipment itself, but for the air that circulates and the person who needs to service it.
A cramped pump house is a common mistake.
It turns a simple filter change into a frustrating puzzle.
It makes replacing a major component like a pressure tank a massive job.
Overheating is another serious risk.
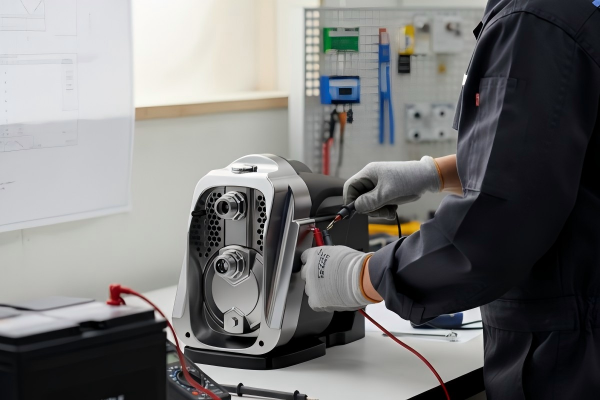
Pumps, especially powerful variable speed drive (VSD) models, generate considerable heat.
Without adequate airflow, this heat gets trapped.
The high ambient temperature can damage sensitive electronic controls and reduce the motor's lifespan.
On the other hand, an excessively large pump house is also a problem.
It represents a waste of capital.
You spend more than necessary on building materials and labor.
You also pay more to heat or cool this oversized space, especially in extreme climates.
An empty, cavernous space does not necessarily add any functional value and can even become a storage area for unrelated items, creating clutter and safety hazards.
Key Factors Causing Sizing Errors
Let's break down the common misjudgments.
- Underestimating Equipment Footprint: People often only consider the pump's base dimensions. They forget about the pressure tank, filtration systems, and control panels.
- Forgetting Service Clearance: Technicians need space to work. This means room to stand, kneel, and use tools around every piece of equipment.
- Ignoring Ventilation Needs: A pump is a machine that needs to breathe. Proper airflow is essential for cooling, and this requires physical space.
- Future-Proofing Neglect: What if you need to add a water softener or an advanced filtration system later? A pump house built with no room for expansion becomes obsolete quickly.
Comparing Incorrect Sizing Scenarios
This table shows the direct consequences of getting the size wrong.
| Sizing Issue | Immediate Problem | Long-Term Consequence |
|---|---|---|
| Too Small | Difficulty accessing equipment for service. | Reduced equipment lifespan due to overheating. |
| Too Small | Lack of airflow, causing high temperatures. | Increased chance of premature component failure. |
| Too Large | Unnecessary construction expenses. | Higher ongoing utility costs for heating/cooling. |
| Too Large | Wasted space and materials. | Potential for clutter and unsafe storage practices. |
The goal is to find the sweet spot.
The right size balances cost, functionality, and future needs perfectly.
It creates an environment where your investment is protected and easy to manage.
Proposed Solution: A Framework for Sizing Your Pump House
Want to avoid sizing mistakes?
A systematic approach can feel complex, but it prevents costly rework and future frustrations.
Building a durable, functional pump house is entirely achievable with the right plan.
Calculate your pump house size using a simple formula. Start with the total footprint of all equipment. Add a 3-foot clearance on all serviceable sides. Finally, add 20-30% more space for future upgrades and proper ventilation. This method ensures adequate room for now and later.
Designing the ideal pump house doesn't require an engineering degree.
It just requires careful planning.
The core idea is to think in zones: the equipment zone, the service zone, and the future expansion zone.
By calculating the needs for each, you can arrive at a total size that is both practical and efficient.
This approach transforms the task from guesswork into a clear, step-by-step process.
It’s about building a space that works for your equipment and the people who will maintain it.
This method not only ensures your pump operates in an optimal environment but also saves you from the future headache of a cramped or inefficient workspace.
Let's dive into the specifics of this framework.
The Component Footprint
The first step is to list every piece of equipment that will go inside.
Do not estimate.
Get the exact dimensions from the manufacturer's specification sheets.
- Pump: Length, width, and height. Remember to account for intake and outlet piping.
- Pressure Tank: Diameter and height. Vertical tanks have a smaller footprint but require more vertical clearance.
- Control Panel: Your VSD controller or switch needs a dedicated, accessible wall space.
- Filtration System: This can include sediment filters, carbon filters, or UV purifiers. Each has its own dimensions.
- Water Softener: If you plan to add one, include its footprint now.
The Service and Access Zone
This is the most frequently overlooked aspect.
A maintenance technician needs room to work safely and efficiently.
The industry standard is to provide a minimum of 3 feet (about 1 meter) of clear space around any side of the equipment that requires service.
This includes the front of the control panel, the side of the pump for motor access, and around filters for easy replacement.
You also need a clear pathway from the door to each component.
Think about how you would carry a new pressure tank in or an old pump out.
The doorway itself must be wide and tall enough to accommodate the largest piece of equipment.
The Ventilation and Future-Proofing Zone
Heat is the enemy of pump electronics.
Your pump house needs space for air to circulate.
This means not packing everything into a corner.
Louvers, vents, or an exhaust fan should be part of your plan, and they require wall space.
Finally, think about what might change in five or ten years.
Will you need a larger pump?
Will you want to add an iron filter or a constant pressure system?
Adding a buffer of 20-30% extra floor space is a wise investment.
It gives you the flexibility to upgrade your system without having to build a new pump house.
Here's a sample calculation for a standard residential setup.
| Component | Dimensions (L x W) | Required Footprint (with 3ft Access) |
|---|---|---|
| Pump & Motor | 2 ft x 1 ft | 5 ft x 4 ft = 20 sq ft |
| Pressure Tank (20-gal) | 1.5 ft diameter | 4.5 ft x 4.5 ft = 20.25 sq ft |
| Filtration Unit | 1 ft x 0.5 ft | 4 ft x 3.5 ft = 14 sq ft |
In this example, just accounting for two components with service access already demands significant space.
A 4x4 ft shed would be far too small.
A 6x8 ft or 8x8 ft structure becomes a more realistic starting point.
Technical Architecture: Construction and Material Choices
Wondering what to build it with?
Choosing the wrong materials can lead to rot, pest infestations, and poor insulation.
Protecting your expensive pump system requires a durable, well-built structure.
Construct your pump house on a concrete slab for stability and moisture resistance. Use pressure-treated wood or steel for framing. For walls and roofing, consider insulated metal panels or fiber cement siding for durability, insulation, and low maintenance. Ensure proper ventilation with screened vents.
The "technical architecture" of your pump house is simply what it's made of and how it’s put together.
This is a critical decision.
The structure's primary job is to protect a valuable, critical piece of machinery from the elements for decades.
Skimping on materials is a false economy.
A cheap shed might save you money today, but it will cost you far more when it fails and your pump system is damaged by water, freezing temperatures, or pests.
Let's look at the key components of a well-built pump house, from the ground up.
Foundation: The Unshakable Base
The foundation is the most important element.
- Concrete Slab: This is the best choice. A 4-inch thick reinforced concrete slab provides a stable, level, and waterproof base. It prevents ground moisture from seeping in and keeps pests out. Make sure the slab is slightly elevated above the surrounding grade to prevent water from pooling around the edges.
- Gravel and Pavers: A less permanent but viable option for smaller setups. A deep base of compacted gravel with concrete pavers on top can work, but it offers less protection against moisture and pests.
Framing and Walls: The Protective Shell
The frame and walls define the structure’s strength and insulation.
- Wood Framing: Standard and cost-effective. Always use pressure-treated lumber for the base plates that contact the concrete. Using 2x4 or 2x6 studs allows you to add insulation easily.
- Steel Framing: Lighter and perfectly straight, steel studs are resistant to rot and termites. They can be more expensive and may require specialized tools.
- Siding: Your choice of siding affects durability and maintenance.
- Fiber Cement: Excellent durability. It’s resistant to fire, rot, and insects. It holds paint well but can be heavy and requires special cutting tools.
- Metal Panels: Very low maintenance and long-lasting. Insulated metal panels offer a complete wall solution with built-in insulation, providing great thermal performance.
- Vinyl Siding: Affordable and easy to install. However, it can become brittle in extreme cold and may be damaged by impact.
Insulation and Ventilation: Climate Control
Insulation is not optional; it's essential.
It protects your pump from freezing in the winter and from overheating in the summer.
| Insulation Type | R-Value per inch | Pros | Cons |
|---|---|---|---|
| Fiberglass Batts | 3.1 - 3.4 | Inexpensive, DIY-friendly | Can lose effectiveness if compressed or wet |
| Rigid Foam Board | 4.0 - 6.5 | High R-value, moisture resistant | Can be more expensive, requires careful sealing |
| Spray Foam | 6.0 - 7.0 | Highest R-value, air seals gaps | Professional installation required, costly |
Ventilation is just as important.
You need at least two vents, placed on opposite walls—one low and one high—to create natural airflow.
These vents should be screened to keep insects and rodents out.
For high-power pumps or hot climates, a thermostatically controlled exhaust fan is a wise investment to actively remove hot air.
Budget and Timeline: Planning Your Pump House Project
Worried about the cost and time?
A pump house project can seem daunting, with hidden costs and delays.
A clear budget and timeline are essential to keep your project on track.
A basic DIY pump house can cost $500 to $1,500 in materials. A professionally built, insulated structure typically ranges from $2,000 to $5,000+. The project can take a weekend for a simple kit or 1-2 weeks for a custom-built structure including concrete work.
Building a pump house is a small construction project.
Like any project, it requires a realistic budget and a well-defined timeline to succeed.
Failing to plan for both can lead to a half-finished structure and unexpected expenses.
It’s crucial to break down the costs and schedule the steps logically.
This ensures you have the necessary funds and materials ready at each stage.
Let's outline the key financial and time-related considerations.
Budgeting for Your Pump House
Your budget will depend on size, materials, and whether you do it yourself or hire a contractor.
Here's a breakdown of potential costs.
- Foundation:
- DIY Concrete: $200 - $400 for a 6x8 ft slab (concrete mix, rebar, frame).
- Professional Concrete: $500 - $1,200.
- Framing and Siding:
- DIY Wood Frame & Plywood: $400 - $800.
- DIY with Metal Siding: $600 - $1,500.
- Insulation:
- Fiberglass Batts: $100 - $200.
- Rigid Foam Board: $200 - $400.
- Roofing:
- Asphalt Shingles: $100 - $250.
- Metal Roofing: $200 - $500.
- Labor:
- Hiring a handyman or contractor can add $1,000 to $3,000+ to the total cost.
Sample Budget Scenarios
This table gives you a rough idea of what to expect.
| Project Scope | Material Cost Range | Total Cost Range (with Labor) |
|---|---|---|
| Small DIY Kit (4x4 ft) | $500 - $900 | N/A |
| Mid-Size DIY (8x8 ft, Wood) | $1,200 - $2,500 | N/A |
| Pro-Built (8x8 ft, Insulated) | $1,500 - $3,000 | $3,000 - $6,000+ |
Project Timeline: From Plan to Protection
A realistic timeline prevents frustration.
Allow ample time for each step, especially if you are new to construction.
- Phase 1: Planning and Design (1-2 days)
- Finalize size and layout.
- Create a materials list.
- Check local building code requirements.
- Phase 2: Foundation (2-4 days)
- Day 1: Excavate, build the form, and lay rebar.
- Day 2: Pour the concrete.
- Day 3-4: Allow the concrete to cure. Curing time is crucial and can take longer in cold or damp weather.
- Phase 3: Framing and Sheathing (1-3 days)
- Day 1: Assemble and raise the walls.
- Day 2: Install roof rafters and exterior sheathing.
- Phase 4: Exterior Finishing (2-3 days)
- Day 1: Install roofing and house wrap.
- Day 2: Install siding, windows, and door.
- Phase 5: Interior Finishing (1-2 days)
- Day 1: Run electrical (if needed) and install insulation.
- Day 2: Put up interior walls (like drywall or plywood) and paint.
This timeline is for a DIY project.
A professional crew might complete the work in a much shorter timeframe, but you must schedule them in advance.
Remember to factor in weather delays.
A week of rain can easily push your project back.
Risk Assessment: Protecting Your Investment
Have you considered what could go wrong?
Building a pump house without thinking about risks is like leaving the door unlocked.
You expose your vital water system to preventable threats like freezing, pests, and theft.
Key risks to a pump house include freezing temperatures, overheating, moisture damage, pest infestation, and unauthorized access. Mitigate these with proper insulation, ventilation, a sealed structure on a concrete slab, screened vents, and a locking door. These steps protect the pump and ensure water system reliability.
Your pump system is a significant investment.
The pump house is its insurance policy.
A thorough risk assessment helps you build a structure that provides maximum protection against common and uncommon threats.
Thinking like a risk manager now will save you from emergency repairs and system downtime later.
Every design choice, from the foundation to the door handle, can either reduce or increase risk.
Let's identify the primary threats and the specific countermeasures you should implement.
Environmental Risks
The environment is the most constant threat to your pump system.
- Freezing: This is a critical risk in cold climates. A burst pipe or cracked pump casing can cause thousands of dollars in damage.
- Mitigation: Full insulation (walls and ceiling) with a high R-value. A small, thermostatically controlled heater or even a simple incandescent bulb can provide enough warmth in a well-insulated space. Heat tape on pipes offers extra protection.
- Overheating: In hot climates, excessive heat degrades electronic components and can cause motor failure.
- Mitigation: A properly designed ventilation system is crucial. Use large, screened vents for passive airflow. Add a thermostatically controlled exhaust fan to actively pull hot air out when temperatures exceed a set point (e.g., 85°F / 30°C).
- Moisture and Flooding: Water is the enemy of electrical components and can cause rot and mold in the structure.
- Mitigation: Build on an elevated concrete slab. Ensure the surrounding ground slopes away from the pump house. Use waterproof siding and roofing materials. Seal all gaps and joints with high-quality caulk.
Biological and Physical Risks
Pests and people can also pose a threat.
- Pests (Rodents, Insects): Mice and rats love to chew on wires, and insects can build nests in control panels.
- Mitigation: A sealed structure is your best defense. Use a concrete slab, screen all vents with fine metal mesh, and seal any gaps where pipes or wires enter the building with spray foam or silicone.
- Unauthorized Access (Theft, Vandalism): Pumps, especially those with copper components, can be a target for theft.
- Mitigation: Use a solid-core door, not a hollow one. Install a heavy-duty deadbolt lock. If in a remote location, consider a steel security door. Avoid windows if possible; if you need one, use reinforced glass and place it high up.
Risk Mitigation Checklist
Use this table to ensure you've covered all your bases.
| Risk Category | Specific Threat | Primary Mitigation Strategy | Secondary Mitigation |
|---|---|---|---|
| Environmental | Freezing | R-13+ Insulation in walls/ceiling | Thermostatic heater, heat tape |
| Environmental | Overheating | Cross-ventilation (high/low vents) | Thermostatic exhaust fan |
| Environmental | Moisture/Flooding | Elevated concrete slab | Ground grading, sealed structure |
| Biological | Rodents/Insects | Sealed entry points, concrete slab | Screened vents, tidy interior |
| Physical | Theft/Vandalism | Solid door with a deadbolt lock | No windows, remote monitoring |
By systematically addressing these risks during the design and construction phase, you create a secure fortress for your water system.
This proactive approach is the hallmark of a professional and long-lasting installation.
Conclusion
Sizing your pump house correctly is simple.
It requires planning for your equipment, service access, and future needs.
A well-built structure protects your investment and ensures system longevity.
FAQs
How do you keep a pump house from freezing?
Use full insulation (R-13+) in walls and the ceiling. Seal all air gaps and consider adding a small, thermostatically controlled heater or heat lamp for extreme cold.
How do I ventilate my pump house?
Install at least two screened vents on opposite walls, one low and one high, for natural airflow. For hot climates or powerful pumps, add a thermostatically controlled exhaust fan.
What is the best floor for a pump house?
A 4-inch thick, reinforced concrete slab is the best choice. It provides a stable, waterproof base that keeps out moisture and pests and is easy to clean.
How much clearance do you need around a well pump?
A minimum of 3 feet of clear space is recommended around any side of the pump and tank that requires service. This allows room for maintenance and replacement.
Does a well pump house need insulation?
Yes, insulation is essential. It protects the pump system from freezing in winter and helps prevent overheating in summer by stabilizing the interior temperature.
Should a well pump house be heated?
In climates where temperatures drop below freezing, heating is highly recommended. A small, inexpensive electric heater on a thermostat is usually sufficient for a well-insulated space.
How close can a pump house be to a well?
Local codes vary, but a pump house is often built directly over or next to the wellhead for convenience. Check your local health and building departments for specific setback requirements.
Can a pump and pressure tank be in the same house?
Yes, it is standard practice. The pump house is designed specifically to shelter both the pump, the pressure tank, and any associated filtration and control equipment together.