Struggling with weak showers or fluctuating water flow?
Your pump's pressure settings are likely off.
Adjusting your automatic pressure pump is simple.
For older models, use a screwdriver on the pressure switch.
For modern digital pumps, use the "UP" and "DOWN" buttons on the control panel to set the exact pressure you need.

Getting the pressure just right can seem complex, but it's the key to a reliable water system.
Whether you have a traditional setup or a new intelligent pump, understanding the adjustment process unlocks consistent performance and efficiency.
This guide will walk you through adjusting both types, explain why it's important, and help you troubleshoot common issues, ensuring you have perfect water pressure whenever you need it.
What is an Automatic Pump Controller?
Tired of manually managing your water pump and dealing with inconsistent pressure?
An automatic controller is the solution.
This single, intelligent device automates your pump's operation, turning it on and off as needed to maintain a constant, steady flow of water to your home or property.
Say goodbye to manual switches and hello to effortless control.
An automatic pump controller is more than just an on/off switch; it’s the brain of your modern water pressure system.
It replaces a bulky collection of traditional components, integrating multiple functions into one compact and efficient unit.
This not only simplifies your plumbing but also adds layers of protection to safeguard your pump investment.
By consolidating several devices, it streamlines your system and enhances its reliability.
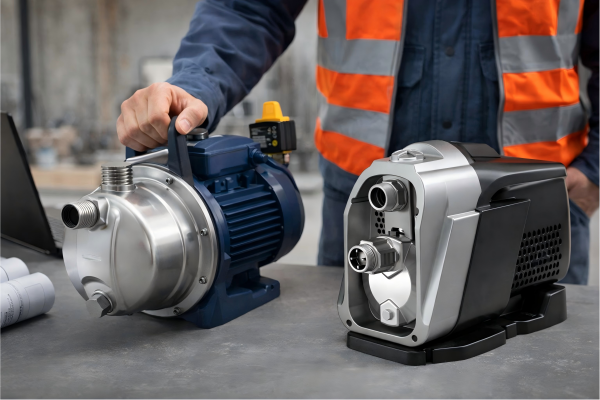
The Evolution from Traditional to Integrated Systems
Traditionally, controlling a water pump required a whole assembly of parts.
You needed a pressure tank to store water under pressure, a pressure switch to read the levels, a check valve to prevent backflow, and a pressure gauge to see what was happening.
An automatic controller combines all these functions and more.
It acts as an intelligent hub, making your entire water system smarter and less prone to failure.
Core Functions of a Modern Controller
A controller's primary job is to ensure your pump performs optimally.
Here’s a breakdown of its key responsibilities:
- Constant Flow Management: It continuously monitors the system to ensure the pump delivers a steady, unwavering flow. This eliminates the frustrating pressure drops and temperature fluctuations you might experience during a shower.
- Automatic Start/Stop: The controller detects when a tap is opened or closed. It instantly starts the pump when it senses a pressure drop (like turning on a faucet) and stops it when the tap is closed. This provides water on demand without any manual intervention.
- Comprehensive Pump Protection: One of its most critical roles is protection. Modern controllers have built-in safety features that guard against common causes of pump failure, such as running dry, overheating, and power surges. This preventative intelligence significantly extends the life of your pump.
| Feature | Traditional System | Automatic Controller |
|---|---|---|
| Pressure Control | Separate pressure switch | Integrated, often digital |
| Pressure Buffer | Large physical pressure tank | Small internal tank or none |
| Dry Run Protection | Often requires a separate float switch | Built-in as standard |
| System Complexity | Multiple components, complex plumbing | Single unit, simplified installation |
| Efficiency | Pump runs at full speed only | Can enable variable speed for energy savings |
By integrating these features, an automatic controller transforms a simple pump into a sophisticated, self-managing water supply system.
It provides peace of mind, knowing your pump is operating efficiently and is protected from harm.
How Does An Automatic Pump Controller Work?
Wondering how one small box can manage your entire water system so effectively?
It's all about intelligent pressure sensing.
The controller constantly monitors the water pressure in your pipes.
When you open a tap, the pressure drops, and the controller instantly activates the pump.
When you close it, the pressure rises, and the controller shuts the pump off.
This simple yet brilliant process ensures you always have water when you need it.
The magic behind an automatic pump controller lies in its blend of straightforward mechanics and smart electronics.
It operates on a simple principle: demand-based activation.
This eliminates the need for the pump to run constantly or for you to manually operate it.
It's an energy-efficient design that simplifies plumbing and makes your water system more responsive and reliable.
Let's break down the technology that makes this seamless operation possible.
The Role of Pressure Sensing
At the heart of every controller is a pressure sensor.
This sensor is the device's eyes and ears, constantly measuring the pressure within your plumbing system.
- Pump Activation: When you open a faucet or flush a toilet, water flows out, causing an immediate drop in pipeline pressure. The sensor detects this drop below a pre-set "cut-in" level and sends a signal to the controller's circuit board. The board then instantly switches the pump on to restore pressure.
- Pump Deactivation: Once you close the faucet, the pump continues to run for a moment, refilling the pipe and building pressure back up. When the sensor detects that the pressure has reached the "cut-out" threshold, it signals the controller to switch the pump off. This prevents over-pressurization and saves energy.
Advanced VFD Technology for Ultimate Control
While basic controllers offer simple on/off functionality, advanced systems use a Variable Frequency Drive (VFD).
This technology takes pressure control to the next level.
Instead of just turning the pump on at full speed, a VFD adjusts the motor's speed in real-time.
- How it Works: A VFD controls the frequency of the electrical power supplied to the pump motor. By changing the frequency, it can speed the motor up or slow it down.
- Benefit of Constant Pressure: If you only open one small tap, the VFD runs the pump slowly, using just enough energy to meet the demand. If you open multiple taps, it speeds the pump up. The result is a perfectly constant water pressure at the tap, regardless of how many outlets are in use. This also leads to significant energy savings, as the pump only ever uses the power it needs.
The Advantage of Soft Start and Soft Stop
Another key feature found in high-quality controllers, especially those with VFDs, is the soft start/stop function.
When a powerful motor turns on instantly, it creates a jolt of mechanical stress on the components and an electrical surge on your power grid.
Similarly, an abrupt stop can cause "water hammer"—a damaging shockwave in your pipes.
The soft start function gradually ramps up the motor's speed, and the soft stop function gently slows it down.
This dramatically reduces wear and tear on the pump, bearings, and pipes, extending the lifespan of your entire system.
It's a small detail that makes a huge difference in long-term reliability.
Do I Need An Automatic Pump Controller?
Are you frustrated with your current water pressure setup?
If you want to save money, simplify your system, and get reliable, constant pressure without any manual effort, then the answer is a definite yes.
An automatic controller is an essential upgrade for any modern home.
Deciding whether to invest in an automatic pump controller comes down to what you value in your home's water system.
It’s not just about convenience; it’s about efficiency, protection, and long-term performance.
If you are setting up a new plumbing system, incorporating a smart controller from the start is the most logical choice.
However, even if you have an existing system, upgrading can solve many common frustrations.
Ask yourself these questions to determine if a controller is right for you.
Are You Looking for Efficiency and Savings?
An automatic controller is inherently more efficient than a traditional setup.
- Water Savings: By preventing leaks from causing the pump to cycle constantly and by ensuring the system only runs when needed, you reduce water waste.
- Energy Savings: This is especially true for advanced VFD controllers. Instead of running at full power every time it kicks on, a VFD pump adjusts its speed to the demand. This optimization can reduce electricity consumption by up to 50% compared to a conventional pump, leading to significantly lower utility bills.
Do You Want to Protect Your Investment?
A water pump is a significant investment, and an automatic controller is its best insurance policy.
Pumps can fail for many reasons, but a smart controller with built-in protections can prevent the most common ones.
The "14-Shield" protection found in premium models is a perfect example of this.
It actively monitors the system for a wide range of potential faults.
| Protection Feature | What It Does | Why It's Important |
|---|---|---|
| Dry Run Protection | Shuts the pump off if it detects no water supply. | Prevents the motor from overheating and burning out. |
| Over/Under Voltage | Stops operation if grid voltage is dangerously high or low. | Protects the electronics from damage due to power fluctuations. |
| Overheating Protection | Monitors motor and PCB temperature and shuts down if too hot. | Prevents permanent damage to the motor and controller. |
| Anti-Freeze Protection | Runs the pump periodically in cold weather. | Prevents water inside the pump from freezing and causing cracks. |
| Leak Warning | Detects small, continuous pressure drops. | Alerts you to a leak in your plumbing before it becomes a major problem. |
These intelligent safeguards work around the clock to keep your pump safe, ensuring it lasts for years to come.
Without a controller, your pump is vulnerable to these common and costly failures.
Do You Value Simplicity and Ease of Use?
A modern automatic controller simplifies everything from installation to daily operation.
It eliminates the need for complex wiring between multiple components and reduces the amount of plumbing required.
Troubleshooting is also far easier.
Instead of guessing which of five different components has failed, a smart controller often has indicator lights or a digital display that tells you exactly what the problem is, such as "Water Shortage" or "Voltage Fault."
This makes diagnosing and fixing issues quick and painless.
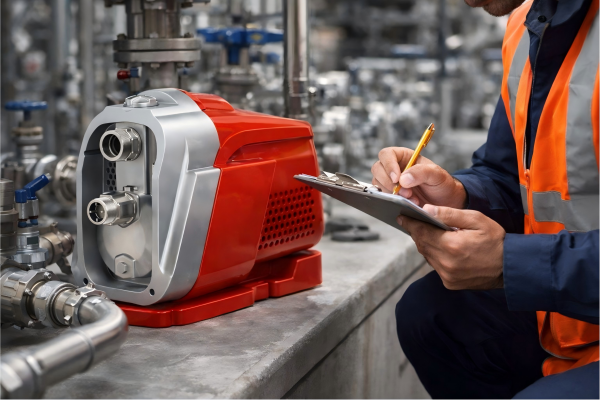
How Do You Adjust an Automatic Water Pump Pressure Controller?
Feeling like your water pressure is either too weak or too strong?
Adjusting it is easier than you think.
For traditional mechanical switches, you'll use a screwdriver to turn two adjustment nuts.
For modern electronic controllers, the process is as simple as pressing "UP" or "DOWN" buttons on a digital display to dial in your perfect pressure.
The method for adjusting your pump's pressure settings depends entirely on the type of controller you have.
Older systems use a mechanical pressure switch, which requires a bit of manual tuning.
Newer, intelligent pumps feature user-friendly digital interfaces that allow for precise, effortless adjustments.
Regardless of your system, the goal is the same: to set the 'cut-in' pressure (when the pump turns on) and the 'cut-out' pressure (when it turns off) to match your needs.
Let's explore both methods.
Adjusting a Traditional Mechanical Pressure Switch
If your pump controller is a small grey or black box mounted near the pressure tank, it's likely a mechanical switch.
Before you begin, always turn off the power to the pump at the circuit breaker for safety.
- Remove the Cover: Use a screwdriver to remove the plastic or metal cover on the pressure switch. Inside, you will see electrical contacts and one or two springs with large nuts on top.
- Identify the Adjustment Nuts:
- Main Nut: There will be one large, central nut. This nut adjusts both the cut-in and cut-out pressure together, shifting the entire pressure range up or down. Turning it clockwise increases the pressure; counter-clockwise decreases it.
- Differential Nut: A smaller nut next to the large one adjusts the differential—the gap between the cut-in and cut-out pressures. Turning this nut clockwise increases the cut-out pressure only, widening the pressure range.
- The Adjustment Process:
- Make small adjustments, only turning the nuts a half-turn at a time.
- Turn the power back on and run a faucet to let the pump cycle and see the effect of your adjustment on a pressure gauge.
- Repeat until you reach your desired settings. A common setting for homes is a 30/50 PSI or 40/60 PSI range.
Adjusting a Modern Digital Controller
Digital controllers, especially those with a VFD, offer a much more intuitive experience.
These units have a control panel with buttons and an LED or LCD screen.
- Access the Control Panel: The controls are typically on the face of the unit. There's no need to open any covers or work with live wiring.
- Use the Adjustment Buttons:
- The interface will usually have dedicated "UP" and "DOWN" arrow buttons.
- Simply press the "UP" button to increase the target constant pressure or the "DOWN" button to decrease it.
- The screen will display the set pressure in real-time, so you know exactly what you're setting it to.
- Monitor Live Data: A significant advantage of digital systems is the ability to see real-time performance data. Many controllers allow you to cycle through displays showing:
- Current pressure
- Motor speed (RPM)
- Power consumption (Watts)
- Input voltage
- Controller temperature
This live feedback helps you understand how your adjustments affect the pump's performance and energy use, allowing you to find the perfect balance between comfort and efficiency.
There's no guesswork involved—just simple, precise control.
Automatic Pump Control Troubleshooting
Is your pump acting strangely, but you don't know where to start?
First, check the basics.
Ensure the power is on and check the controller's indicator lights.
A warning light often tells you exactly what's wrong, such as a water shortage or voltage issue.
Always consult your user manual for specific error codes and their meanings.
When your automatic pump controller fails, it can bring your entire water supply to a halt.
Fortunately, modern controllers are designed to be user-friendly, and many common problems can be diagnosed and resolved with a few simple steps.
The key is to approach the problem systematically.
Always start with the simplest potential causes before assuming a major failure.
And remember, for any electrical work, your safety comes first—always disconnect the power.
Common Problems and Step-by-Step Solutions
Many issues can be traced back to a handful of common causes.
The diagnostic indicator lights on an intelligent controller are your best friend here, as they can point you directly to the source of the problem.
Here’s a structured guide to tackling the most frequent issues.
| Problem | Possible Causes | Solution |
|---|---|---|
| Pump won't start | No power supply; Controller in fault mode (e.g., dry run); Closed valves | Check circuit breaker; Check controller for warning lights (reset if necessary); Ensure all valves on suction/discharge lines are open. |
| Pump won't stop | Significant water leak in plumbing; Leaking check valve; Faulty pressure sensor | Inspect all pipes, taps, and toilets for leaks; Listen for water running back into the well/tank; The controller may need professional service. |
| Pump cycles on/off frequently | Small leak in the system; Waterlogged pressure tank (if present); Leaking foot valve | Check for dripping taps or toilets; Drain and recharge the pressure tank; The foot valve at the bottom of the suction line may need replacement. |
| Controller shows a warning light | A specific fault has been detected. | This is where the controller's intelligence shines. Look at the light or display and consult the manual. |
Understanding Warning Indicators
Advanced controllers provide specific visual feedback to help you diagnose problems instantly.
Here’s what typical indicators might mean:
- "Pump On" or "Constant Pressure" Light: This shows the system is operating normally.
- "Failure" or "Alarm" Light: A general fault indicator. You may need to press a button to see a more specific error code.
- "Water Shortage" / "Dry Run" Light: The most common fault. It means the controller has detected the pump is running without water. Many smart systems will automatically try to restart after a set period to see if the water supply has returned. You can often trigger a manual restart by pressing a reset button.
- "Voltage Fault" Light: Indicates the incoming power is too high or too low. This protects the pump's electronics but may point to an issue with your home's electrical supply.
- "Leakage" Light: Some high-end controllers can detect very small, persistent pressure drops that indicate a leak somewhere in your plumbing system.
The Power of the Reset Button
Sometimes, an electronic controller can enter a fault state due to a temporary glitch, like a brief power surge or a momentary air bubble in the suction line.
Before diving into complex diagnostics, try a simple manual reset.
Most controllers have a dedicated "RESET" or "RESTART" button.
Pressing it will often clear the fault code and prompt the controller to re-evaluate the system.
If the problem was temporary, the pump will resume normal operation.
If the fault light immediately returns, it indicates a persistent issue that needs further investigation using the steps above.
Conclusion
Adjusting your pump controller is key to a reliable water system.
Whether using simple tools or digital buttons, you can easily achieve perfect, constant pressure for your home.
FAQs
How do I increase water pressure in my pump?
For mechanical switches, turn the main nut clockwise. For digital controllers, simply press the "UP" arrow button to increase the set pressure value on the display.
What should my pump pressure be set at?
Most homes operate well with a cut-in pressure of 40 PSI and a cut-out of 60 PSI. However, this can be adjusted based on your home's size and your personal preference.
What is the difference between cut-in and cut-out pressure?
Cut-in pressure is the low point that tells the pump to turn on. Cut-out pressure is the high point that tells the pump to turn off.
Why is my water pump pressure not building up?
This could be due to a significant leak in your plumbing, a worn-out pump impeller, or a faulty foot valve that is allowing water to drain back to the source.
What happens if pump pressure is too high?
Excessively high pressure can stress your pipes and fixtures, leading to leaks and potential burst pipes. It can also damage appliances like washing machines and dishwashers.
How do I reset my automatic water pump controller?
Most modern controllers have a dedicated "RESET" or "RESTART" button. Pressing this button will clear any current faults and prompt the system to try starting again.
Can you adjust the pressure on a constant pressure pump?
Absolutely. Constant pressure pumps, especially VFD models, are designed for easy adjustment. You simply set your desired target pressure on the digital control panel.