Struggling to plan your project timeline?
Unpredictable borehole pump installation times can cause costly delays and disrupt your entire schedule, frustrating your clients.
Let's clarify the exact timeframe.
Typically, installing a standard borehole pump takes between 4 to 8 hours. However, this can extend from a full day to several days. The total time depends on borehole depth, site accessibility, and the specific pump system being installed.

Getting a clear timeline for your borehole pump installation is crucial.
It's not just about the hours spent on-site.
The entire process, from initial site checks to final testing, has many moving parts.
Understanding these variables helps you manage expectations for your clients and ensures a smoother, more predictable project flow.
This guide will break down every factor, step, and potential delay, giving you the detailed knowledge needed to accurately forecast installation times for any scenario.
What Key Factors Influence the Installation Timeline?
Worried about hidden factors delaying your installation?
These unknown variables can turn a simple job into a lengthy project, impacting your budget and reputation.
Knowing these factors in advance is key.
The most significant factors are borehole depth and diameter, site accessibility, and the type of pump. Deeper wells, remote or difficult-to-access sites, and complex pump systems like VFDs can increase installation time by over 50%.
Understanding the Variables
Planning an installation requires more than just scheduling a team.
You must account for the specific conditions of each site.
Every borehole presents a unique set of challenges.
A shallow, easily accessible well in a suburban area is worlds apart from a deep, remote borehole in rugged terrain.
Ignoring these details is a common mistake.
It leads to inaccurate quotes and inefficient scheduling.
A professional assessment considers every variable to provide a realistic timeframe.
This detailed approach prevents unexpected costs and maintains client trust.
Borehole Characteristics
The physical properties of the borehole itself are the primary time determinants.
- Depth: A deeper well requires more piping, more electrical cable, and more time to lower the equipment. A 200-meter well can take 3-4 hours longer than a 50-meter well just for the lowering process.
- Diameter: A narrow or irregular casing can make it difficult to lower the pump, risking damage or jamming. This can add 1-2 hours for careful maneuvering.
- Water Level: The static water level determines the length of the drop pipe needed, directly impacting the amount of material and time required for assembly.
Site Accessibility and Conditions
The location of the borehole plays a major role.
A site with poor road access requires specialized vehicles or more manual labor, adding significant time.
We've seen projects delayed by half a day simply due to logistical challenges in reaching the wellhead, a 25-30% increase in total project time.
Weather is another critical factor.
Rain can make a site muddy and unsafe, while high winds can make handling long sections of pipe dangerous.
Work may need to be paused, extending the installation into a second day.
Pump Type and System Complexity
The choice of pump system is a huge factor.
| Pump System Type | Average Installation Time Add-on | Key Complexity Driver |
|---|---|---|
| Standard Submersible Pump | Baseline (0 hours) | Standard electrical connection. |
| Solar Powered Pump | +2 to 4 hours | Solar panel array installation and wiring. |
| Variable Frequency Drive (VFD) Pump | +1 to 3 hours | Complex control panel wiring and programming. |
| Hand Pump | -1 to 2 hours | Simpler mechanical assembly. |
As the table shows, a standard pump is straightforward.
Installing a solar-powered system involves setting up and wiring solar panels, which can easily add half a day to the job.
VFD pumps require a skilled technician to wire the control panel and program the drive parameters for optimal performance, adding 1-3 hours depending on the system's complexity.
What Are the Steps in a Typical Borehole Pump Installation?
Feeling uncertain about the installation process?
A lack of a clear, step-by-step plan can lead to confusion and mistakes on-site, causing unnecessary delays.
Let's outline the exact procedure for you.
A standard installation involves four main stages: site preparation and safety checks, pump and pipe assembly, lowering the unit into the borehole, and finally, electrical connections and system testing. Each stage has a specific time allocation.
The Installation Workflow Explained
A successful installation follows a structured and methodical process.
Rushing any step can lead to significant problems later.
Problems can range from poor performance to complete system failure.
This workflow is designed to be efficient yet thorough.
It ensures safety, protects the equipment, and guarantees the pump operates as designed.
For your business, understanding this process helps you manage your installation teams and communicate effectively with your clients.
It transforms a complex task into a manageable series of checkpoints.
Let's walk through each stage in detail.
Stage 1: Site Preparation and Safety Check (30-60 minutes)
This is the foundation of the entire installation.
The team arrives and first assesses the site for any immediate hazards.
This includes checking for overhead power lines and ensuring the ground around the wellhead is stable.
They will set up a clean, designated area for assembling the pump and pipes.
All tools and equipment are laid out and inspected.
This crucial first hour prevents accidents and ensures a smooth workflow, a principle that reduces on-site incidents by over 90% in professional operations.
Stage 2: Pump and Pipe Assembly (1-3 hours)
This is often the most time-consuming part of the pre-installation work.
The submersible pump is unboxed and inspected.
The first section of drop pipe is securely threaded onto the pump outlet.
The electrical submersible cable is attached to the pipe using cable ties or specialized clips at regular intervals (e.g., every 1.5 to 3 meters).
It's critical not to tape the cable too tightly, as this can cause abrasion against the well casing.
A safety rope, typically made of nylon or stainless steel, is also securely fastened to the pump.
As each section of pipe is added, the process is repeated.
The team meticulously connects the pipe, cable, and rope, ensuring all connections are watertight and secure.
Stage 3: Lowering the Unit into the Borehole (1-4 hours)
This stage requires precision and care.
Using a tripod, crane, or specialized installation rig, the assembled pump and pipe column is slowly and carefully lowered into the borehole.
The speed depends on the total weight and depth.
For a 100-meter deep well, this process alone can take 1-2 hours.
The team must prevent the unit from scraping against the borehole casing, which could damage the pump or cable.
This is why a straight and clean borehole is so important.
Once the pump is set at the correct depth (determined during the borehole yield test), the top of the pipe is secured with a well seal or pitless adapter.
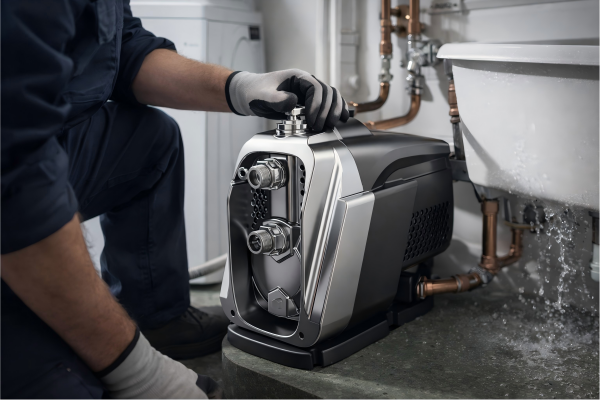
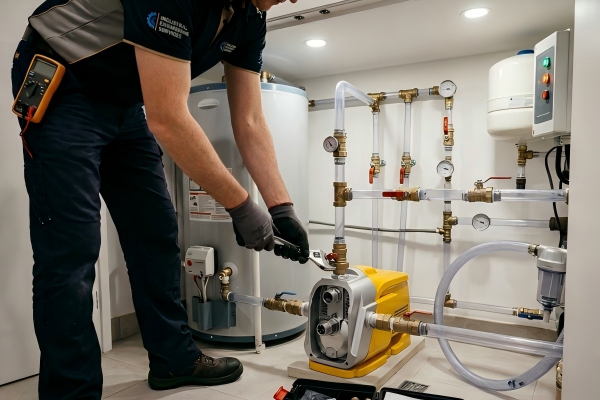
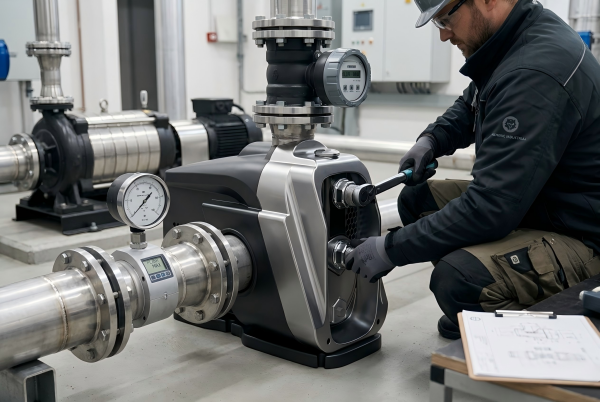
Stage 4: Electrical Connection and System Test (1-2 hours)
The final stage is connecting the power.
The submersible cable is wired into the pump's control box and then to the main power supply.
For VFD or solar systems, this involves connecting to the inverter and control panel.
Once all electrical work is complete, the system is turned on for the first time.
The team performs several critical tests:
- Flow Rate Check: They measure the gallons or liters per minute to ensure it matches the pump's specifications.
- Pressure Test: They check the system pressure to confirm it meets the requirements.
- Amperage Draw: They test the motor's electrical current to ensure it's operating within a safe range.
The system might run for 30-60 minutes to confirm stable operation and check for any leaks or unusual noises.
How Do Pre-Installation Preparations Save Time and Money?
Think showing up on installation day is enough?
Poor preparation leads to chaos.
Missing parts or an unprepared site can halt work entirely, doubling costs and project time.
Proper prep work is the solution.
Completing pre-installation checks can reduce on-site installation time by 25-40%. This includes confirming borehole data, ensuring all necessary equipment is on-site, and clearing the access route and work area before the installation team arrives.
The Value of Being Prepared
Preparation is not just a preliminary step; it is a core part of the installation strategy.
Many project delays are not caused by the installation work itself.
They are caused by failures in planning.
For a business like yours, which handles large-scale distribution and supports numerous installers, promoting a culture of preparation is a significant value-add.
It positions your brand as a partner, not just a supplier.
When your clients (the installers) are more efficient, they are more profitable and more loyal to you.
Let's break down the essential prep work that guarantees a smooth installation day.
Verifying Borehole Data
Before a single tool is ordered, you must have accurate data.
This is the most critical preparation step.
- Borehole Report: Obtain the driller's report. This document contains vital information.
- Total Depth: The full depth of the borehole from the surface to the bottom.
- Static Water Level: The level the water naturally sits at when the pump is off.
- Yield Test Results: The rate at which the borehole replenishes, measured in gallons or liters per minute. This determines the maximum size of the pump you can install without running the well dry.
- Casing Diameter: The internal diameter of the well casing, which dictates the maximum diameter of the pump.
Actionable Tip: Create a standardized pre-installation checklist for your distributors. Require them to confirm this data with their clients before placing an order. This simple QC step can prevent 99% of pump-borehole mismatch errors.
Component and Tool Checklist
Nothing stops a job faster than a missing part.
A comprehensive checklist is non-negotiable.
| Category | Essential Items |
|---|---|
| Pump System | Submersible pump, motor, control box, drop pipe, submersible cable, safety rope. |
| Installation Gear | Tripod/rig, pipe wrenches, splicing kit, electrical multimeter, tape measure, cable ties. |
| Wellhead Components | Well seal or pitless adapter, sanitary cap, fittings for connection to the water line. |
| Safety Equipment | Gloves, hard hats, safety glasses, harnesses (for deep installations). |
Have your team physically check every item off the list before leaving for the site.
A single forgotten pipe fitting can waste hours as a team member drives back to a supplier.
This meticulous check ensures 100% readiness.
Site and Access Preparation
The physical site must be ready to receive the installation team.
Confirm this with the end-user or site manager a day or two before the scheduled installation.
- Clear Access: Ensure the path to the borehole is clear for the installation vehicle. This may involve trimming tree branches or temporarily moving obstacles.
- Work Area: The area around the wellhead (a radius of at least 3-5 meters) should be clear and level. This provides a safe space to assemble long sections of pipe.
- Power Availability: If the system is grid-powered, confirm that a certified electrician has run the necessary power supply to the wellhead location. This is not the installer's job and can cause major delays if overlooked.
By ensuring these three areas are addressed, you eliminate the most common on-site physical barriers, allowing the team to start work immediately upon arrival.
Choosing the Right Pump: Does It Affect Installation Time?
Is a more powerful pump always better?
Choosing the wrong pump type can lead to complex, lengthy installations and even damage to the borehole or the pump itself.
The right choice simplifies everything.
Yes, the pump type dramatically affects installation time. A simple hand pump may take 1-2 hours. A standard AC submersible pump takes 4-8 hours. A complex solar VFD pump system can take 1-2 days due to panel installation and advanced wiring.
Matching the Pump to the Application
Selecting a pump is a technical decision, not a casual one.
The goal is to find the perfect balance between performance, efficiency, and installation simplicity for a given application.
An oversized pump is inefficient and can over-pump the well.
An undersized pump will fail to meet the water demand.
As a supplier, guiding your customers to the right choice is crucial.
It demonstrates your technical expertise and builds long-term trust.
The right pump not only works better but is also faster and easier to install, saving your clients time and labor costs.
This efficiency is a powerful selling point for your products.
Comparing Installation Complexity
Let's look at how installation time varies across different pump technologies.
The complexity grows with the technology.
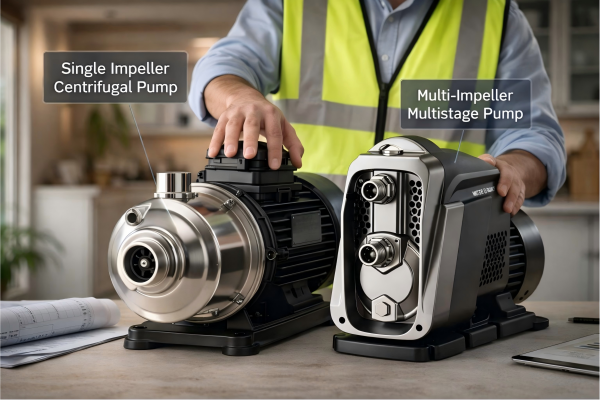
Standard AC Submersible Pumps
This is the workhorse of the industry.
Installation is straightforward for an experienced team.
The primary tasks are mechanical (pipe assembly) and basic electrical (wiring a control box).
Most of the 4-8 hour installation window is dedicated to these pumps.
The process is well-understood and highly repeatable.
Variations in time are almost always due to site-specific factors like depth, not the pump technology itself.
Solar-Powered Pumps
Solar pumps introduce a new layer of complexity.
You are not just installing a pump; you are installing a miniature power plant.
- Panel Installation: This is a major task. A mounting structure must be built, and solar panels must be securely fastened to it. This alone can take 2-4 hours. The array must be correctly angled and oriented for maximum sun exposure.
- DC Wiring: Solar systems use DC power, which requires specialized knowledge. All wiring from the panels to the controller and then to the pump must be done correctly to ensure safety and efficiency.
Because of this extra work, a solar pump installation often takes a full day or even longer, representing a 100% to 200% increase in time compared to a standard AC pump.
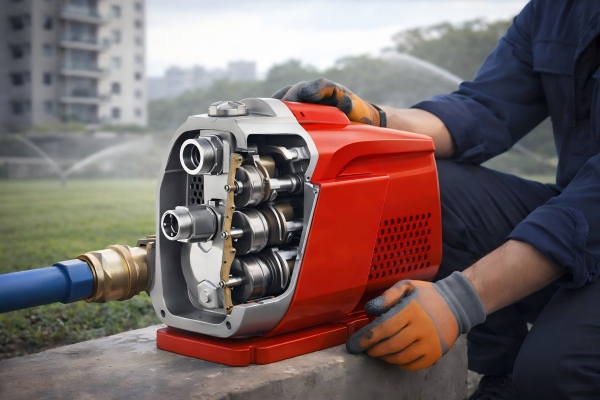
VFD (Variable Frequency Drive) Pumps
VFD pumps offer incredible efficiency and control.
However, this sophistication adds time to the installation.
While the in-well part of the installation is identical to a standard pump, the surface-level work is more advanced.
- Control Panel Programming: The VFD controller must be programmed. This involves setting parameters like minimum/maximum frequency, pressure setpoints, and motor protection settings. An inexperienced technician might spend 1-2 hours on this alone.
- Sensor Integration: Many VFD systems use pressure transducers or flow meters. These sensors must be installed in the plumbing and wired correctly back to the VFD controller.
This added electrical and programming work can extend a standard installation by 1-3 hours.
Conclusion
The time to install a borehole pump is not a single number.
It ranges from hours to days, hinging on pump type, well depth, and site prep.
Proper planning is everything.
FAQs
What is the fastest a borehole pump can be installed?
Under ideal conditions—a shallow well, easy access, and a pre-assembled standard pump—an experienced team might complete an installation in as little as 3-4 hours.
Can I install a borehole pump myself?
While possible for very simple systems, it is not recommended. Professional installation ensures safety, protects your equipment warranty, and guarantees correct and efficient operation.
Does borehole depth affect pump choice?
Yes, absolutely. Deeper wells require pumps capable of generating higher pressure (head) to lift the water to the surface, directly influencing the pump model and motor size.
What is the most common cause of installation delays?
The most common delay is inaccurate information about the borehole, such as incorrect depth or yield data, leading to a mismatched pump that cannot be installed.
How much does it cost to install a water pump in a borehole?
Installation costs vary widely based on labor rates, location, and pump complexity. Labor can range from a few hundred to several thousand dollars.
Do you need an electrician to install a borehole pump?
Yes, a qualified electrician is essential for safely connecting the pump's control box and power supply to the grid, especially for high-voltage systems.
What maintenance is required after installation?
After installation, it's good practice to monitor the pump's performance and water flow. A professional should check the system every 2-3 years for optimal longevity.