Misaligned vertical pumps lead to catastrophic failures and costly downtime.
This vibration and wear can cripple your system.
Proper alignment is the key to ensuring long-term operational reliability and efficiency.
Aligning a vertical pump involves securing the base, centering the motor to the C-face adapter, and ensuring shaft faces are parallel and concentric.
This is achieved by using dial indicators or lasers for measurement and making precise adjustments with shims or jacking bolts until tolerances are met.

While the concept seems straightforward, achieving a perfect alignment requires careful attention to detail and a systematic approach.
A minor error can compromise the entire process, leading to the very issues you're trying to prevent.
Let's explore the step-by-step process and the essential tools that transform this critical task from a complex challenge into a manageable routine.
This guide will provide you with the knowledge to protect your equipment and maximize its service life.
Key Steps for Vertical Pump Alignment
Skipping initial preparations is a common but costly mistake.
This can lead to inaccurate measurements, repeated work, and even safety hazards.
Following a structured, safety-focused procedure is the only way to guarantee a correct and lasting alignment.
The essential steps begin with safety lockout and thorough preparation.
This includes cleaning surfaces and correcting soft foot.
Next comes a rough alignment, then precise measurement and iterative adjustments using shims and bolts.
A final check after tightening secures the alignment.
Achieving a perfect alignment is a process of refinement.
It's not about getting it right on the first try.
It is about making small, calculated adjustments and re-measuring until the shafts are perfectly positioned relative to one another.
This iterative process ensures that every variable, from foundation stability to bolt tension, is accounted for.
Let's break down each phase of the alignment process in greater detail.
1. Safety & Preparation
The first step in any maintenance task is ensuring the safety of the personnel involved.
You must never work on equipment that could accidentally start.
Lock out and tag out all electrical power sources connected to the pump and motor.
This prevents any unexpected activation during the alignment process.
Once the equipment is safely de-energized, preparation of the physical components begins.
Cleanliness is critical for accurate measurements.
Remove any rust, dirt, grease, or old paint from the motor feet and the baseplate where the motor sits.
Any debris can interfere with measurements and prevent the motor from sitting flush, leading to a false alignment.
One of the most critical preparatory checks is for "soft foot."
-
What is Soft Foot?
Soft foot occurs when one or more of the motor's feet do not sit flat on the baseplate.
When you tighten the mounting bolts, this gap causes the motor frame to distort or twist.
This distortion introduces stress into the system and makes a precise alignment impossible to achieve. -
How to Check for Soft Foot:
Start by loosening all the motor's hold-down bolts.
Use a feeler gauge to check for any gaps under each foot.
A common rule of thumb is that any gap over 0.05mm (or 2 mils) needs to be corrected.
To correct it, insert shims with the exact thickness of the gap under the affected foot.
Re-check after shimming to ensure the problem is resolved.
2. Rough Alignment
Rough alignment, also known as "eyeball" or "straight edge" alignment, is a preliminary step.
Its purpose is to get the motor and pump shafts into a close-enough position before you begin using precision instruments.
This step saves a significant amount of time during the final alignment phase.
For many vertical pumps, the initial alignment concerns the pump's connection to the piping system.
Ensure the pump is installed without any stress or strain from the connected pipes.
Pipe strain can pull the pump casing out of position, making a true motor-to-pump alignment impossible.
Use proper pipe supports and flexible connectors to eliminate this strain.
Once the pump is properly positioned, you can mount the motor.
Loosely install the mounting bolts.
Use a straight edge or a ruler placed across the coupling halves.
Adjust the motor horizontally until the straight edge rests evenly on both sides of the coupling.
Visually inspect the gap between the coupling faces to ensure they are roughly parallel.
This gets you into the ballpark for the precision measurements that follow.
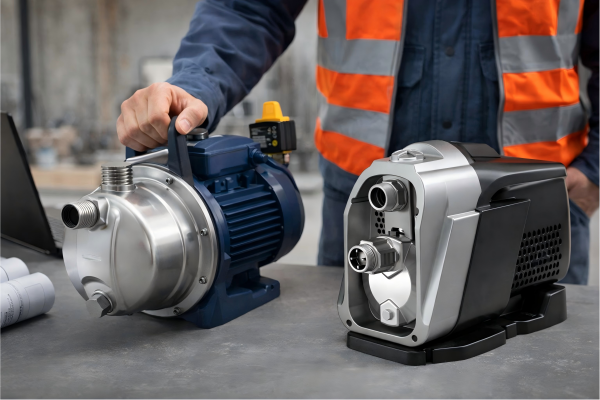
3. C-Face Alignment
Many vertical pumps utilize a C-face (or flange-mounted) motor.
In this design, the motor bolts directly onto a C-face adapter on the pump.
This simplifies alignment significantly, as the primary goal is to ensure the motor shaft is perfectly centered within the circular register of the adapter.
Even with this design, manufacturing tolerances can create misalignment.
Here is a common procedure using a dial indicator:
-
Mounting the Indicator:
Secure a magnetic base for a dial indicator to the face of the motor's C-face adapter.
Position the plunger of the dial indicator so it touches the inner machined surface (the register) of the adapter.
Preload the indicator slightly and set the dial to zero. -
Taking Readings:
Slowly and carefully rotate the motor shaft by hand.
As the shaft turns, watch the dial indicator for any movement.
The goal is to have the indicator reading remain at zero (or within a very tight tolerance) for a full 360-degree rotation.
Any deviation indicates that the motor is not perfectly centered. -
Making Adjustments:
Based on the readings, you will need to shift the motor horizontally.
Use jacking bolts or soft-faced hammers to make small, precise movements.
For example, if the indicator shows a positive reading at the 3 o'clock position and a negative reading at 9 o'clock, you need to move the motor toward the 9 o'clock position.
Make an adjustment, then re-measure.
Repeat this iterative process until the runout is within the manufacturer's specified tolerance.
4. Coupled Alignment
For pumps with bolted rigid couplings, the alignment process involves measuring and correcting two types of misalignment: angular and parallel.
| Misalignment Type | Description | How It's Measured |
|---|---|---|
| Angular | The shafts are not parallel; their centerlines meet at an angle. | Measured as the gap difference between the coupling faces at opposite points (e.g., top vs. bottom). |
| Parallel | The shafts are parallel but their centerlines are offset. | Measured as the offset between the outside diameters of the coupling halves. |
This process is highly iterative.
Adjusting for angular misalignment can often affect the parallel alignment, and vice versa.
You must measure, adjust, and re-measure until both are simultaneously within tolerance.
Patience and precision are key.
After achieving the final alignment, tighten all the mounting bolts.
It is crucial to use a specific tightening sequence, known as a star or cross pattern.
This ensures even pressure is applied and prevents the motor from shifting out of position as the bolts are torqued.
After tightening, perform one final alignment check to confirm that nothing has moved.
Finally, consider the effects of thermal growth.
As a pump and motor operate, their temperatures increase.
This causes the metal components to expand.
For high-temperature applications, this "thermal growth" can shift the alignment.
Engineers often perform a "hot alignment" calculation to intentionally misalign the equipment in its cold state.
When the equipment reaches operating temperature, it grows into a state of perfect alignment.
Tools & Techniques
Having the correct tools makes all the difference.
Guesswork has no place in precision alignment.
The right instruments provide accurate data, guiding your adjustments.
Investing in quality tools ensures repeatable and reliable results every single time.
The primary tools for professional pump alignment are dial indicators and laser alignment systems.
Dial indicators are a time-tested manual method, while laser systems offer superior speed and precision.
Both are supplemented by shims and jacking bolts for making adjustments.
The choice between dial indicators and a laser system often comes down to budget, frequency of use, and the required level of precision.
While dial indicators are perfectly capable of achieving excellent results, they require a higher level of user skill and are more prone to calculation errors.
Laser systems simplify the process, perform calculations automatically, and provide live feedback during adjustments, significantly reducing the time required for a typical alignment job.
Regardless of the tool, the fundamental principles of measurement and adjustment remain the same.
Dial Indicators
Dial indicators are mechanical instruments used for making precise measurements.
For pump alignment, they are typically used in pairs with specialized mounting brackets that attach to one shaft and measure against the other.
This method is commonly referred to as the "rim and face" method.
-
Face Reading:
A dial indicator is mounted to measure parallel to the shaft's centerline.
Its plunger touches the face of the other coupling half.
As the shafts are rotated together, this indicator measures angular misalignment.
A change in the reading indicates that the gap between the coupling faces is not uniform. -
Rim Reading:
A second indicator is mounted to measure radially (perpendicular to the shaft).
Its plunger touches the outside diameter (the rim) of the other coupling half.
This indicator measures parallel offset misalignment.
A change in the reading indicates that the shaft centerlines are not aligned.
Using dial indicators requires careful setup to avoid "indicator sag" (where the weight of the bracket causes a false reading) and meticulous recording of measurements at the 12, 3, 6, and 9 o'clock positions.
These readings are then used in calculations to determine the exact amount of shims needed for vertical correction and the horizontal movement required.
Laser Alignment Systems
Laser alignment systems represent the modern standard for precision machinery alignment.
The system consists of two units, a laser emitter and a receiver, which are mounted on the pump and motor shafts.
The laser beam from the emitter strikes a sensor in the receiver.
The process is highly automated:
- Mounting: The units are mounted on the respective shafts.
- Measurement: The shafts are rotated. The system's computer continuously tracks the position of the laser beam on the sensor. Modern systems often require only a partial rotation (as little as 60 degrees) to capture all necessary data.
- Calculation: The onboard computer instantly calculates both angular and parallel misalignment in both the vertical and horizontal planes.
- Live Adjustment: The screen displays the current alignment values in real-time. It shows exactly how much shimming is needed under each motor foot. As you use jacking bolts to make horizontal adjustments, the screen provides live feedback, telling you exactly when the alignment is perfect.
This technology eliminates calculation errors, is much faster than traditional methods, and provides a documented report of the alignment before and after the job.
Shims and Jacking Bolts
Measurement tools tell you what's wrong, but adjustment tools are what you use to fix it.
-
Shims:
Shims are thin, precisely manufactured pieces of metal used to adjust the vertical height of the motor.
They come in pre-cut, standardized sizes and thicknesses.
It is crucial to use high-quality, corrosion-resistant, pre-cut shims.
Avoid using homemade or stacked, dirty shims, as these can compress unevenly and defeat the purpose of a precision alignment.
Always use the fewest number of shims possible to achieve the required thickness. -
Jacking Bolts:
Jacking bolts are threaded bolts installed on the baseplate that push against the motor feet.
They allow for very small, controlled, and precise horizontal movements of the motor.
They are far superior to using hammers or pry bars, which can cause sudden, oversized movements and damage equipment.
By turning the jacking bolts on one side and loosening the ones on the other, you can smoothly slide the motor into the correct horizontal position.
Conclusion
Proper vertical pump alignment is not optional; it is a fundamental requirement for reliable operation.
This detailed process prevents premature wear, reduces energy consumption, and ensures the long-term health of your entire system.
FAQs
-
What is the most common cause of vertical pump misalignment?
The most common causes are an unstable foundation (soft foot), pipe strain pulling on the pump casing, and failure to account for thermal growth in hot applications. -
How often should I check pump alignment?
Check alignment during initial installation, after any maintenance on the pump or motor, and at least annually as part of a preventive maintenance program. -
Can I align a pump while it is running?
No, never attempt to align a pump while it is in operation. The equipment must be locked out and tagged out for safety before any work begins. -
What are typical alignment tolerances for a vertical pump?
Tolerances vary by speed and manufacturer, but a common target for angular misalignment is +/- 0.025mm per 25mm of coupling diameter, and +/- 0.05mm for parallel offset. -
What is the difference between C-face and coupled alignment?
C-face alignment focuses on centering the motor shaft within the pump's adapter register. Coupled alignment measures and corrects both angular and parallel misalignment between two separate shaft ends. -
Why is a star pattern important when tightening bolts?
A star or cross pattern ensures even pressure is applied across the motor feet, preventing the base from distorting and pulling the motor out of its final aligned position. -
Is a laser aligner always better than dial indicators?
Laser aligners are faster, more accurate, and easier to use, eliminating human error in calculations. While dials can achieve good results, lasers are the modern professional standard. -
What is pipe strain?
Pipe strain is a force exerted on the pump by misaligned piping. This force can pull the pump casing, distorting its position and making a true motor-shaft alignment impossible.