Your solar pump's performance is dropping.
You suspect dirt is the problem, but a complex cleaning process feels daunting.
A simple maintenance routine can restore full power and protect your investment.
Cleaning a solar water pump primarily involves washing the solar panels and clearing the pump's intake screen.
The submersible pump and motor are sealed units that rarely require internal cleaning unless there is a severe blockage or mineral buildup from harsh water conditions.
A solar pump system seems complex.
But its maintenance is surprisingly straightforward.
You do not need to be an engineer to keep it running at peak performance.
The vast majority of performance issues stem from two accessible areas.
The first is the power source, the solar panels.
The second is the water inlet, the pump's intake screen.
The pump and motor, located deep in your well, are designed to be self-sufficient.
They are sealed and engineered for a long, maintenance-free life.
Attempting to disassemble these components is often unnecessary and can cause more harm than good.
Let's walk through the correct, safe, and effective cleaning process, focusing on what truly matters to keep your water flowing strong.
Step 1 | Cleaning the Power Source: Solar Panels
Dusty panels are choking your pump's power supply.
You see the grime but are unsure how to clean them safely.
This hesitation costs you water volume every single sunny day.
Cleaning your solar panels is the most effective step to boost performance.
Use a soft brush and clean water to gently remove dust, pollen, and bird droppings, ideally in the cool morning hours.
This can restore up to 30% of lost efficiency.
Your solar panels are the system's engine.
They convert sunlight into the electrical energy that drives your pump.
Anything that blocks sunlight reduces the amount of power generated.
Over time, a layer of dust, dirt, pollen, leaves, or bird droppings accumulates on the glass surface.
This film can significantly cut down on the panel's output.
In very dusty or agricultural areas, it is not uncommon for dirty panels to lose 20-30% of their power-generating capacity.
This means your pump will start later in the day, run slower at peak sun, and stop earlier in the evening.
The result is a noticeable drop in the total amount of water pumped daily.
Regularly cleaning the panels is the single most important maintenance task you can perform.
It requires no special tools and directly translates to more water in your tank.
The Safe and Effective Cleaning Procedure
Safety should always be your first priority.
If your panels are mounted high on a roof, consider hiring a professional.
If they are on a ground-mounted array, the process is simple.
- Timing is Key: Clean panels in the early morning or late evening. The panels can get extremely hot in the midday sun, and spraying cold water on hot glass could, in rare cases, cause a thermal shock that cracks it. The water will also evaporate too quickly, leaving spots.
- Initial Power Down: For absolute safety, it is best practice to shut down the system at the DC isolator or controller before starting. This prevents any risk of electrical shock.
- Use the Right Tools: A soft-bristled brush, preferably on a long extension pole, is ideal. You can also use a soft cloth or sponge. Never use abrasive materials or harsh scrapers that could scratch the glass surface.
- Use the Right Cleaning Solution: In most cases, clean water is all you need. A gentle spray from a hose is sufficient to loosen the dirt. For stubborn grime like bird droppings, you can use a small amount of non-abrasive, pH-neutral soap (like dish soap) mixed with water.
- The Cleaning Motion: Gently wash the panels from top to bottom. Rinse thoroughly with clean water to ensure no soapy residue is left behind, as this can attract more dirt.
- Final Step: Allow the panels to air dry, or use a clean squeegee to remove excess water for a spot-free finish. Remember to turn the system back on once you are done.
How Often Should You Clean Your Panels?
The frequency of cleaning depends entirely on your local environment.
| Environment | Dust/Pollen Level | Recommended Cleaning Frequency |
|---|---|---|
| Rural/Agricultural | High | Every 3-4 months |
| Dry/Desert | Very High | Every 2-3 months |
| Urban/Suburban | Low | Every 6-12 months |
| High Rainfall Area | Very Low | Annually or as needed |
A simple visual inspection is your best guide.
If you can see a noticeable layer of dust or grime on the surface, it is time for a clean.
Keeping a simple log of your water tank's fill time can also be an indicator.
If it starts taking longer to fill on sunny days, dirty panels are the most likely culprit.
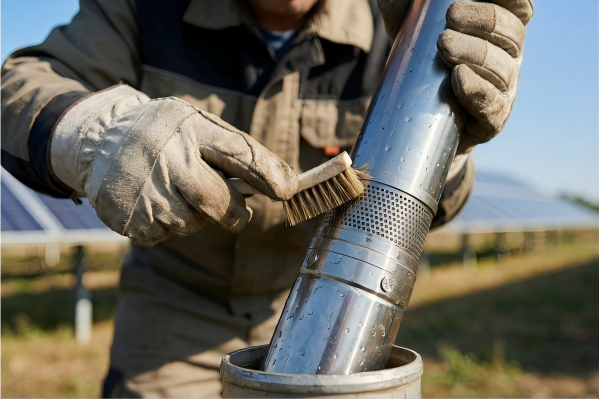
Step 2 | Inspecting and Cleaning the Pump Intake
Your pump is running, but the water flow is weak.
You fear a major failure inside the pump itself.
This worry overlooks the simple, common problem of a clogged intake screen.
Weak water flow is often caused by a blocked intake screen.
Periodically lift the pump to inspect and clean this screen, removing any leaves, sediment, or debris that might be restricting water from entering the pump.
Every submersible pump has an inlet or intake screen.
This is the first line of defense for your pump's internal components.
Its job is to prevent large particles like pebbles, leaves, stringy algae, and heavy sediment from being sucked into the pump mechanism.
If this screen becomes clogged, it literally suffocates the pump.
The motor might be running at full speed, but the flow of water into the pump is restricted.
This results in a significant drop in water output at the surface.
It also puts unnecessary strain on the motor, which is forced to work harder for less result, a condition which can shorten its operational life if left unchecked for a long time.
Before you ever assume a problem with the motor or internal pump parts, you must check the intake screen.
In many cases, a simple cleaning of this screen will restore your system's performance to its original state.
This task does require pulling the pump from the well, which can be a physically demanding job depending on the well's depth.
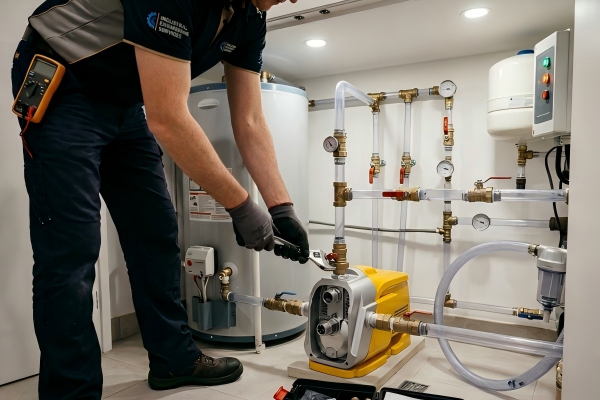
The Process for Accessing and Cleaning the Intake
This procedure requires caution and preferably two people for deeper wells.
- Safety First: Completely disconnect all power to the pump at the controller or breaker before you begin. This is non-negotiable.
- Prepare the Area: Lay a clean tarp or plastic sheet on the ground next to the wellhead. This will prevent the pump and piping from becoming contaminated with dirt or grass when you pull them out.
- Lift the Pump: Carefully begin to pull the pump up by the drop pipe. Do not pull on the electrical cable. It is helpful to have one person pulling while the other manages the pipe and cable to prevent them from kinking or scraping against the well casing.
- Inspect and Clean: Once the pump is out of the well, you will see the intake screen, usually located near the bottom of the pump or just below the motor. Use a stiff brush and water to scrub away any accumulated debris. A screwdriver or wire may be needed to pick out stubborn material lodged in the screen openings.
- Check for Damage: While the pump is out, inspect the screen for any rips or damage. A damaged screen can allow damaging particles to enter the pump and should be replaced.
- Lowering the Pump: Carefully lower the pump back into the well, again ensuring the cable and pipe do not get tangled or abraded. Secure the wellhead and reconnect the power.
When is Intake Clogging Most Common?
The need for this type of cleaning is directly related to your water source.
Pumps in clean, deep bedrock wells may never need this service.
However, it is more common in other situations:
- Newly Drilled Wells: A new well often has a lot of loose sediment and drilling residue that can be pulled in during the first few months of operation.
- Shallow or Surface Water Sources: Pumps in ponds, rivers, or shallow dug wells are highly susceptible to drawing in leaves, algae, and organic debris.
- Wells with High Sediment: Some aquifers are naturally sandy or silty, which can lead to faster buildup on the intake screen.
Step 3 | When to Clean the Submersible Pump Itself
You suspect an internal clog is the real problem.
You are worried about the cost and difficulty of disassembling the pump.
This fear may be unnecessary, as the pump's design often prevents the need for internal cleaning.
Internal cleaning is rarely needed and signals a larger issue.
A pump that requires frequent internal cleaning is likely the wrong type for your well's water conditions, such as using a plastic impeller pump in a very sandy well.
The submersible pump and its BLDC motor are engineered as sealed, robust units.
They are designed to operate for over a decade without needing to be opened up.
If you have cleaned your solar panels and the pump intake screen, and you are still experiencing poor performance, an internal blockage is possible but unlikely.
More often, it indicates a mismatch between the pump technology and the water quality of your well.
A system that is constantly clogging internally is a system that is fighting against its environment.
This is why selecting the right type of pump from the outset is the most effective form of maintenance.
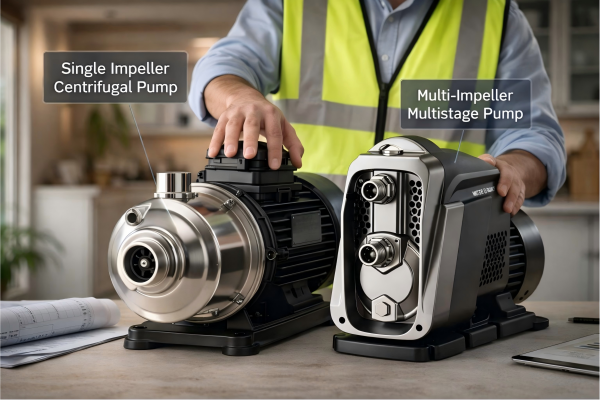
Understanding how different pump types handle solids and minerals is key to diagnosing the real problem.
Instead of asking "How do I clean the inside of my pump?", the better question is often "Why does the inside of my pump need cleaning?".
Cleaning for Sandy or Silty Conditions
If your water has a high sand or silt content, the choice of pump is critical.
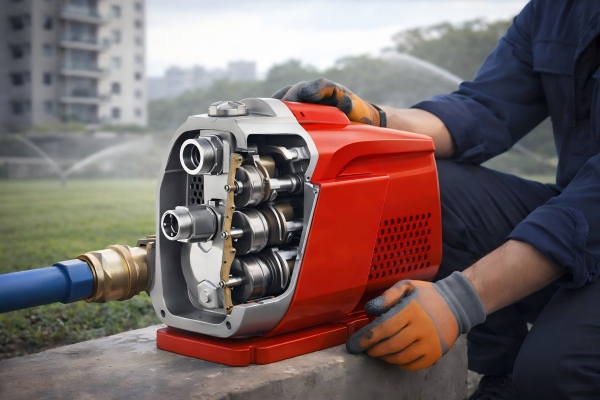
A Solar Screw Pump is the ideal solution for these conditions.
Its design, featuring a stainless steel screw (rotor) turning within a flexible rubber stator, is inherently resistant to abrasion.
It acts more like an archimedes screw, pushing sandy water through rather than trying to spin it with delicate impellers.
- Self-Cleaning Nature: To a large degree, the screw pump's mechanism is self-cleaning. The constant movement of the rotor against the stator helps to pass small abrasive particles without damage or clogging.
- When It Might Clog: In extreme cases with very large particles or heavy clay, the stator can become clogged. This is a rare event. Disassembly would involve removing the pump body to access and flush out the rotor/stator assembly.
- The Wrong Choice: A centrifugal pump (with plastic or stainless steel impellers) used in a very sandy well will not just clog; it will be destroyed. The sand will rapidly abrade the impellers and pump housing, leading to a permanent loss of pressure and eventual failure.
Cleaning for Hard Water and Mineral Buildup
In regions with hard water, mineral buildup (scaling) can be a concern over many years.
This is where calcium and magnesium salts precipitate out of the water and form a hard, crusty layer on surfaces.
| Pump Type | Material | Resistance to Scale Buildup | Ease of Cleaning (if needed) |
|---|---|---|---|
| Plastic Impeller | Engineering Plastic | Fair | Difficult; scale can embed in plastic |
| S.S. Impeller | SS304 Stainless Steel | Excellent | Good; smooth surfaces easier to clean |
A Solar Stainless Steel Impeller Pump is the superior choice for hard or corrosive water.
The SS304 material is highly resistant to both corrosion and the kind of uniform scaling that can choke a pump.
The smooth surface of the steel makes it harder for minerals to get a strong grip.
If, after many years, a teardown was required, stainless steel components can be cleaned of scale using dilute acid solutions without damaging the material.
Plastic impellers are more susceptible to having scale embed into their surface, making effective cleaning almost impossible.
Conclusion
Proper solar pump cleaning focuses on the panels and intake.
Internal pump issues often point to a mismatch between the pump type and your water source, not a lack of cleaning.
Frequently Asked Questions
How do I increase the water pressure from my solar pump?
Clean your solar panels first.
Also, check for any leaks in your plumbing.
If pressure is still low, your pump may be undersized for your well's depth.
Can I run my solar well pump directly from panels?
Yes, that is how they are designed to work.
A controller (MPPT) is placed between the panels and the pump to maximize power and protect the motor.
Batteries are not needed.
How do you get a pump out of a tight well?
Pull steadily and evenly on the pipe, not the wire.
If it is stuck, a slight rotation of the pipe can sometimes help free it.
Avoid forceful jerking, which can damage the equipment.
Can a submersible pump be cleaned?
Yes, the exterior and intake screen can and should be cleaned.
Cleaning the internal components is a complex job best left to professionals and is rarely necessary.
How long does a solar pump last?
The panels can last over 25 years.
The pump and motor typically have a lifespan of 10 to 15 years, depending on the pump type and water conditions.
Can I use CLR to clean my submersible pump?
For external mineral buildup, a CLR or similar mild acid solution could be used carefully on the pump housing and intake screen.
Never introduce it inside the pump mechanism.