Is your water pump making strange noises or failing to deliver water?
This common issue, often caused by air infiltration, can lead to serious damage if ignored.
Getting air in a water pump, a problem known as air lock or losing prime, causes it to stop pumping water effectively. The pump's impeller spins in the air instead of liquid, leading to overheating, seal damage, and eventual pump failure if not resolved quickly.
When a pump is supposed to be moving water, moving air is a big problem.
This situation isn't just an inconvenience; it's a direct threat to the pump's mechanical integrity.
The impeller, designed for the density of water, can't generate pressure with thin air.
This leads to a cascade of issues, from the immediate loss of water flow to long-term, costly damage.
Understanding why this happens is the first step toward preventing it.
Let's explore the common signs that your pump has an air lock, so you can act before minor issues become major repairs.
How to Tell if Air Is in Your Water Pump?
Struggling with a pump that's running but not moving water?
This frustrating symptom often points directly to air being trapped inside the system, a critical issue to identify early.
Key signs of air in a water pump include a complete loss of water discharge despite the motor running, sputtering water flow, and unusual noises like gurgling or rattling as the impeller spins uselessly in air instead of water. These symptoms indicate the pump has lost its prime.
Diagnosing air in a water pump is a process of observation.
It requires listening to the pump and watching the water output.
A healthy pump operates with a consistent, smooth hum and delivers a steady stream of water.
When air enters the system, this stability is lost.
The signs are often clear, but you need to know what to look for.
Recognizing these symptoms promptly is crucial for preventing significant damage and restoring your water supply.
Let's break down the specific indicators in more detail.
Audible and Visual Cues
The most immediate signs of an air-bound pump are what you can see and hear.
Your pump might sound like it's gargling stones or running with a high-pitched whine.
This is the sound of the impeller spinning at thousands of RPMs in air, a condition it was not designed for.
Visually, the problem is just as obvious.
You will notice a significant drop in water pressure.
The flow from your taps might sputter, mixing air and water, or it might stop altogether, even with the pump motor running.
Paying attention to these two senses is your first line of defense.
Performance Indicators
Beyond the obvious sounds and sights, you can diagnose an air-locked pump by its performance metrics.
If your system has a pressure gauge, you'll see a reading that is much lower than normal or drops to zero.
This confirms the pump is failing to build pressure.
Another key indicator is the pump's temperature.
Without water to cool it, the pump will begin to overheat.
The motor might feel excessively hot to the touch.
In systems with thermal overload protection, the pump may shut itself off repeatedly.
A summary of diagnostic checks is provided below.
| Symptom Group | Specific Indicator | What It Means |
|---|---|---|
| Audible Cues | Gurgling, rattling, or high-pitched whining noise. | The impeller is spinning in air, not water. |
| Visual Cues | Sputtering water flow from outlets. | Air pockets are being pushed through the lines. |
| Visual Cues | No water discharge at all. | The pump has completely lost its prime. |
| Performance | Pressure gauge reads zero or very low. | The pump is unable to build pressure. |
| Performance | Pump motor is hot to the touch or shuts down. | The pump is overheating due to lack of water for cooling. |
Monitoring these signs will allow for a swift and accurate diagnosis.
This enables you to address the root cause before the pump sustains permanent mechanical seal failure or motor damage.
Catching it early saves time, money, and the lifespan of your equipment.
What Causes Air To Get into Water Pumps?
Are you repeatedly priming your pump, only for it to fail again?
This cycle is often caused by a hidden leak in the suction line, allowing air to sabotage your system.
Air commonly enters a water pump through leaks in the suction-side plumbing, such as cracked pipes, loose fittings, or a faulty foot valve. Other causes include a low water level in the source (well or tank) and incorrect initial priming, which can trap air inside the pump casing.
Preventing air from entering a water pump starts with understanding how it gets there in the first place.
The problem almost always originates on the suction side of the system—the network of pipes and fittings that brings water to the pump.
Unlike leaks on the discharge (pressure) side, which visibly spray water, leaks on the suction side invisibly draw air into the line.
This makes them much harder to detect.
Even a tiny pinhole leak can be enough to break the prime and stop the pump from working.
Let’s examine the most frequent culprits behind these frustrating air leaks.
Suction Line Integrity Issues
The suction line is the most common source of air infiltration.
Over time, plumbing components can degrade, leading to leaks.
A significant percentage, estimated at over 70%, of air lock issues are traced back to the suction line.
- Cracked Pipes: PVC pipes can become brittle and crack due to UV exposure, ground movement, or physical impact.
- Loose Fittings: Pipe joints, unions, and threaded connections can loosen due to vibration or improper sealing. Using low-quality thread sealant or not tightening fittings correctly are common mistakes.
- Worn Seals and Gaskets: The seals on pump lids (for pool pumps) or gaskets at connection points can dry out, crack, and fail, creating a pathway for air.
Issues at the Water Source
The problem might not be with the plumbing but with the water source itself.
If the water level drops below the intake point, the pump will start drawing air instead of water.
- Low Well Water Level: During dry seasons or periods of high demand, the water level in a well can recede below the foot valve or pump intake. For shallow well jet pumps, this is a very common issue.
- Faulty Foot Valve: The foot valve, located at the bottom of the suction pipe in a well, is a one-way check valve that keeps the pipe full of water. If it gets stuck open with debris or the seal fails, water can drain back into the well, allowing the pipe to fill with air.
Installation and Operational Errors
Sometimes, the problem stems from how the pump was installed or operated.
- Improper Priming: If a pump is not filled completely with water before its first use, trapped air will remain in the casing. This air pocket prevents the pump from creating the necessary suction to draw water.
- Pump Running Dry: Accidentally leaving a pump running after the water source has been depleted can introduce a large volume of air and cause severe overheating.
Identifying the exact cause is a process of elimination.
This often requires a meticulous inspection of every joint and component from the water source to the pump intake.
A thorough approach is the only way to find the leak and implement a permanent solution.
| Cause Category | Specific Problem | Solution |
|---|---|---|
| Plumbing Leaks | Cracked PVC pipe | Replace the damaged section of pipe. |
| Loose threaded fitting | Re-seal the fitting with high-quality thread sealant tape or paste. | |
| Worn O-ring or gasket | Replace the old, brittle seal with a new, lubricated one. | |
| Source Issues | Water level too low | Lower the suction pipe or wait for the water source to replenish. |
| Defective foot valve | Clean or replace the foot valve at the end of the suction line. | |
| Operational Errors | Air trapped after priming | Re-prime the pump, ensuring the casing and suction line are completely full. |
By systematically checking these potential failure points, you can accurately pinpoint the source of the air leak.
This targeted approach ensures you fix the problem correctly the first time, preventing recurring pump failures and protecting your investment.
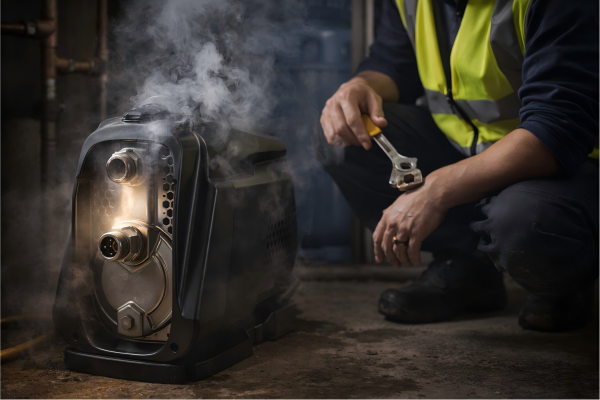
What Happens if a Water Pump Runs with Air in It?
Ever wondered about the real damage when a pump runs dry?
It's not just a temporary halt in water flow; it's a fast track to irreversible mechanical failure and costly replacements.
When a pump runs with air, it's called running dry. This causes the mechanical seal to overheat and fail rapidly due to lack of lubrication and cooling from water. The impeller and diffuser can also melt or warp from the heat, leading to catastrophic and expensive pump damage.
A pump running with air is a pump destroying itself from the inside out.
Water is not just the substance a pump moves; it is also the primary lubricant and coolant for its most critical internal components.
Without water, friction and heat build up at an alarming rate.
The consequences range from reduced efficiency to complete, non-repairable failure.
The speed at which this damage occurs can be shocking—sometimes in less than a minute.
Let’s delve into the specific mechanical failures that result from this seemingly simple problem.
Mechanical Seal Failure
The mechanical seal is arguably the most vulnerable component.
This precision part prevents water from leaking out of the pump along the motor shaft.
It typically consists of two extremely flat rings (one stationary, one rotating) pressed together.
A thin film of water between these rings serves as both a lubricant and a coolant.
- Overheating and Cracking: When the pump runs dry, this water film disappears. The rings grind against each other, generating intense frictional heat. Temperatures can quickly exceed the material's tolerance, causing the rings (often made of ceramic or carbon) to crack, melt, or shatter. A failed seal results in a major leak, and the pump is no longer usable until the seal is replaced. This single failure accounts for a vast majority of pump repairs.
Impeller and Diffuser Damage
The impeller is the rotating disc with vanes that flings water outward, creating pressure.
The diffuser is the stationary piece that surrounds the impeller, guiding the water flow.
Both are often made from high-grade thermoplastics like Noryl.
- Melting and Warping: While durable, these plastics are not designed to withstand the heat generated by dry running. The air friction from the impeller spinning at high speed (often 3,000 RPM or more) creates significant heat. The plastic components can soften, warp, or even melt. A warped impeller loses its precise balance and shape, drastically reducing or eliminating the pump's ability to create pressure, even after it has been reprimed.
Catastrophic Failure Cascade
The initial failures can trigger a chain reaction of damage.
- Shaft Damage: A warped impeller can scrape against the diffuser or volute, creating more friction and heat. This can lead to the melting plastic seizing onto the motor shaft.
- Motor Overload: As components melt and create blockages, the motor has to work harder to try and spin the locked impeller. This can lead to the motor Stator Winding overheating and burning out, which is often the most expensive part of the pump to replace.
The table below outlines the progression of damage during a dry-run event.
| Time From Start of Dry Run | Component Affected | Type of Damage | Consequence |
|---|---|---|---|
| 0-30 Seconds | Mechanical Seal | Loss of water lubrication, rapid heat buildup. | Seal faces begin to score and degrade. |
| 30-60 Seconds | Mechanical Seal | Extreme overheating. | Seal faces crack or shatter. Catastrophic leak begins. |
| 1-5 Minutes | Impeller & Diffuser | Frictional heat from spinning in air. | Plastic components begin to soften and warp. |
| 5+ Minutes | Impeller, Shaft, Motor | Severe warping and melting. | Impeller seizes on shaft. Motor strains and burns out. |
The cost of inaction is high.
Replacing a mechanical seal is a standard repair.
Replacing a melted impeller, diffuser, and a burned-out motor often costs more than a new pump.
This is why preventing dry-run scenarios is a top priority for any pump owner.
How to Get Air Out of Your Water Pump?
Is an air-locked pump disrupting your water supply?
Don't worry, getting it back up and running is often a simple fix you can do yourself with a few basic steps.
To get air out of a water pump, a process called priming, you must turn off the power, open the priming port on the pump, and slowly fill the pump casing and suction line with water until it overflows. Then, securely close the port and restart the pump.
Removing trapped air from a pump is a fundamental maintenance task.
The procedure, known as "priming the pump," is designed to replace all the air in the pump's casing and suction line with water.
This re-establishes the solid column of liquid that the pump needs to create suction and move water effectively.
While the concept is simple, the process requires care and attention to detail to be successful.
Failing to prime the pump correctly will only lead to the same air-lock problem recurring as soon as you turn the power back on.
Let's walk through the safe and effective step-by-step procedure.
Step-by-Step Priming Guide
Before you begin, you must solve the underlying problem that allowed air to enter in the first place.
Otherwise, you will be repeating this process again very soon.
Once you have fixed the leak or resolved the low water level issue, you can proceed with priming.
1. Disconnect Power:
This is the most important safety step.
Go to your circuit breaker panel and turn off the power to the pump.
This ensures the pump cannot accidentally turn on while you are working on it.
2. Relieve System Pressure:
Open a nearby tap or faucet on the discharge side of the pump.
This will release any pressure trapped in the lines and make it easier to open the prime plug.
3. Locate and Open the Prime Port:
Find the prime plug on top of the pump casing (the "wet end").
It is usually a square or hexagonal plug that can be removed with a wrench.
Place a rag around it to catch any small drips.
Slowly loosen and remove the plug.
4. Fill the Pump with Water:
Using a hose or a bucket, slowly pour water into the priming hole.
You need to fill both the pump casing and the entire suction line.
You may hear gurgling sounds as the water displaces the air.
Continue filling until water overflows from the priming hole and no more air bubbles emerge. This can take several minutes and a significant amount of water, especially if the suction line is long or wide.
Patience here is critical; a 99% full line will not work. It must be 100% full.
5. Close the Prime Port and Restart:
Once the pump is completely full, apply thread sealant to the prime plug's threads and screw it back in, tightening it securely.
Close the faucet you opened earlier.
Now, you can restore power to the pump at the breaker.
The pump should start, and within about 30-60 seconds, it should build pressure and begin pumping a steady stream of water.
If the pump fails to prime, repeat the process.
If it fails after 2-3 attempts, it indicates there is still an air leak in the suction line that needs to be found and fixed.
How To Prevent Air from Getting into Water Pumps?
Tired of dealing with an air-locked pump?
Proactive maintenance is the key, letting you prevent problems before they start and ensuring a reliable water supply for your clients.
Prevent air in pumps by regularly inspecting all suction-side plumbing for leaks, ensuring pipe joints and fittings are tightly sealed, keeping the water source level well above the intake, and installing a spring-loaded check valve or a run-dry protection device to safeguard the system.
The best way to deal with air in a water pump is to never let it get there in the first place.
Prevention is far more cost-effective and less disruptive than a cure.
A robust preventative strategy focuses on two key areas: ensuring a perfectly sealed suction line and protecting the pump from adverse operating conditions.
By adopting a schedule of regular inspections and investing in simple protective hardware, you can drastically reduce the likelihood of air-lock failures.
This protects the equipment, improves system reliability, and builds trust with your end-users.
Implement a Regular Inspection Schedule
Routine checks are the cornerstone of prevention.
Encourage your customers to perform simple inspections to catch potential problems early.
- Visual Inspection (Quarterly): Walk the length of the suction line. Look for any visible cracks in pipes, especially in areas exposed to sunlight. Check for signs of moisture or drips around fittings, which could indicate a failing seal that might soon start drawing in air.
- Auditory Check (Weekly): Listen to the pump while it's running. Any change from its normal, smooth hum to a gurgling or rattling sound is an early warning sign of air entering the system.
- Seal and Gasket Check (Annually): For pumps with accessible lids like pool pumps, inspect the O-ring. If it appears dry, flattened, or cracked, it should be replaced. Lubricating the O-ring with a suitable silicone-based lubricant helps extend its life and ensure a better seal.
Upgrade System Hardware
Investing in better hardware can provide an active defense against air infiltration and its consequences.
- High-Quality Sealants: When installing or repairing suction line fittings, always use high-quality, non-setting thread sealant paste or multiple wraps of thick PTFE tape. This creates a durable, vacuum-tight seal that is less likely to fail over time.
- Install a Spring-Loaded Check Valve: A high-quality spring-loaded check valve or foot valve is more reliable than a simple flapper valve. It provides a more positive seal, helping to keep the suction line primed and preventing water from draining back into the source.
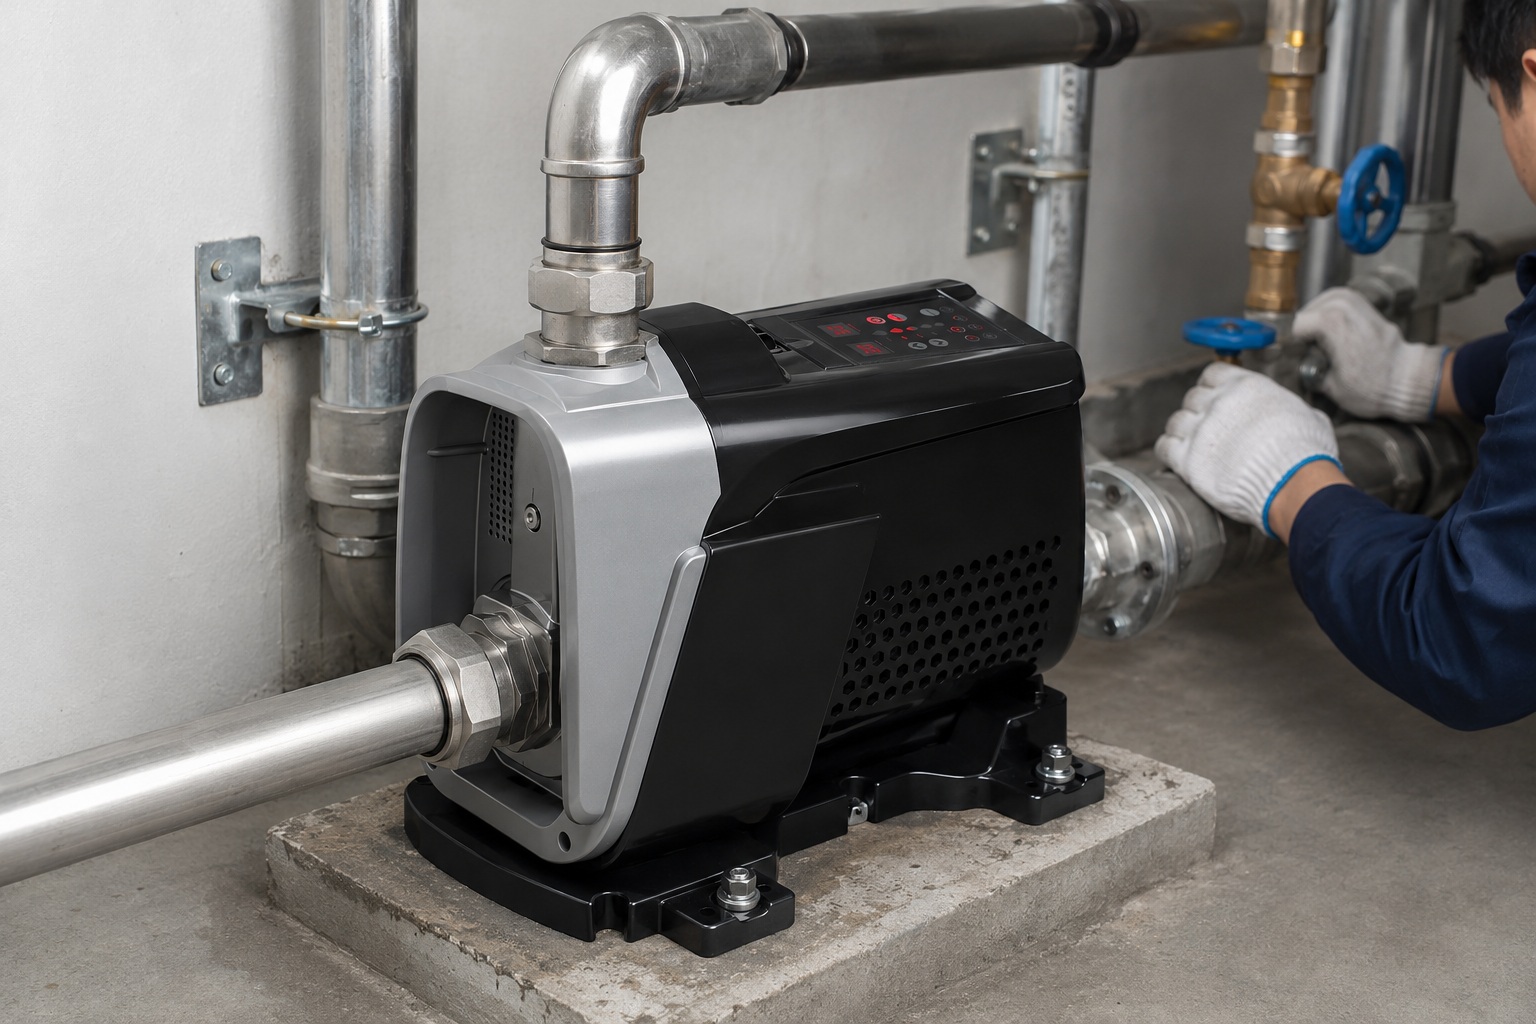
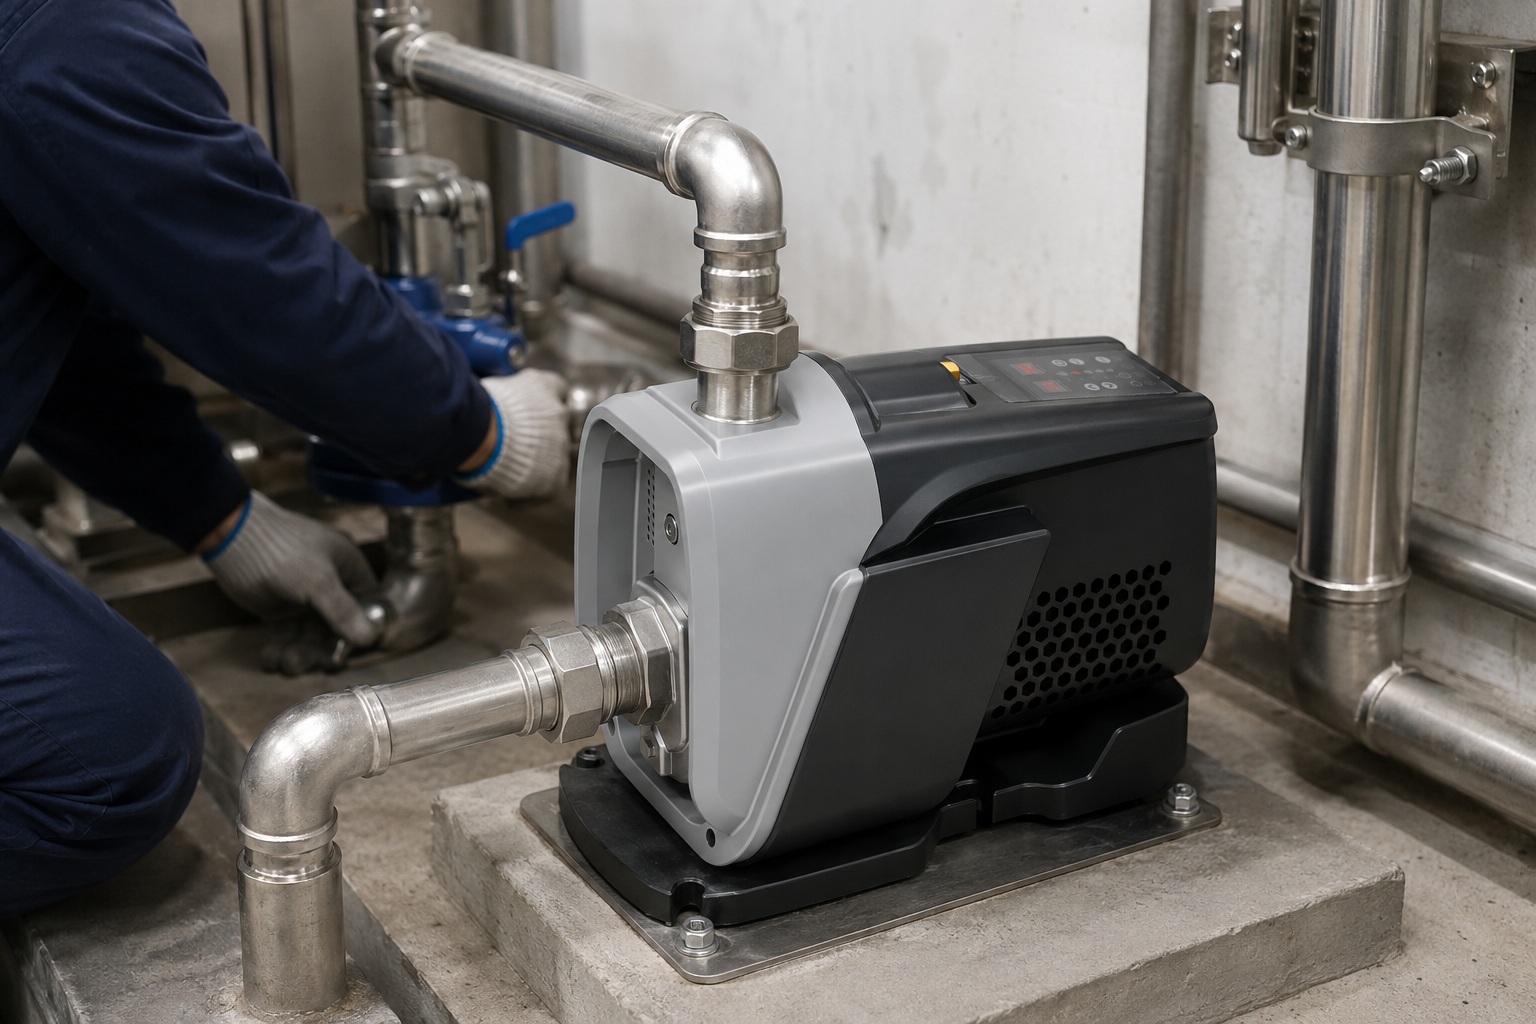
- Run-Dry Protection: This is the ultimate safeguard. Devices like flow switches or specialized pump controllers can detect a no-flow condition (indicating an air lock or dry well) and automatically shut off the pump before damage occurs. This is a critical feature for any automated or unattended pump system, such as those using intelligent variable frequency drive (VFD) pumps, which often have this protection built-in.
By combining diligent maintenance practices with strategic hardware upgrades, you can create a pumping system that is resilient, reliable, and protected from the damaging effects of air infiltration.
| Prevention Strategy | Action Item | Frequency | Benefit |
|---|---|---|---|
| Maintenance | Visually inspect suction pipes and fittings. | Quarterly | Catch cracks and loose joints early. |
| Maintenance | Listen to the pump for unusual noises. | Weekly | Early detection of air entering the system. |
| Maintenance | Check and lubricate/replace O-rings and gaskets. | Annually | Prevents seals from drying out and failing. |
| Hardware | Use premium thread sealants on all connections. | During Installation/Repair | Creates a long-lasting, vacuum-tight seal. |
| Hardware | Install a quality spring-loaded check valve. | During Installation | Ensures the suction line remains full of water. |
| Hardware | Install a run-dry protection device or smart pump. | During Installation | Automatically protects the pump from catastrophic failure. |
Adopting these best practices transforms pump maintenance from a reactive, stressful event into a proactive, manageable process.
It ensures longevity and performance, which is exactly what professional clients demand.
Conclusion
Getting air in a water pump causes it to lose prime, overheat, and suffer severe mechanical damage.
Prevention through regular maintenance is key to ensuring your pump's long-term reliability and performance.
FAQs
How do I bleed air from my water pump?
Turn off the power, open the prime plug, and slowly fill the pump with water until it overflows.
Close the plug securely, then turn the power back on.
Can an air lock fix itself?
No, an air lock will not fix itself.
The trapped air must be manually removed by priming the pump and fixing the source of the air leak.
How long can a pump run with air in it?
A pump can suffer permanent damage in under a minute of running with air.
The mechanical seal can overheat and fail very quickly without water for cooling.
What does an air-locked pump sound like?
An air-locked pump often makes a loud gurgling, rattling, or high-pitched whining sound, very different from its normal smooth hum.
This is the impeller spinning in air.
Why does my pump keep getting air locked?
Recurring air lock problems mean there is a persistent leak in the suction line, such as a cracked pipe, a loose fitting, or a faulty foot valve.
Is it normal for a new pump to have air in it?
Yes, a new pump is full of air and must be properly primed before its first use.
Failure to do so will cause it to air lock immediately.
Can I run my pump for a few seconds to see if it primes?
It is not recommended.
Running a pump dry for even a few seconds can cause wear on the mechanical seal.
Always fill it with water first.
Does a self-priming pump need to be primed?
Yes, a "self-priming" pump must be primed for the very first use.
Its design then allows it to re-prime itself and clear small amounts of air during subsequent operations.