Annoyed by weak showers and trickling faucets?
Low water pressure can be a daily frustration, disrupting your home life and making simple tasks feel like a chore.
Adjusting a booster pump involves locating the pressure switch, turning adjustment nuts to set the cut-in (pump on) and cut-out (pump off) pressures, and testing the system. For systems with a pressure tank, you must also match the tank's pre-charge pressure to the cut-in setting for efficient operation.

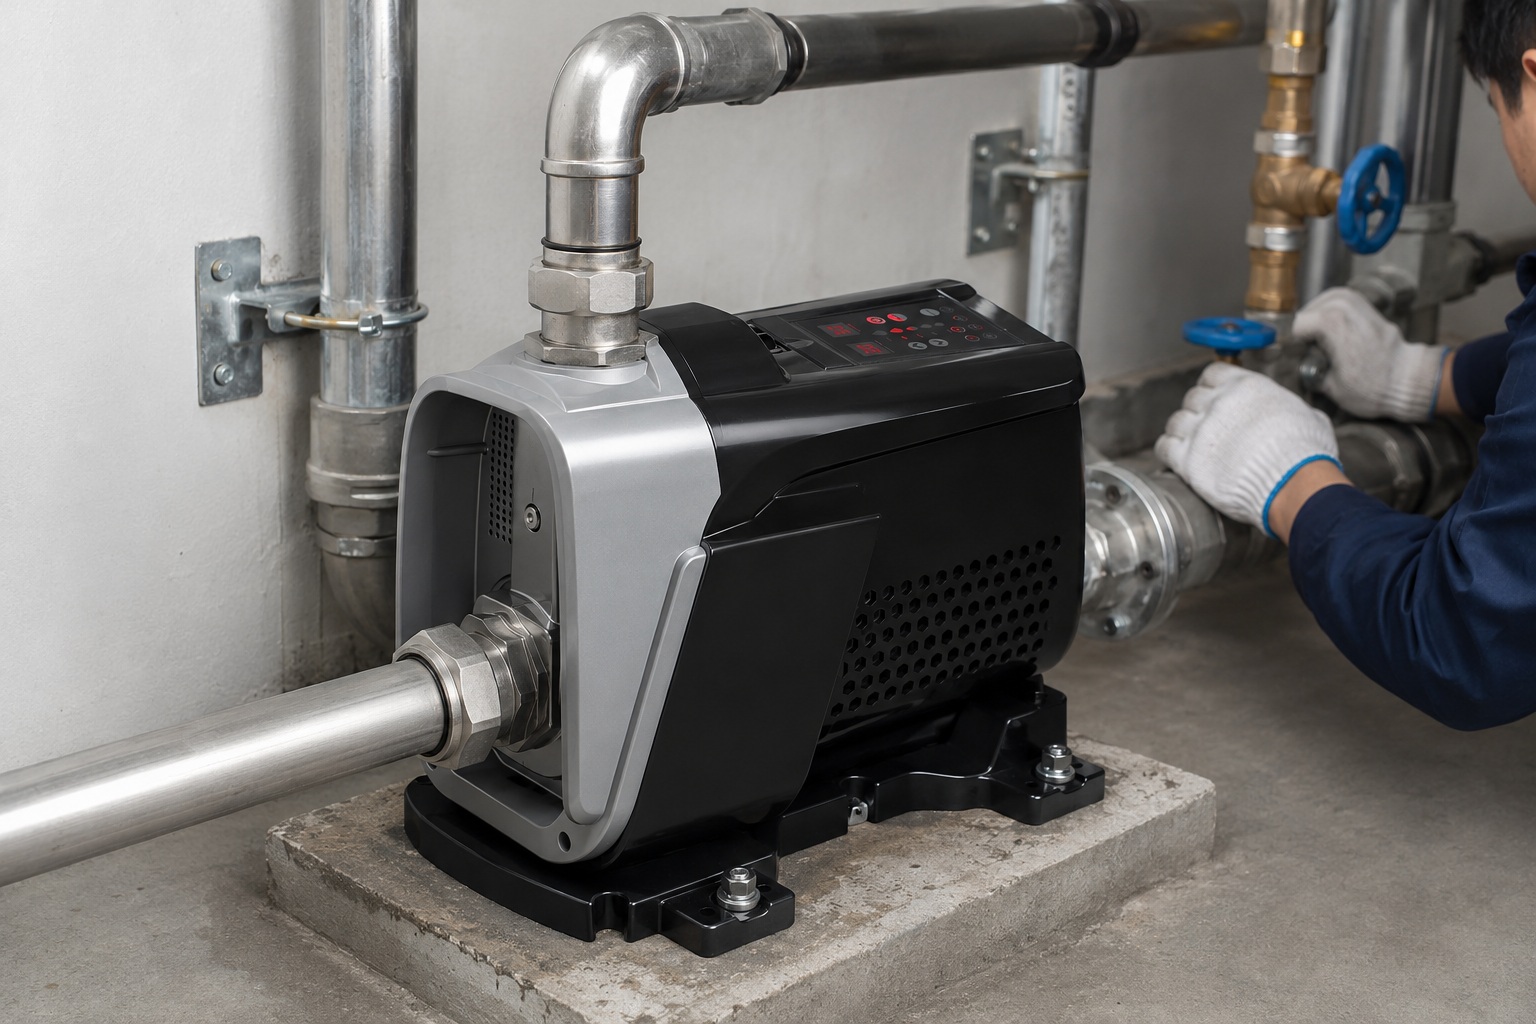
Before you start turning screws, understanding the key components of your booster pump system is essential.
This guide will walk you through the process step-by-step, ensuring you can fine-tune your water pressure safely and effectively for optimal performance.
Let's get started.
What Key Components Control Your Pump's Pressure?
Ever wondered what makes your booster pump tick?
It's not magic, but a few key parts working together to manage water pressure efficiently.
The main components are the pressure switch, which turns the pump on and off; the pressure tank, which stores water to reduce pump cycling; and check valves, which prevent backflow [^1]. Understanding these parts is the first step to a successful adjustment.
To properly adjust your system, you need to know what each part does and how they interact.
Think of them as a team working in sync.
The pressure switch is the coach calling the plays.
The pressure tank is the backup player ready to jump in.
And the check valves are the defenders, holding the line.
Getting to know this team is crucial before you make any changes to their strategy.
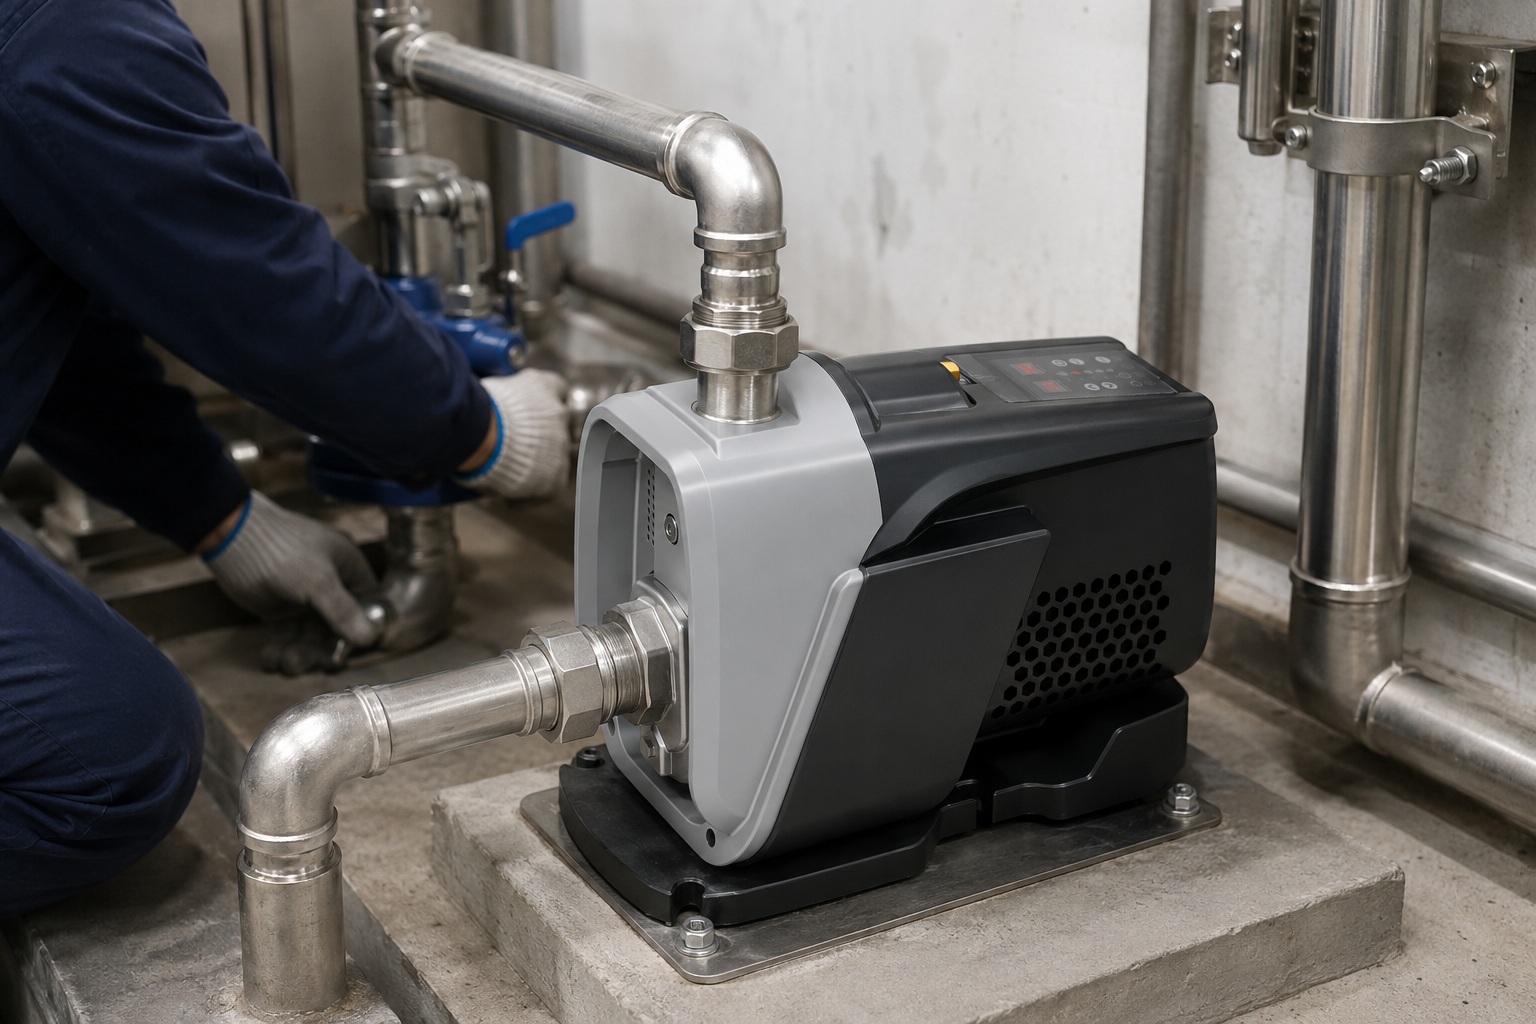
The Pressure Switch: The Brain of the Operation
The pressure switch is the central controller of your booster pump system.
It constantly monitors the pressure in your water lines.
It has two key settings that dictate its function: the cut-in pressure and the cut-out pressure.
Cut-in Pressure (P1): This is the low-pressure point at which the switch activates the pump. For example, if your pressure drops to 30 PSI, the pump will turn on [^1].
Cut-out Pressure (P2): This is the high-pressure point at which the switch deactivates the pump. For instance, when the pressure reaches 50 PSI, the pump will turn off [^1].
The difference between these two points is known as the pressure differential (ΔP) [^2].
Inside the switch housing, you'll typically find two adjustable springs.
The larger spring adjusts both the cut-in and cut-out pressures together, moving the entire pressure range up or down [^2].
The smaller spring adjusts only the pressure differential, changing the gap between the cut-in and cut-out points [^2].
The Pressure Tank: The System's Buffer
Many booster pump systems are paired with a pressure tank.
This tank is not just for storage; it plays a vital role in the system's health and efficiency.
The tank contains a bladder or diaphragm that separates a pocket of pressurized air from the water.
When the pump runs, it pushes water into the tank, compressing the air.
This stored, pressurized water can then be supplied to your home without the pump needing to run immediately.
This action significantly reduces pump cycling—the frequent starting and stopping of the motor.
Fewer cycles mean less wear and tear on the pump motor, lower energy consumption, and a longer lifespan for your equipment [^1].
For the tank to work correctly, its internal air pressure, known as the pre-charge, must be set properly relative to the pump's cut-in pressure [^1].
Check Valves and Other Components
Check valves are simple but essential one-way gates within your plumbing.
Their job is to prevent water from flowing backward into the pump and the main supply once the pump shuts off.
This ensures that the pressure built up in your system remains stable and doesn't bleed away, which would cause the pump to cycle unnecessarily [^1].
While you don't adjust check valves, a faulty one can mimic the symptoms of an improperly adjusted pressure switch.
Other components, like pressure gauges, are your window into the system's performance, providing the real-time readings you need to make accurate adjustments.
| Component | Primary Function | Adjustment Insight |
|---|---|---|
| Pressure Switch | Turns pump on/off at set pressures (cut-in/cut-out). | Adjusted via two internal spring-loaded nuts. |
| Pressure Tank | Stores pressurized water to reduce pump cycling. | Pre-charge air pressure must align with the cut-in setting. |
| Check Valve | Prevents water backflow to maintain system pressure. | Not adjustable, but crucial for system stability. |
| Pressure Gauge | Displays the current water pressure in real-time. | Essential tool for monitoring during adjustment. |
How Do You Adjust the Pressure Switch Step-by-Step?
Ready to get hands-on but worried it's too complicated?
Adjusting your pump's pressure switch is a straightforward task that doesn't require an engineering degree.
First, always turn off the power. Use a screwdriver to adjust the nuts on the pressure switch. The larger nut adjusts the cut-in and cut-out pressures together, while the smaller one adjusts the difference between them. Make small, incremental changes and test after each one [^2].
Patience is key during this process.
Making large adjustments all at once can overshoot your target pressure and may even put your plumbing at risk.
By following a methodical process of small tweaks and tests, you can dial in the perfect pressure for your needs safely and accurately.
It's a process of refinement, not a race.
Safety First: Preparing for Adjustment
Before you even think about touching the pressure switch, safety must be your top priority.
Working with equipment that combines water and electricity requires caution.
Always begin by completely disconnecting the pump from its power source.
Go to your circuit breaker or switchboard and turn off the power to the pump [^3].
This step is non-negotiable and eliminates the risk of electrical shock.
Next, gather the necessary personal protective equipment (PPE).
This includes gloves to protect your hands and safety glasses to shield your eyes from any debris or accidental water spray [^3].
Ensure your work area is clean, dry, and well-lit so you can clearly see all the components you're working on.
Finally, have your tools ready. You will typically need:
- A reliable pressure gauge
- A flathead screwdriver
- A nut driver or pliers
The Adjustment Process in Detail
With safety precautions in place, you can now begin the adjustment.
Step 1: Check Your Current Pressure
Before making changes, you need a baseline. Turn the power back on temporarily. Open a faucet and watch your pressure gauge. Note the pressure at which the pump turns on (cut-in) and turns off (cut-out) [^1].
Step 2: Disconnect Power and Access the Switch
Turn the power off again at the breaker. Locate the pressure switch—it's usually a small box mounted on the pump's plumbing. Unscrew the cover to expose the adjustment nuts and springs [^2].
Step 3: Adjust the Pressure Range (Large Nut)
The large nut controls the overall pressure range. To increase both the cut-in and cut-out pressures, turn this nut clockwise. To decrease them, turn it counter-clockwise [^2]. Remember to make small adjustments, like a half-turn at a time.
Step 4: Adjust the Differential (Small Nut)
The smaller nut adjusts the pressure differential (the gap between cut-in and cut-out). Tightening this nut (clockwise) will increase the cut-out pressure, making the gap wider. Loosening it (counter-clockwise) will lower the cut-out pressure, making the gap narrower [^2]. A common strategy is to first loosen the small spring completely, set your desired cut-in pressure with the large spring, and then tighten the small spring to set your desired cut-out pressure.
Step 5: Test and Refine
Put the cover back on the switch, restore power, and run a faucet again. Watch the pressure gauge to see your new cut-in and cut-out points. If it's not what you want, disconnect the power and repeat the adjustment process until you achieve the desired pressure range [^1].
A Crucial Note on Pressure Tanks
If your system includes a pressure tank, one final step is critical for optimal performance.
After setting your new cut-in pressure, you must adjust the tank's pre-charge.
To do this, turn off the pump and drain all water from the system by opening a faucet.
Use a tire pressure gauge to check the air pressure in the tank via the air valve on top.
Inflate or release air until the pre-charge pressure is set to match the pump's new cut-in setting [^1].
This balance ensures the pump and tank work together harmoniously, preventing rapid cycling and extending the life of your pump.
Are All Pump Controllers Adjusted the Same Way?
Thinking all pump controllers are identical?
Modern systems offer a wide variety of control methods, and each has its own distinct adjustment process.
No, they are not all the same. While traditional pumps use mechanical pressure switches adjusted with screws, modern ones often feature electronic controllers. These can range from simple pre-set switches to advanced digital or VFD controllers that provide more precise, automated, and efficient pressure management [^4].
The evolution of pump technology means that the "one-size-fits-all" approach to adjustment is a thing of the past.
While the fundamental goal of regulating pressure remains the same, the method for achieving it has become much more sophisticated.
Understanding which type of controller your pump uses is the first step in knowing how to adjust it correctly.
Attempting to adjust a digital controller with a screwdriver will be fruitless and could cause damage.
Mechanical Pressure Switches
This is the classic, most common type of controller, and the one this guide has focused on so far.
Its operation is based on a simple, robust mechanical system.
As water pressure changes, it physically moves a diaphragm that triggers a switch, turning the pump on or off.
Adjustment Method: Physical adjustment of two spring-loaded nuts inside the switch housing [^2]. The large nut sets the pressure range, and the small nut sets the differential.
Key Features: They are generally reliable, inexpensive, and easy to understand. However, they lack the precision of electronic controls and can only provide simple on/off functionality.
Electronic Pressure Controllers
Electronic controllers represent a significant step up in precision and functionality.
They replace the mechanical spring system with electronic sensors and microprocessors, offering more refined control over your water system.
Digital Electronic Controllers:
These are highly precise and user-friendly. They often feature a digital display that shows the exact real-time pressure, and settings are adjusted with simple up and down buttons instead of screws [^4]. Many also include advanced features like flow meters, run-dry protection, and programmable operating times.
Analog Electronic Controllers:
These are a hybrid, using electronic sensors but sometimes displaying the pressure on an analog gauge. They offer better precision and more protective features than a purely mechanical switch but may lack the a digital display and advanced programming of their digital counterparts [^4].
Advanced Controllers: VFD and PID
At the high end of pump control technology are Variable Frequency Drive (VFD) and PID controllers. These systems offer intelligent, adaptive performance.
Variable Frequency Drive (VFD) Controllers:
Instead of just turning the pump on and off, a VFD controller adjusts the speed of the pump's motor in real-time [^3]. If demand for water is low, the pump runs slowly. If multiple faucets are opened, it speeds up. The result is a perfectly constant, unwavering water pressure and significant energy savings, as the pump only ever uses the exact amount of power needed.
Proportional-Integral-Derivative (PID) Controllers:
These are the most sophisticated controllers, typically used in large-scale commercial or industrial applications. They use a complex feedback loop algorithm to achieve exceptionally precise control over both flow rate and pressure, making instantaneous micro-adjustments to maintain system stability under varying loads [^4].
| Controller Type | Adjustment Method | Key Feature | Best For |
|---|---|---|---|
| Mechanical Switch | Screws/nuts on springs | Simple, reliable on/off control | Basic residential systems |
| Digital Electronic | Buttons on a digital interface | High precision, extra features | Homes/businesses wanting exact control |
| VFD Controller | Digital interface | Varies motor speed, constant pressure | Maximum energy efficiency, premium experience |
| PID Controller | Programmable logic | Ultimate precision for flow/pressure | Complex industrial & irrigation systems |
What if Adjusting Doesn't Fix the Problem?
You've carefully adjusted the pressure switch, but the water pressure is still off.
Don't panic; this doesn't necessarily mean you did something wrong. The issue may lie elsewhere.
If adjustments don't work, check for other issues. The pump might be constantly cycling (a pressure tank issue), failing to turn off (pressure set too high), or the pressure might fluctuate during use (differential pressure needs adjustment). These problems often point to underlying causes beyond the switch settings [^5].
A booster pump system is an interconnected set of components.
A problem with one part can often manifest as a symptom in another.
Before assuming the pressure switch is faulty, it's wise to perform some basic troubleshooting.
Looking at the system as a whole will help you accurately diagnose the root cause of the problem, saving you time, money, and frustration.
Problem: Pump Constantly Cycles (Rapid Cycling)
You hear the pump clicking on and off every few seconds, even with a small amount of water running.
This is known as rapid cycling or "twitching" [^5].
Primary Cause: This is the classic symptom of a pressure tank problem. The tank's purpose is to prevent this very issue. It's either "waterlogged" (meaning the air bladder has failed and the tank is full of water) or it has an incorrect air pre-charge.
Solution:
- Check Pre-Charge: Turn off the pump and drain the system. Use a tire gauge on the tank's air valve. The pressure should match the pump's cut-in pressure [^1]. Adjust it with an air pump if needed.
- Inspect Bladder: If the tank won't hold air pressure or if water comes out of the air valve, the internal bladder has failed. The tank needs to be replaced.
- Switch Location: In rare cases, the pressure switch is mounted in a part of the pipework with high turbulence, causing false readings. Relocating it to a more stable pressure zone may be necessary [^5].
Problem: Pump Won't Turn Off
Even after all faucets and appliances are closed, the pump continues to run indefinitely.
Primary Cause: The cut-out pressure is set higher than the pump is physically capable of producing [^5]. The pump is running endlessly, trying to reach a pressure target it can never hit. Another cause could be a significant leak in your plumbing system.
Solution:
- Lower the Cut-Out Pressure: Disconnect power and adjust the pressure switch. Either turn the large nut counter-clockwise to lower the entire range, or loosen the small nut to reduce the differential, which also lowers the cut-out point [^5].
- Check for Leaks: Close the main valve after the pump. If the pump then builds pressure and shuts off, you have a leak somewhere in your house's plumbing that needs to be found and fixed.
Problem: Fluctuating Pressure During Use
When you're in the shower, the water pressure and temperature noticeably pulse or change.
Primary Cause: The pump is cycling on and off during the shower. This happens because the flow rate of your showerhead is very close to the pump's shut-off threshold. The pressure differential may be set too wide, or the overall range is not optimized for your usage [^5].
Solution: The goal is to adjust the switch so the pump runs continuously during a shower but still shuts off when you close the faucet.
- Adjust the Differential: Try slightly reducing the pressure differential (by loosening the small nut). This brings the cut-in and cut-out points closer together.
- Raise the Range: Alternatively, you can raise the overall pressure range (by tightening the large nut). This ensures the pump has more headroom and is less likely to cycle during use. Test after each adjustment.
Conclusion
Adjusting your booster pump is a manageable task.
By understanding its components and following a safe, methodical process, you can achieve consistent, reliable water pressure throughout your home.
FAQs
What is the ideal water pressure for a house?
Most homes operate best with water pressure between 40 and 60 PSI. Pressures above 80 PSI can damage plumbing fixtures and appliances over time.
How do I know if my booster pump pressure switch is bad?
A faulty switch may cause constant rapid cycling, a failure to turn on or off, or only work when you tap on its housing. These are signs it needs replacement [^5].
Can I increase water pressure without a pump?
Yes. First, check for clogged pipes or partially closed valves. Ensuring your home has correctly sized piping can also make a significant difference in flow [^7].
What is the difference between cut-in and cut-out pressure?
Cut-in pressure is the lower pressure setting that signals the pump to turn on. Cut-out pressure is the upper setting that tells the pump to turn off [^1].
Why does my pump turn on and off so often?
This is called rapid cycling and is most often caused by a faulty or improperly charged pressure tank, which has lost its air cushion needed to buffer the system [^5].
Should a pressure tank be full of water?
No, a healthy pressure tank should contain a significant cushion of compressed air. If it's completely full of water, it is "waterlogged" and can no longer do its job.
How often should I check my booster pump settings?
It's good practice to check your system's performance annually as part of routine maintenance, or any time you notice a decline or inconsistency in your water pressure.
My pump won't start at all, what should I check first?
Always start with the basics. Check for a tripped circuit breaker, ensure the pump is plugged in, and verify there is water available in your source tank or city line [^6].