Your pump suddenly stops working.
You hear it running, but no water is moving.
This downtime is costing you money and causing frustration.
A pump loses its prime when air enters the suction line or pump casing, displacing the water. This air pocket prevents the pump from creating the necessary vacuum to draw in more fluid, causing it to run dry and stop pumping effectively.
Understanding why your pump is losing its prime is crucial.
It's the first step to diagnosing the problem correctly.
A swift diagnosis prevents costly damage and extended downtime.
This article will break down the common culprits behind a loss of prime.
We will explore everything from simple leaks to more complex operational issues.
Let's dive into the specifics to keep your systems running smoothly.
What Are Air Leaks in the Suction Line?
Your pump system is failing, and an air leak is the likely suspect.
This invisible problem can halt operations, leading to frustrating and expensive delays.
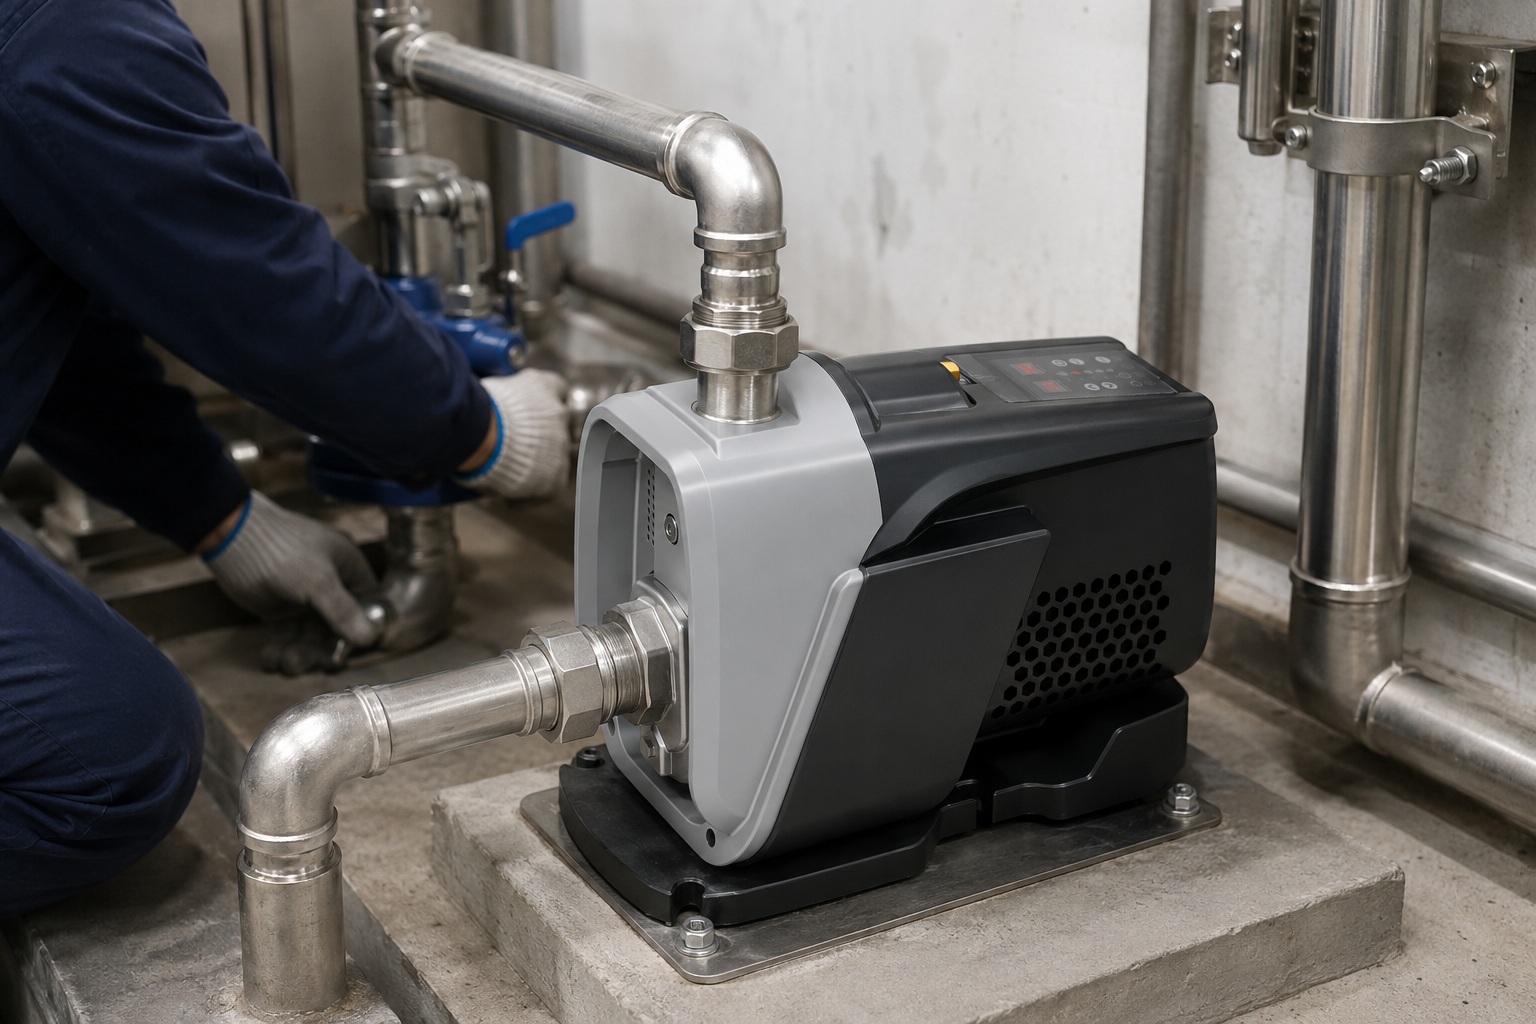
Air leaks in the suction line are a primary cause of lost prime, accounting for over 70% of such issues. These leaks occur when cracks, loose fittings, or damaged seals on the inlet side allow air to be drawn into the pump instead of liquid.
Air is the enemy of a centrifugal pump.
A pump is designed to move liquid, not gas.
When air enters the suction line, it gets drawn into the pump's impeller.
The impeller spins, but it cannot effectively pressurize the air like it can with water.
This pocket of air breaks the vacuum that is essential for suction.
Without this vacuum, the pump can no longer pull liquid from the source.
The pump then runs without moving any fluid, a condition known as running dry.
This can lead to overheating and severe mechanical damage.
Identifying the source of an air leak is critical for restoring pump function.
Common Locations for Air Leaks
Leaks are often found at specific points in the system.
Inspecting these areas systematically can save you time.
-
Pipe Joints and Fittings: Threads on PVC or metal pipes can wear out. Fittings can become loose due to vibration or improper installation. Even a tiny gap can be enough to let air in. Studies show that up to 45% of suction-side leaks originate from threaded connections.
-
Gaskets and Seals: Gaskets between flanges or seals around the pump shaft can degrade over time. Exposure to chemicals, temperature fluctuations, and simple aging can cause them to crack and lose their sealing ability.
-
Valves: Valves on the suction line, particularly older gate or butterfly valves, have seals and packing that can wear. The valve stem packing is a frequent point of failure.
-
The Suction Pipe Itself: The pipe material can develop pinhole leaks or cracks. This is especially common with older metal pipes that are prone to corrosion or plastic pipes exposed to UV radiation.
How to Detect and Fix Air Leaks
Finding an air leak can be challenging because you are looking for air going in, not water coming out.
A methodical approach is necessary.
| Detection Method | Description | Success Rate |
|---|---|---|
| Soap and Water Test | Apply soapy water to all joints and fittings while the system is under slight pressure. Look for bubbles forming, which indicates an air leak. | ~60% |
| Shaving Cream Method | A thicker and more visible alternative to soapy water. Apply shaving cream to suspect areas. A dimple or hole in the cream indicates air being sucked in. | ~75% |
| Ultrasonic Leak Detector | This device detects the high-frequency hissing sound produced by air entering a vacuum. It is highly accurate for finding very small leaks. | >90% |
| Pressure Testing | Isolate and pressurize the suction line with air. Use a pressure gauge to see if it holds pressure. This is a definitive but more complex method. | >95% |
Once you locate a leak, the fix is usually straightforward.
For loose fittings, simply tightening them may solve the problem.
For compromised threads, you may need to disassemble, clean, and re-seal them with appropriate pipe dope or thread seal tape.
Cracked pipes or failing valves will need to be replaced.
Regular inspection and maintenance are the best prevention strategies.
A preventative maintenance schedule can identify potential leak points before they cause a complete loss of prime, saving significant operational costs.
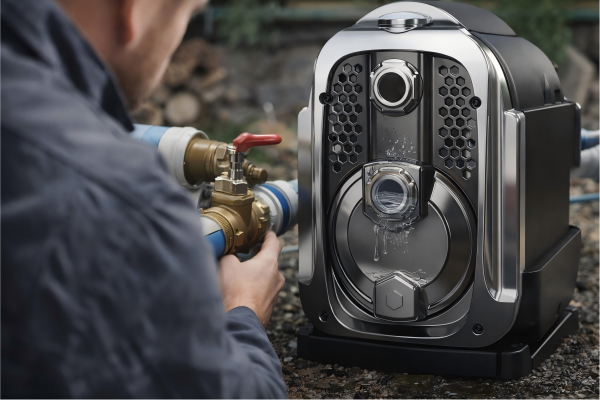
Why is a Leaking Foot Valve an Issue?
Your pump keeps losing prime when it's off.
You have to re-prime it every single time you start it up.
This constant effort wastes time and risks damaging the pump.
A leaking foot valve is a common cause for losing prime, especially when the pump is idle. This check valve at the end of the suction line fails to hold water in the pipe, allowing it to drain back to the source and air to fill the line.
The foot valve is a critical component in many pump applications.
It is essentially a check valve combined with a strainer.
Its primary job is to maintain the column of water in the suction pipe when the pump is shut down.
This ensures the pump casing and suction line remain full of water.
This state is called being "primed."
When the pump starts again, it can immediately begin moving water without needing to purge air first.
If the foot valve leaks, this column of water slowly drains out.
Air replaces the drained water, and the pump loses its prime.
This issue is particularly prevalent in systems where the pump is positioned above the water source, such as drawing from a well, tank, or sump.
A leaking foot valve can reduce system efficiency by over 25% due to the energy wasted in repeated priming cycles.
How Foot Valves Fail
Foot valves operate in harsh conditions.
They are constantly submerged and exposed to debris.
Several factors contribute to their failure.
-
Debris Obstruction: The most common issue is small rocks, sand, or other debris getting lodged in the valve seat. This prevents the valve from closing completely, allowing water to leak back. The strainer helps, but it can't stop everything.
-
Seal Wear and Tear: The sealing-disc inside the valve, often made of rubber or a similar polymer, can wear out over time. Constant opening and closing, along with chemical exposure, causes it to lose its flexibility and sealing capability.
-
Corrosion or Damage: The valve body itself can corrode, especially in acidic or salty water. The moving parts, like hinges or springs, can seize up or break, preventing proper operation.
Diagnosing and Replacing a Faulty Foot Valve
Diagnosing a leaking foot valve can be inferred from the pump's behavior.
If the pump consistently loses prime between cycles, the foot valve is a prime suspect.
A simple diagnostic test confirms this.
-
Prime the Pump: Manually fill the pump and suction line with water until it is fully primed.
-
Wait and Observe: Let the system sit idle for a period, from 30 minutes to a few hours.
-
Check the Prime: Attempt to start the pump again. If it fails to pump water immediately, it has lost its prime, strongly indicating a leak in the foot valve or suction line.
| Foot Valve Problem | Solution | Difficulty |
|---|---|---|
| Debris | Pull the suction line and clean the valve. | Medium |
| Worn Seal | Replace the valve. Repairing the seal is often not cost-effective. | Medium |
| Corrosion/Damage | Replace the valve entirely with a more durable model. | Medium |
Replacing a foot valve requires pulling the entire suction line out of the water source.
This can be a physically demanding task depending on the depth and pipe material.
When replacing the valve, consider the application.
For water with high debris content, a high-quality valve with a robust strainer is essential.
Using a durable material like stainless steel or bronze can prevent corrosion issues in the future.
Proper installation is key to ensuring a long service life and reliable pump operation.
Could Vaporization or Cavitation Be the Cause?
Your pump is running noisily, like it's pumping gravel.
Performance has dropped significantly, and you fear major damage is occurring.
This destructive process could be cavitation.
Vaporization, leading to cavitation, causes a pump to lose its prime by forming vapor bubbles within the liquid. When the suction pressure drops below the liquid's vapor pressure, the liquid boils, creating pockets of gas that disrupt flow and can destroy the impeller.
Cavitation is a complex and highly destructive phenomenon.
It starts when the pressure of the liquid at the pump inlet drops too low.
Every liquid has a vapor pressure, which is the pressure at which it will start to boil at a given temperature.
If the pressure inside the suction line falls below this vapor pressure, the liquid essentially boils, even at room temperature.
This "boiling" creates small pockets of vapor, or bubbles.
These bubbles travel with the flow of the liquid into the pump impeller.
Inside the impeller, the pressure rapidly increases.
This high pressure causes the vapor bubbles to collapse violently.
This collapse creates a tiny but powerful shockwave.
Thousands of these implosions happening every second generate significant noise and vibration.
More importantly, they blast away tiny pieces of the impeller material over time.
This erosion leads to severe damage, reduced performance, and eventual pump failure.
A pump experiencing heavy cavitation can lose over 15-20% of its hydraulic efficiency.
Understanding NPSH and Its Role
To prevent cavitation, you must understand a concept called Net Positive Suction Head (NPSH).
There are two types of NPSH.
-
NPSH Available (NPSHa): This is a characteristic of your system. It is the absolute pressure at the suction port of the pump. It's calculated based on factors like atmospheric pressure, the height of the liquid source relative to the pump, and friction losses in the suction piping.
-
NPSH Required (NPSHr): This is a characteristic of the pump itself. It is the minimum pressure required at the suction port to prevent cavitation. This value is determined by the pump manufacturer through testing and is listed on the pump's performance curve.
The fundamental rule to prevent cavitation is simple.
NPSHa must always be greater than NPSHr.
A safety margin of at least 3 feet (or 1 meter) is often recommended.
Factors That Lead to Cavitation
Several system design and operational issues can cause NPSHa to drop below NPSHr.
| Cause of Low NPSHa | Explanation | Prevention Strategy |
|---|---|---|
| Suction Lift Too High | The pump is physically located too far above the liquid source. | Lower the pump's position or raise the liquid level. |
| Long or Undersized Suction Pipe | Excessive pipe length or a small pipe diameter increases friction loss, reducing pressure at the pump inlet. | Use a larger diameter pipe and keep the line as short and straight as possible. |
| High Liquid Temperature | Warmer liquids have a higher vapor pressure, making them more likely to boil at lower pressures. | Cool the liquid if possible or select a pump designed for higher temperatures. |
| Clogged Suction Line | A blocked strainer, foot valve, or pipe dramatically increases friction and pressure drop. | Regularly inspect and clean the entire suction line, including all filters and valves. |
| Operating Off-Curve | Running the pump too far to the right on its performance curve (excessive flow) can cause NPSHr to increase beyond what the system can provide. | Ensure the pump is properly sized for the application's required flow and head. |
Resolving cavitation often requires a re-evaluation of the system's hydraulic design.
It is not just a pump problem but a system-wide issue.
Addressing the root cause is essential to protect the equipment and ensure reliable operation.
How Do Operational Errors Lead to Lost Prime?
Your pump system seems perfectly designed, yet it still fails.
You've checked for leaks and cavitation, but the problem persists.
The issue might be how the system is being operated.
Operational errors, such as running the pump with a closed discharge valve or failing to prime it correctly, are frequent non-mechanical causes of losing prime. These mistakes create conditions that introduce air or prevent the pump from establishing flow in the first place.
Even the best pump system can fail if not operated correctly.
Human error and a lack of proper procedure are significant contributors to pump problems.
These errors can be just as damaging as a mechanical failure.
They often lead to the pump losing its prime and can cause long-term damage if not corrected.
For example, a pump that is started without being properly filled with water will not prime itself.
The impeller will just spin in the air, creating friction and heat.
This can damage the mechanical seal within minutes, a repair that can account for up to 30% of pump maintenance costs.
Understanding common operational pitfalls is the first step toward building robust procedures that prevent them.
Common Operational Mistakes
Proper training and clear procedures are vital for any team that manages pump systems.
Here are some of the most frequent errors that lead to a loss of prime.
-
Forgetting to Open Valves: One of the simplest yet most common mistakes is starting the pump with a suction or discharge valve closed. A closed suction valve will starve the pump of liquid, causing it to lose prime and cavitate immediately. A closed discharge valve can lead to rapid overheating of the liquid within the casing.
-
Improper Priming Procedure: For pumps that are not self-priming, the initial priming process is critical. If the pump casing and suction line are not completely filled with liquid, any remaining air pockets will prevent the pump from working. Operators must vent all air from the high points of the casing.
-
Running the Pump Dry: Allowing the water source to run out will cause the pump to draw in air and lose its prime. This is common in applications like draining tanks or sumps. Without liquid to cool and lubricate it, the pump can quickly suffer catastrophic failure.
-
Incorrect Startup/Shutdown Sequence: In complex systems with multiple pumps or automated valves, following the correct sequence is essential. Opening or closing valves in the wrong order can create pressure surges or air pockets that disrupt the system.
Best Practices for Pump Operation
Developing and enforcing standard operating procedures (SOPs) can eliminate the vast majority of these errors.
A good SOP is clear, concise, and easy to follow.
| Operational Phase | Best Practice | Rationale |
|---|---|---|
| Pre-Startup | Check that all suction and discharge valves are in the correct position (typically, suction open, discharge slightly open). | Ensures a clear flow path and prevents dead-heading. |
| Priming | For manual priming, fill the casing and suction line completely. Vent all air. Confirm the casing is full before starting. | Guarantees the pump can create the necessary vacuum to operate. |
| Startup | Start the motor. Slowly open the discharge valve fully once the pump reaches operating pressure. | Prevents water hammer and motor overload. |
| Monitoring | Regularly check pressure gauges, listen for unusual noises (like cavitation), and check for leaks. | Early detection of developing problems can prevent major failures. |
| Shutdown | Slowly close the discharge valve. Then, stop the motor. | Prevents backflow and water hammer in the system. |
Implementing safeguards like tank level sensors, dry-run protection devices, and flow switches can automate protection.
These devices can automatically shut down the pump before damage occurs.
While they add to the initial cost, they provide insurance against far more expensive repairs and downtime, often with a return on investment of less than a year.
Conclusion
Understanding pump prime loss is key.
It stems from air leaks, faulty valves, cavitation, or operational errors.
Solving these issues ensures reliable performance and prevents costly damage.
Frequently Asked Questions
1. How do you know if a pump has lost its prime?
You'll know because the pump motor will be running, but no fluid, or very little fluid, will be coming out of the discharge pipe.
2. Can a pump prime itself?
Some pumps are "self-priming" and can purge air automatically. However, standard centrifugal pumps cannot and must be manually filled with liquid to operate.
3. What happens if you run a pump without prime?
Running a pump without prime, or "running dry," causes rapid overheating. This can destroy the mechanical seal and damage the impeller and casing within minutes.
4. How long does it take for a pump to lose prime?
This varies greatly. A large leak in the suction line can cause an instant loss of prime. A slow leak in a foot valve might take hours.
5. Why does my pump lose prime when I turn it off?
This is almost always caused by a leaking foot valve or another check valve in the suction line, allowing water to drain back to the source.
6. Does a clogged filter cause a loss of prime?
Yes, a clogged filter or strainer on the suction side increases friction loss. This can lower the pressure enough to cause cavitation, which leads to a loss of prime.