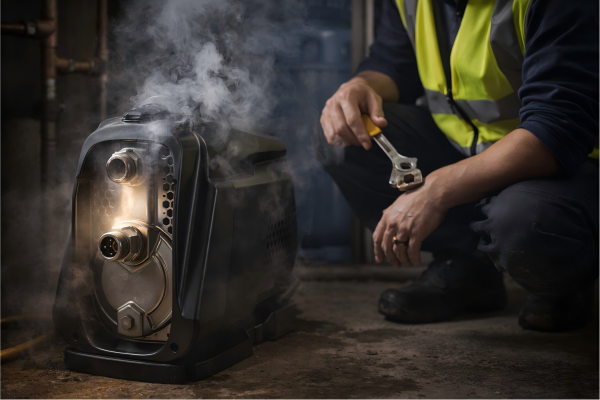
Your pump is running, but no water is flowing.
This frustrating airlock can stop your water supply cold and risks serious damage to your equipment.
To bleed air out of a pump, you must first turn off the power.
Then, locate the prime plug or a bleed valve on the pump casing, slowly open it to release the trapped air, and close it once a steady stream of water emerges.
An airlock is a bubble of trapped air that obstructs the flow of water, preventing your pump from creating the necessary pressure to operate.
Pumps are designed to move liquid, not gas.
When air gets trapped inside, the pump's internal mechanics can't function correctly, leading to a situation where the motor runs but no water is delivered.
This not only cuts off your water but also causes the pump to run dry, which can lead to rapid overheating and potentially irreversible mechanical failure.
Successfully bleeding the air out restores the pump's function and protects your investment.
The exact procedure can vary depending on your pump's design, so understanding the right steps for your specific system is crucial.
Safety First: Essential Preparation Before You Begin
Are you ready to fix the problem?
Wait.
Skipping the preparation steps can turn a simple fix into a dangerous situation or cause further damage to your system.
Before attempting to bleed your pump, always disconnect it from its power source.
This is the single most important step to prevent electrical shock or a sudden restart of the pump while you are working on it.
Bleeding a pump is a straightforward task, but it involves working with a system that combines water and electricity.
Safety cannot be overstated.
Failing to properly prepare not only endangers you but also risks damaging the components you are trying to fix.
A methodical approach ensures that you can resolve the airlock safely and efficiently without any unexpected complications.
Taking just a few minutes to prepare will save you time, money, and potential injury.
Step-by-Step Safety Checklist
Before you touch a single tool, run through this critical safety checklist.
Each step is designed to create a safe working environment.
-
Isolate the Power: Go to your circuit breaker panel and switch off the breaker dedicated to the water pump. If it's a plug-in model, unplug it directly from the outlet. For solar systems, disconnect the solar panels from the pump controller. You want to be 100% certain there is no power reaching the unit.
-
Close Relevant Valves: To prevent water from draining out of your entire system, close the isolation valves on both the suction (inlet) and discharge (outlet) sides of the pump. This will contain the water and pressure within a small, manageable section of the plumbing.
-
Gather Your Tools: Having the right tools on hand prevents you from having to leave the job halfway through. Typically, you will need:
- An adjustable wrench or a pipe wrench to open the bleed plug.
- A bucket or container to catch any water that spills out.
- A funnel and a container of clean water for priming, if necessary.
- Towels or rags for cleanup.
Understanding Your System's Pressure
Even with the power off, your system might still hold residual pressure.
Be cautious when you first open a bleed plug or valve.
Open it slowly to allow any stored pressure to release gradually.
A sudden burst of water and air can be startling and messy.
This is especially true for systems with a large pressure tank.
The tank is designed to hold water under pressure, and this pressure can remain even after the pump is powered down.
By following these pre-maintenance steps, you ensure that the process of bleeding your pump is controlled, safe, and effective, setting the stage for a successful repair.
Bleeding Centrifugal Pumps: The Impeller Method
Your high-flow impeller pump is humming, but the fields are getting dry.
This common problem requires a specific solution because of how these powerful pumps work.
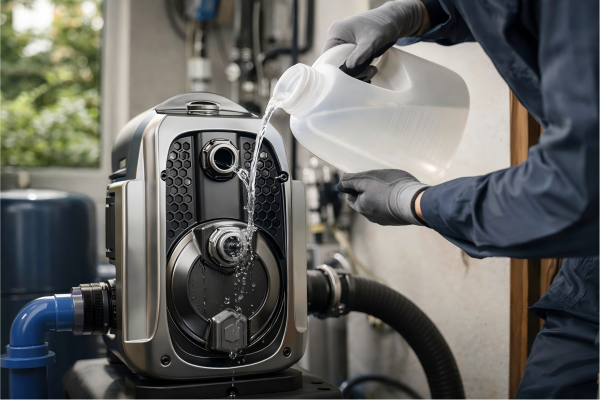
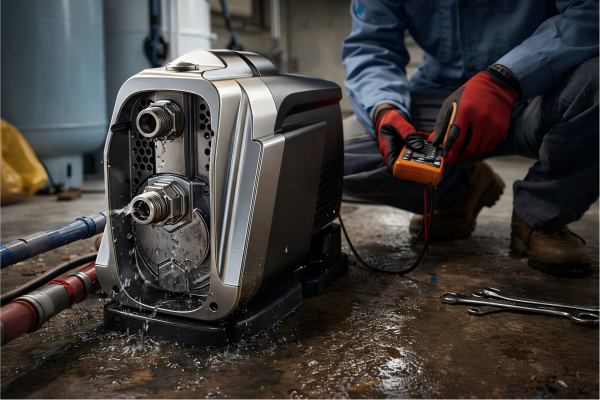
To bleed a centrifugal pump, turn off the power, locate the prime plug on top of the pump casing, and remove it.
Slowly pour water into the opening until the casing is completely full, then securely replace the plug before restoring power.
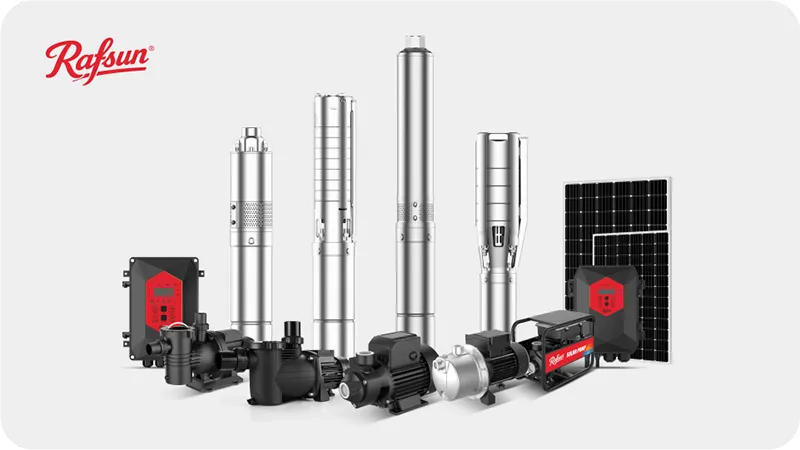
Centrifugal pumps, including both the economical Solar Plastic Impeller Pump and the robust Solar Stainless Steel Impeller Pump, are the workhorses for high-flow applications like farm irrigation and pasture water supply.
They operate by using a rapidly spinning impeller to create centrifugal force, which pushes water out.
This action creates a low-pressure zone that draws more water in.
However, this design is extremely inefficient at moving air.
If a significant air pocket gets into the pump casing, the impeller just spins freely in the air, unable to create the suction needed to draw in water.
This is why they must be filled with water—a process called priming—to operate.
Detailed Steps for Priming and Bleeding
Follow this procedure carefully to remove air from any centrifugal pump.
This process essentially replaces the trapped air with water, allowing the pump to function correctly.
1. Ensure Power is Off
As covered in the safety section, this is non-negotiable.
Verify that the pump cannot turn on unexpectedly.
2. Locate and Open the Priming Port
The priming port is almost always a plug located at the highest point of the pump's casing (the volute).
It's placed there because air naturally rises to the highest point.
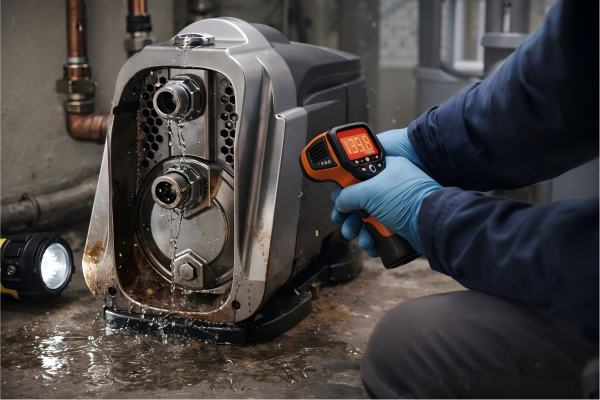
Use your wrench to slowly loosen and remove this plug.
You may hear a hiss as trapped air or pressure is released.
3. Fill the Pump Casing
Using a funnel, slowly pour clean water into the priming port.
Continue filling until water overflows.
You may see air bubbles come out as you fill; this is a good sign.
It means water is displacing the trapped air.
Let the water settle for a minute and top it off again, ensuring the casing and the suction line are as full as possible.
The goal is to eliminate 100% of the air.
4. Replace the Plug and Test
Securely reinstall the priming plug.
Do not overtighten, but ensure it is sealed to prevent air from being sucked in.
Now, open the necessary valves, restore power to the pump, and turn on a nearby faucet or outlet.
The pump should engage, and you should see water flowing steadily after a few moments.
If the pump runs for more than a minute without producing a steady flow, turn it off and repeat the priming process.
A persistent airlock may indicate a leak on the suction side of the plumbing.
| Step | Action | Purpose | Common Mistake to Avoid |
|---|---|---|---|
| 1 | Disconnect Power | Safety | Forgetting to check the breaker. |
| 2 | Open Prime Plug | Acess for water & air release | Opening a discharge fitting instead. |
| 3 | Fill with Water | Displace trapped air | Not filling it completely. |
| 4 | Replace Plug & Test | Seal system & verify fix | Overtightening and stripping threads. |
This method applies whether you have a lightweight plastic impeller model for general use or a premium SS304 stainless steel impeller pump designed for corrosive water conditions in places like Australia.
The hydraulic principle is the same, and their vulnerability to airlock is identical.
Managing Air in Positive Displacement Pumps: The Screw Pump Case
Is your deep-well screw pump struggling to deliver water?
While tougher than other pumps, even these powerful machines have their limits when it comes to handling air.
Positive displacement pumps like screw pumps can often push small amounts of air through the system automatically.
If a large airlock occurs, you may need to cycle the pump on and off briefly to help it clear the air.
The Solar Screw Pump operates on a completely different principle from centrifugal pumps.
It is a positive displacement pump, specifically a progressing cavity type.
It uses a helical stainless steel rotor spinning inside a flexible rubber stator.
This creates sealed cavities of fluid that are forced progressively up the pipe.
This mechanism is much better at handling entrained air and can often "push" bubbles out of the way.
This gives them a limited ability to self-prime, something a centrifugal pump cannot do.
However, they are not air compressors.
If the pump ingests a large volume of air, for instance, if the well's water level drops below the pump intake, it will become airlocked and stop moving water.
Why the Bleeding Process is Different
You typically do not bleed a submersible screw pump in the traditional sense, as there is no accessible priming port.
The entire process is managed by controlling the pump's operation from the surface.
Running a screw pump dry is extremely damaging, as the friction between the steel rotor and the rubber stator generates intense heat very quickly, which can destroy the stator in under a minute.
The Recommended Procedure for Clearing Air
If you suspect your screw pump is airlocked (e.g., after the well ran low), follow these steps cautiously.
1. Submergence is Key
First and foremost, ensure the pump is fully submerged in water.
If the airlock was caused by a low water level, you must wait for the well to recover before restarting the pump.
There must be water available for the pump to draw in.
2. The Cycling Method
Modern pump controllers often have features to assist with this.
The goal is to jog the pump without letting it run dry for an extended period.
- Turn the pump on for a very short duration—no more than 5-10 seconds.
- Turn the pump off and wait for 30 seconds. This allows any water that was starting to be lifted to fall back and help purge air from the intake.
- Repeat this on/off cycle a few times.
This process can help the pump gradually ingest water and push the large air pocket up and out of the discharge pipe.
Listen carefully.
You may hear the sound of the motor change as it begins to pick up water and come under load.
3. Leveraging Smart Controllers
Pumps powered by a BLDC permanent magnet motor and managed by an intelligent MPPT controller have a significant advantage here.
These controllers feature sophisticated dry-run protection.
The controller monitors the motor's power draw.
When the pump is airlocked, the motor is under very little load, and the power consumption is abnormally low.
The controller recognizes this state and will automatically shut the pump down to prevent damage, often displaying a "dry run" or "low power" error.
This built-in intelligence acts as a critical safety net, preventing the catastrophic stator burnout that can occur from running a screw pump dry.
It effectively automates the detection of a severe airlock.
Modern Solutions: How Technology Prevents Airlocks
What if your pump could protect itself from the damage an airlock causes?
Advanced technology is shifting the focus from fixing airlocks to preventing their destructive consequences in the first place.
High-efficiency BLDC motors paired with intelligent MPPT controllers offer built-in dry-run protection.
This system detects the low-load condition of an airlock and automatically shuts down the pump, preventing burnout and alerting the operator to the problem.
The core of any modern, high-performance solar water pump is the integration of a superior motor and a smart controller.
The BLDC Permanent Magnet Motor is a technological leap forward, offering efficiencies greater than 90%.
This means more of the sun's energy is converted into pumped water.
But its true value is unlocked when paired with an intelligent MPPT (Maximum Power Point Tracking) controller.
This controller not only maximizes the solar panel's output but also acts as the brain and guardian of the entire system.
It provides a level of protection that makes the system far more resilient to common problems like airlocks.
Dry-Run Protection: The Ultimate Defense
An airlocked pump is a pump that is running dry.
This is one of the most common and fastest ways to destroy a pump.
Here’s how the smart system turns a potential catastrophe into a manageable alert:
-
Constant Load Monitoring: The MPPT controller continuously monitors the electrical load on the BLDC motor. Pumping water requires a specific amount of power (watts). Pumping air requires significantly less—often less than 30% of the normal operating power.
-
Algorithmic Detection: The controller's firmware is programmed to recognize this drastic drop in power consumption as an abnormal event. It interprets this signature as a "dry run" condition, which could be caused by an airlock, a closed valve, or a well that has run out of water.
-
Automated Shutdown: Once a dry run is detected, the controller initiates a protective shutdown. It will stop sending power to the pump motor to prevent it from overheating and failing. This action is automatic and occurs within seconds or a few minutes, depending on the settings.
-
Fault Codes and Alerts: The controller will typically display an error code on its screen, clearly indicating the nature of the problem. This provides immediate diagnostic feedback to the user, who now knows to check for an airlock or water source issue instead of a motor failure.
This proactive protection is a game-changer for end-users.
For a distributor supplying pumps for domestic water in Africa or livestock watering in Latin America, this feature translates into higher customer satisfaction and fewer warranty claims.
The system's intelligence preserves the core components—the highly efficient motor and the precision-engineered pump end—ensuring a long and reliable service life.
It's a key part of the value proposition for the entire solar pump portfolio, adding a layer of durability and user-friendliness that sets modern systems apart.
Conclusion
To bleed a pump, always start by shutting off the power.
Then, depending on the pump type, either prime it through its port or cycle it carefully to clear the air.
Frequently Asked Questions
How do you bleed a water pump after changing a filter?
After changing a filter, open the bleed valve on the filter housing until water spurts out, which releases air trapped during the change, then prime the pump if needed.
How long does it take to bleed a pump?
Bleeding a simple airlock can take as little as 5-10 minutes, but persistent issues caused by suction leaks may require more time to diagnose and fix before priming.
What happens if you don't bleed a water pump?
If you don't bleed a pump, it will run without moving water, leading to rapid overheating that can damage seals, melt plastic components, or seize the motor.
Do you bleed a pump with it on or off?
Always bleed a pump with the power OFF. Bleeding releases pressure and involves direct contact with the pump, making it unsafe to have the motor suddenly start.
Why does my pump keep getting airlocked?
Recurring airlocks are almost always caused by a leak in the suction line, such as a cracked pipe, a bad fitting, or a faulty foot valve in the well.
Is there a tool to bleed water pumps?
The primary tools are simple: an adjustable wrench or pipe wrench to open the bleed or prime plug, and a funnel and water for priming the pump casing.
Can running a pump dry damage it?
Yes, running a pump dry is extremely damaging. Water acts as both a coolant and a lubricant for the pump's internal parts; without it, failure can occur quickly.
How do I know if my foot valve is bad?
A bad foot valve will allow water to slowly drain back down into the well from the suction pipe, causing the pump to lose its prime between cycles.